DIY Christmas Ornaments: Mini Wood Bead Ornaments

Do you guys have your Christmas trees up yet? Sadly, I do not and I have no intention to until after Thanksgiving (I fall firmly into that camp regarding the holiday season), but as a blogger, I know that everyone wants to start planning way in advance for their Christmas crafting and decorating projects. So like a good little blogger, I thought I’d share with you guys this cute DIY Christmas Ornament that I made this week. These cute little Mini Wood Bead Ornaments can be made for your Christmas tree or they’d also be super cute as Christmas gift tags that can later be used as a tree decoration…so they serve a dual purpose and would be a cute homemade Christmas gift idea! Let’s see how easy these DIY Christmas Ornaments – Mini Wood Beads to make!
What’s better than a handmade ornament as a great gift – plus everyone loves doing DIY projects! We hope you’ll like this wooden ornament tutorial – great for all your holiday decor (trust us, you won’t find this on Amazon)!
Table of Contents
DIY Wood Bead Ornaments
How to Make DIY Wood Bead Christmas Ornaments
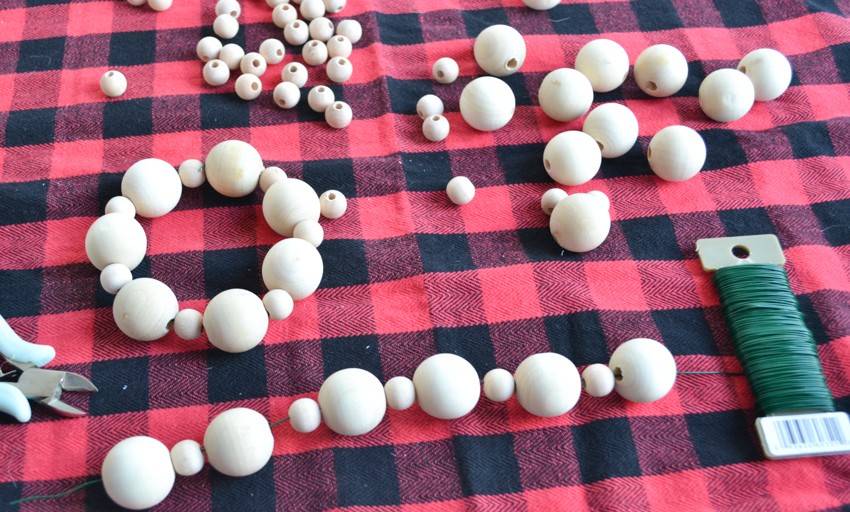
What you need:


2. Floral Wire


3. Twine/Ribbon


4. Greenery


5. Hot Glue


6. Wire Cutters


7. Pliers


How to make the ornaments:
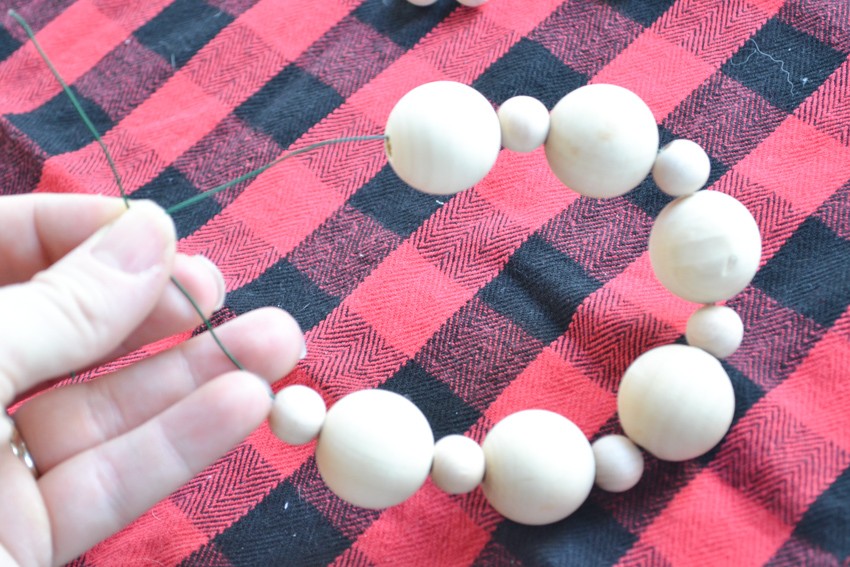
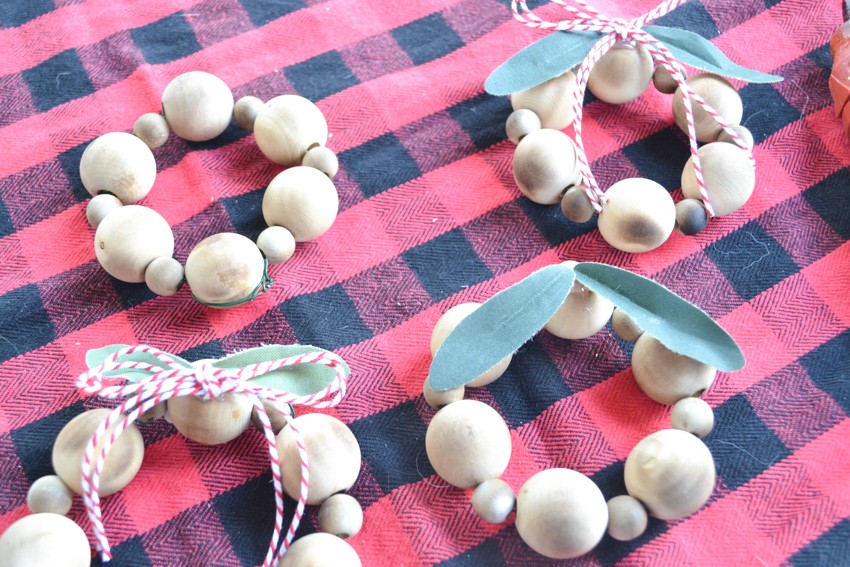
Start by stringing up your wooden beads onto wire. I used floral wire I already had on hand, but jewelry wire would work too. Whatever you thread your beads onto just needs to be strong enough to hold a wreath shape.

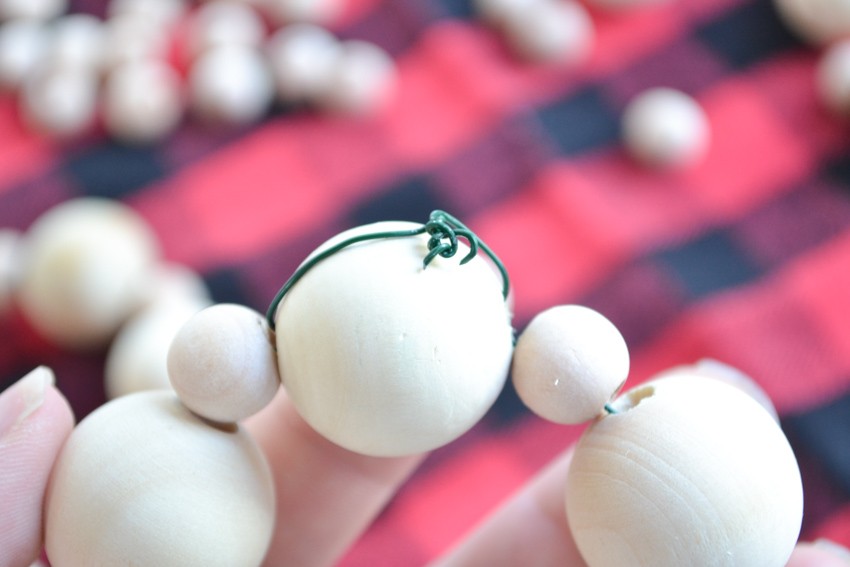
My wreathes took about 6 large beads and 7 small beads. Once I had a nice bead strand, I met the wire in the middle and thread it both ways through one of the larger beads, then twisted it off at the top to hold it in place.

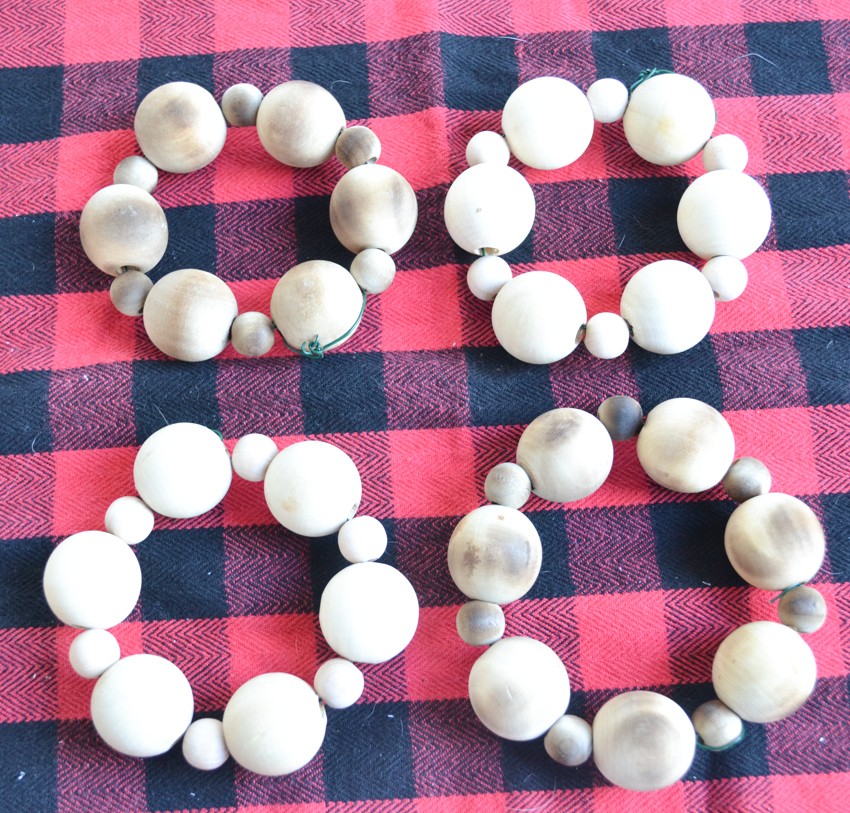
Once secured, I continued to make my bead wreathes until I had them all made. Next step, wood burning! I used my Wagner Furno 300 Heat Gun to make the ornaments look a little more vintage and worn as opposed to the fresh white wooden beads right out of the bag. All you have to do is plug in your heat gun and apply the heat directly onto the beads and you’ll slowly see them darkening to your color desired.
Here’s a shot of what they look like before and after burning with the Heat Gun…
Final Step on DIY Christmas Ornaments – Mini Wood Beads
I tried to darken up the smaller beads a bit to give them a nice weathered look and add some cool texture to the beads naturally. After all the beads were burnt, I went ahead and used some greenery and twine to finish up the designs. I hot glued them in place and they turned into little mini holiday wreathes…perfect for a tree or for Christmas packages!


These are such cute and easy DIY Christmas ornaments and I love that you have the freedom to embellish them any way you see fit. Seriously – nothing beats DIY Christmas tree ornaments – from Santa ornaments to snowflake ornaments…maybe even incorporate some crafty paper ornaments on the tree!

The wood burning makes them look a little rustic or vintage and you can burn them more or less for your desired effect.

I hope you enjoyed this easy Christmas Ornament tutorial!!
We’d love to hear your feedback down below on this homemade Christmas ornament tutorial. Plus- what other Christmas ornament idea tutorials do you want to see – Rudolph/reindeer ornaments, photo ornaments for a keepsake, marbled ornaments, maybe even a pinecone ornament?
Or – let’s get creative! Want to use pipe cleaners, popsicle sticks, bead snowflakes, sprinkles, antlers, or even spray paint and other embellishments to make some tree toppers? Let us know what you’d like to see below and we’ll roundup the Christmas ideas! Personally, I love incorporating cardstock and chalkboard paint along with a glue gun and clear glass ornaments to make a super cool tree hanger. Or, maybe we can try something with cinnamon sticks and a mason jar for a great holiday idea. We hoped you liked DIY Christmas Ornaments – Mini Wood Beads
Equipment list once again:
2. Floral Wire
3. Twine/Ribbon
4. Greenery
5. Hot Glue
6. Wire Cutters
7. Pliers