


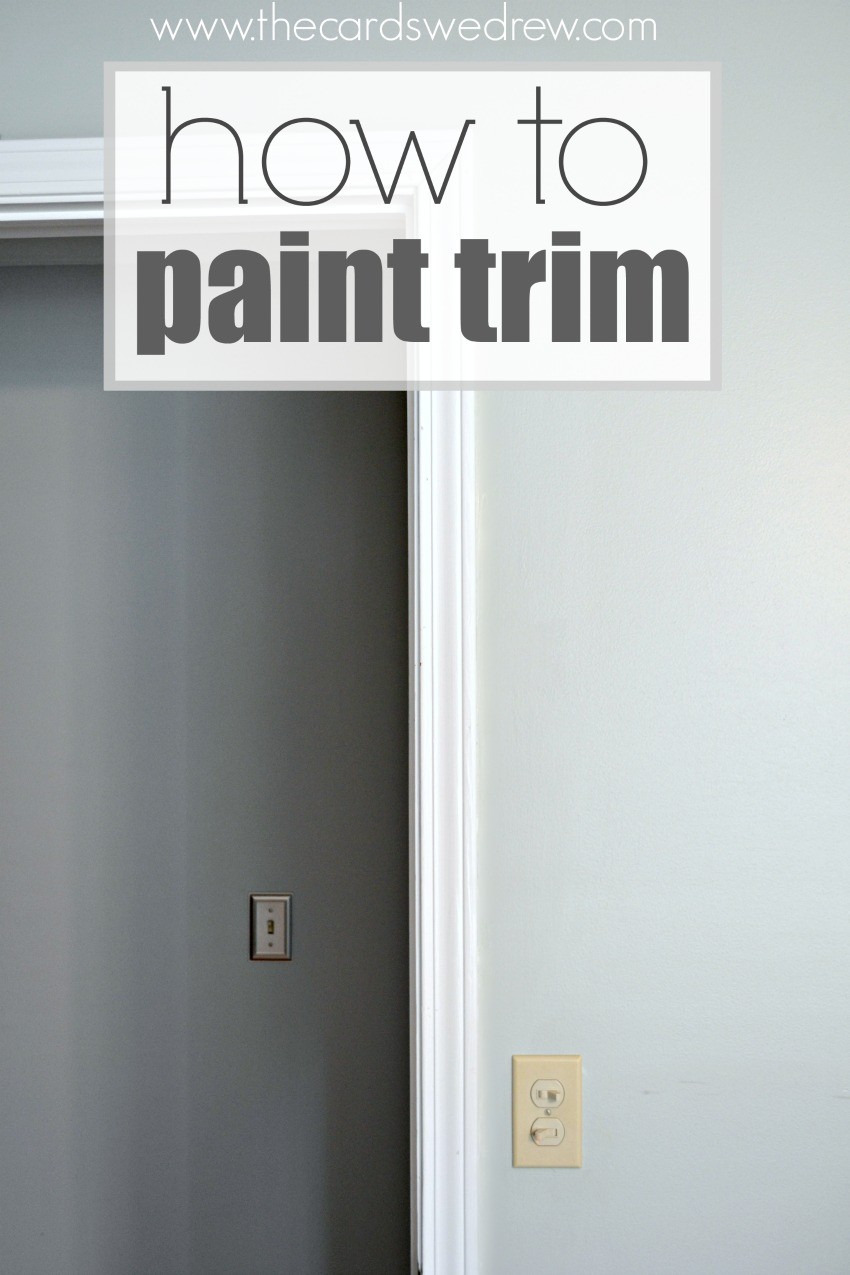
You guys may remember from a few months ago when we updated our HALLWAY and painted all the doors and trim white. It was quite a labor of love, but definitely worth it when you consider how much lighter and brighter the space looked with just some good old fashioned elbow grease! Well, I thought I’d give you a quick update on our trim painting situation and share some tips and tricks for how to paint trim like a pro! If you want to know how to paint wood trim or how to paint trim white, then you’re in the right place because after years of experience in the trim painting department (and a dad who’s a seasoned contractor for over 35+ years) I can definitely share the best way to paint trim!!
Trim Paint
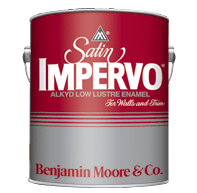
My dad swears that if you are painting trim that has already been stained that you need to use oil based Benjamin Moore Satin Impervo Paint. After two houses of using this product now, I can agree that it does appear to visibly hold up much better than standard latex paint. However, it does come at a price! So be prepared to pay more for this, as well.
How to Paint Wood Trim: Prep Work
- Tape off the floors or carpet. We have hardwood floors, so we tape off the floor getting right up against the floorboard. With carpet, you’ll have to use something to pull the carpet away from the wall and then lay the tape carefully down as deep against the trim as you can.
- Lightly sand the trim and wipe down with a cloth after to remove any dust or debris.
- Using wood filler, fill holes or nicks in the trim so that you have a nice smooth edge. Now is also the time to ensure that the trim is laying down correctly and doesn’t need nailed down more. Fill nail holes, nicks, and holes with wood filler and let dry.
- Be sure that the edges around your trim are laying flush again the wall. If not, use caulk to fill in those spaces. Be sure to wipe away extra, unneeded caulk around edges and let dry.
- You’re about ready to start painting!!
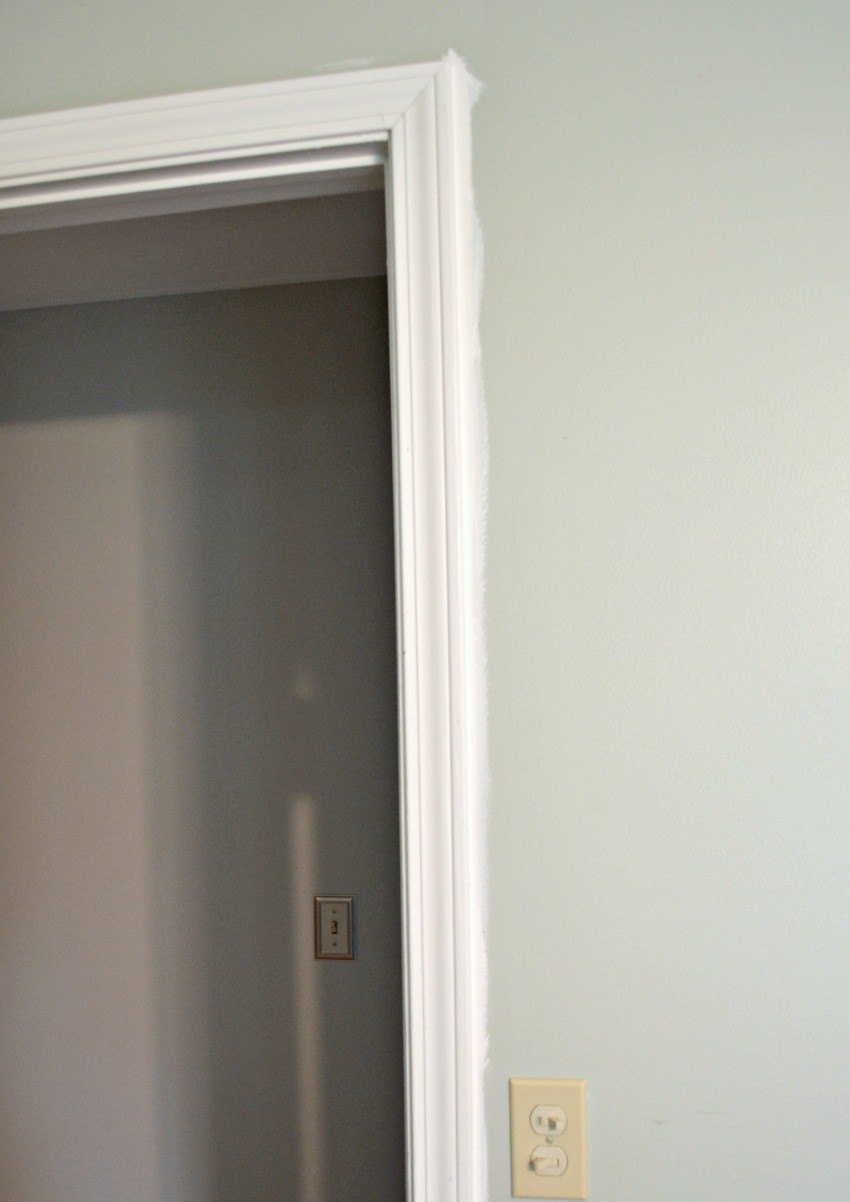
Once you’ve completed your prep work, time to get started on painting. We do not tape off above our trim and we use a primer like Kilz to prime the trim before we paint. We do one coat of Kilz, then we lightly sand.
Next we do two coats of Satin Impervo, giving 24 hours between each coat to fully dry.
Final step when painting trim? Remove the tape and get to touching up your walls!
This is where my secret tool comes in…the HomeRight Quick Painter is a lifesaver for this part of the job. You know, that part when you’re all done…your trim is looking fly…and you just want to sit back and enjoy, but now you have to clean up the paint on your walls?
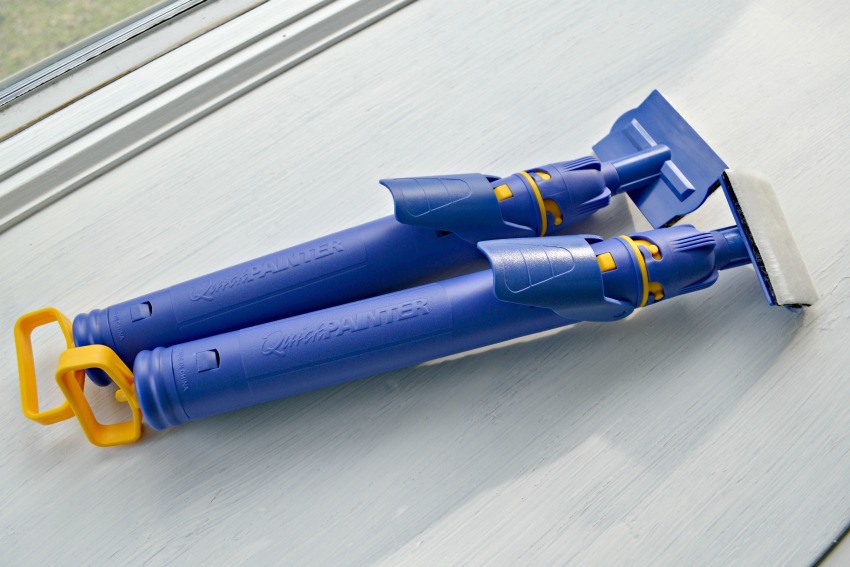
It’s very simple to use, you pull off the top pad, you suck your wall paint into the tool, then place the pad back on.

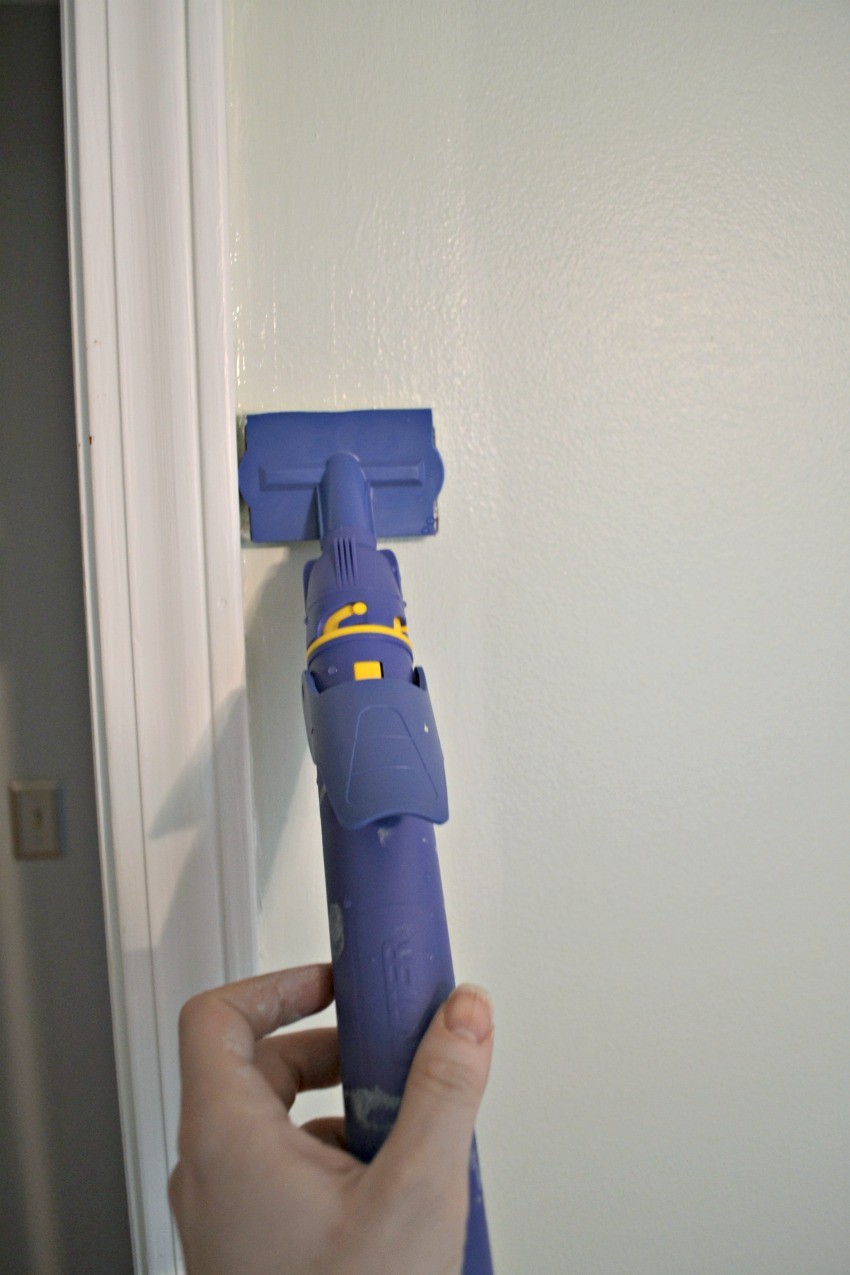
It takes the hard work out of cutting in, but you need to be careful about how hard you push the button to release the paint (a little goes a long way) and you need to ensure that it’s getting all the way into the corner against your wall. For someone who hates cutting in, this was a handy tool for us!
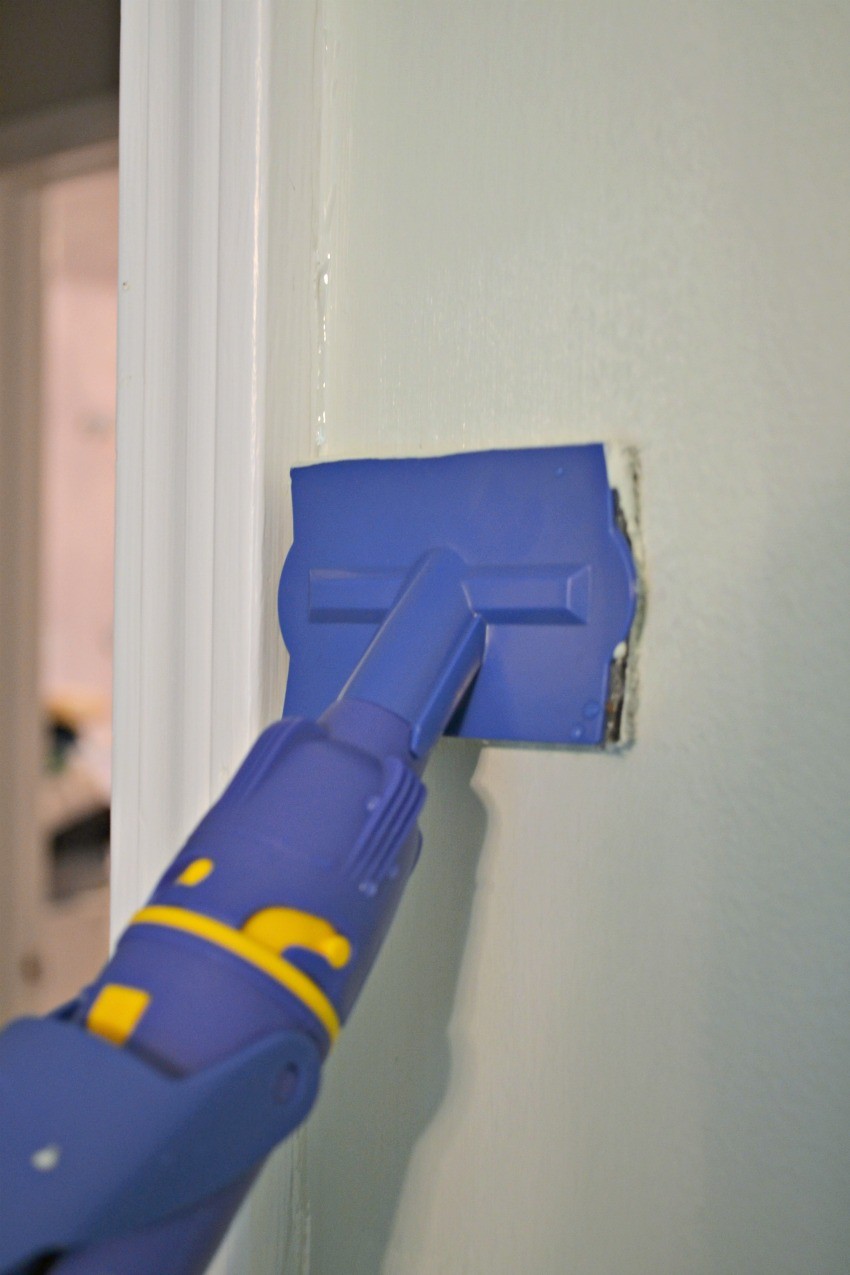
I had to touch up a few areas where I had a little too much paint get in, but otherwise it make the process of touching up the walls a lot easier and less time consuming.
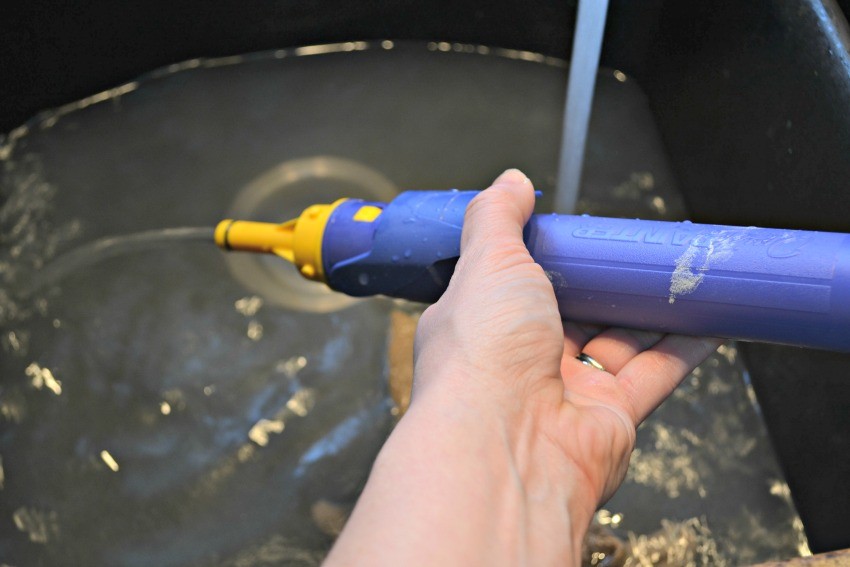
And the best part…it’s SUPER easy to clean up!!
Painting your trim is definitely a time consuming adventure, but I truly believe that it INSTANTLY brightens your home and adds immediate appeal to your home. I swear though…I will never buy another home that doesn’t come with white trim. Quote me on this…never ever again. LOL
Grab your HomeRight Quick Painter and get started today!
If you have any questions about how to paint trim, shoot me an email at [email protected] or leave a message in the comments.
This post is sponsored by HomeRight.


Comments 3