


This post is sponsored by Plaid Crafts, all thoughts, words, and opinions are my own.
Last month I had the opportunity to visit Plaid Crafts headquarters in Atlanta, Georgia for the second time (more on that to come). Not only was it SUPER DUPER fun, but I got to try out some of their newest and greatest products first hand! One of my absolute favorites from the trip was the new Martha Stewart Watercolors® which are exclusively at any Michaels store or Michaels.com! So today I thought I’d create a pretty and fun tutorial that you can do for your own kids or for friends using just a few items and a variety of gorgeous Martha Stewart Watercolor paint colors!
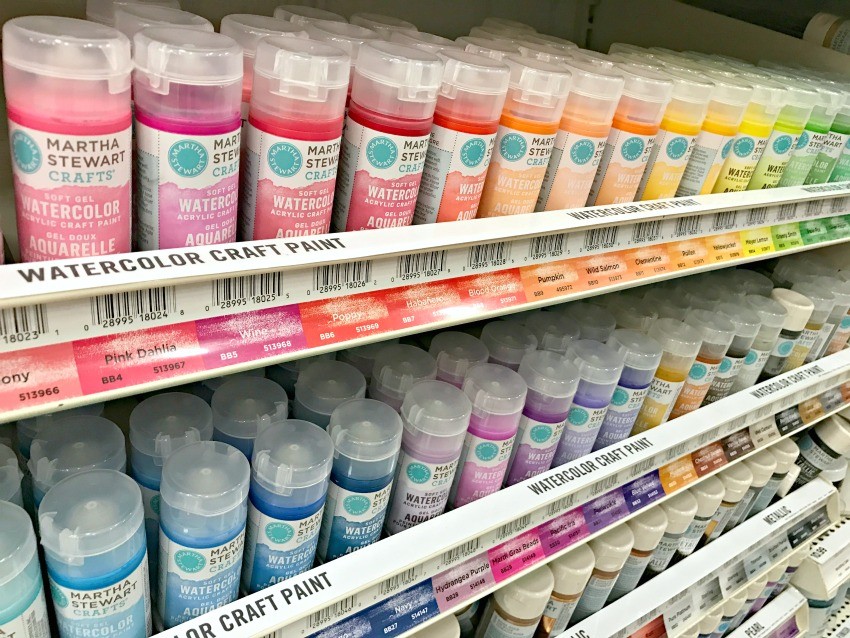
These new paints are so cool because they can use on multiple different surfaces including wood, watercolor paper, fabric, canvas, and more! It’s definitely an added benefit over traditional watercolor! The paint itself is permanent gel-based acrylic formula, so it’s easy to blend and either use as is or dilute for beautiful watercolor effects. It’s durable on indoor and outdoor porous surfaces and comes in 40 colors at Michaels stores.
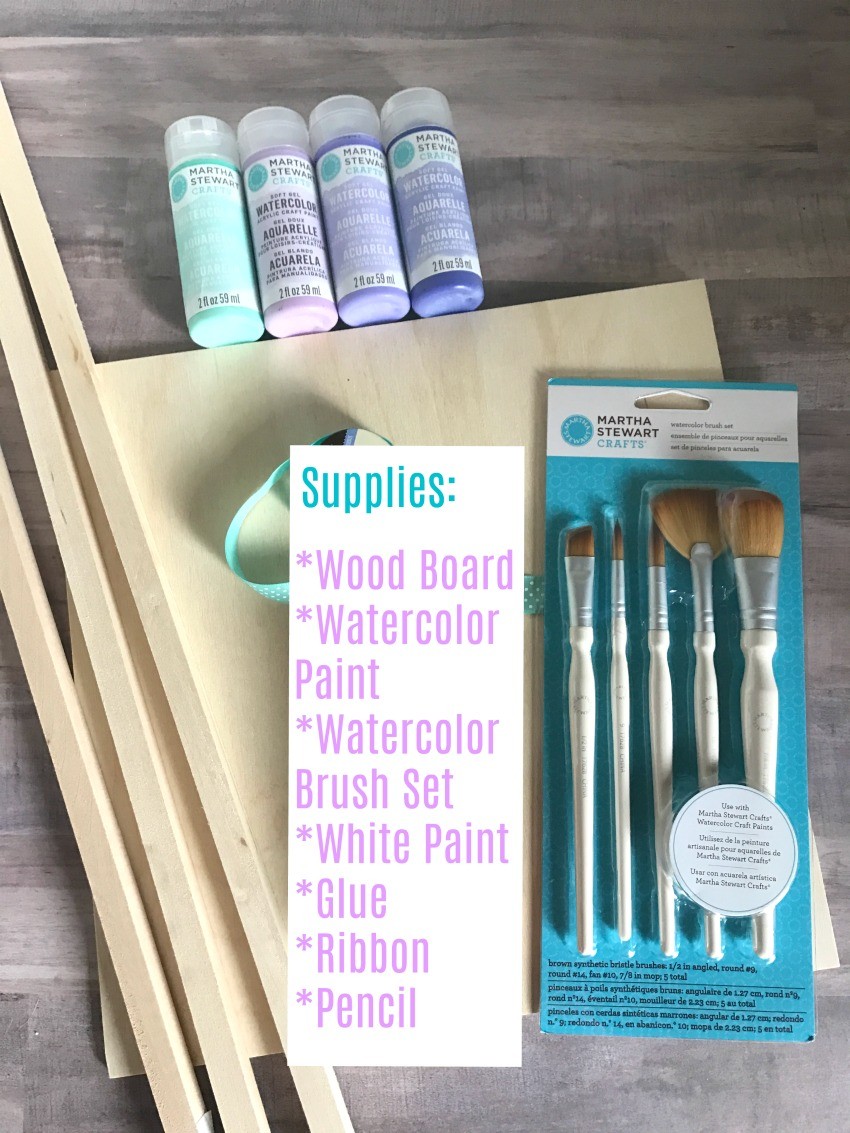
For this post I used (all from Michaels):
Martha Stewart® Soft Gel Watercolor Acrylic Paint in Blue Velvet, Periwinkle Violet, Hydrangea Purple, and Beach Glass
1 12×12 wood board
4 pieces of craft wood for framing the sides
white Martha Stewart Acrylic Paint
Martha Stewart® Watercolor Brush Set
Paper/Pencil/Scissors for photo
Glue
Ribbon
How to:
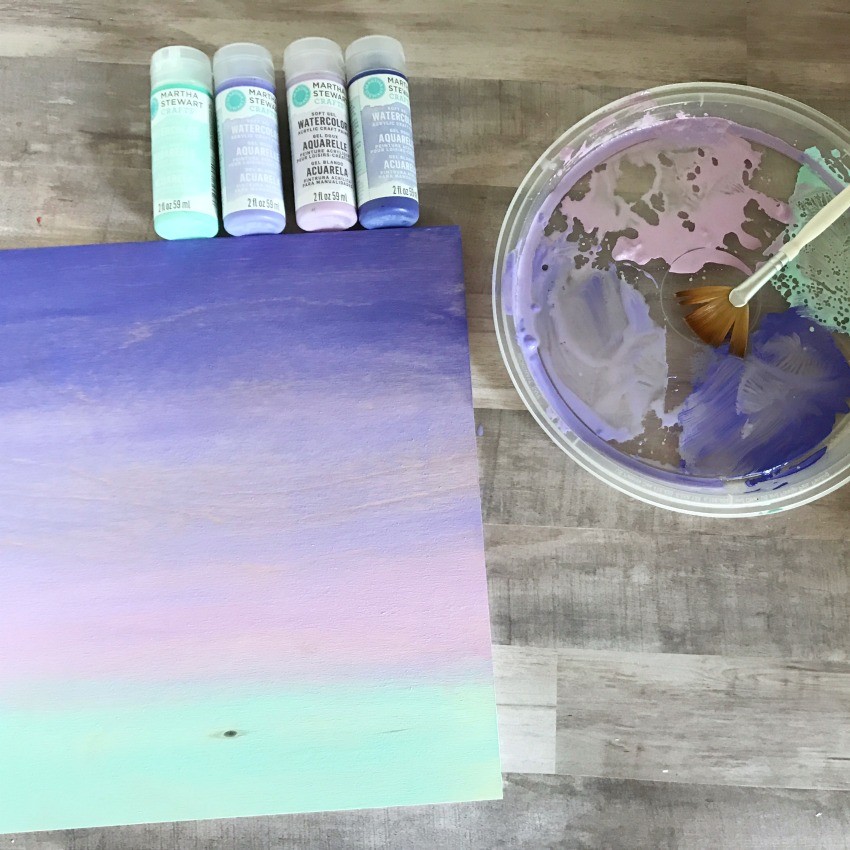
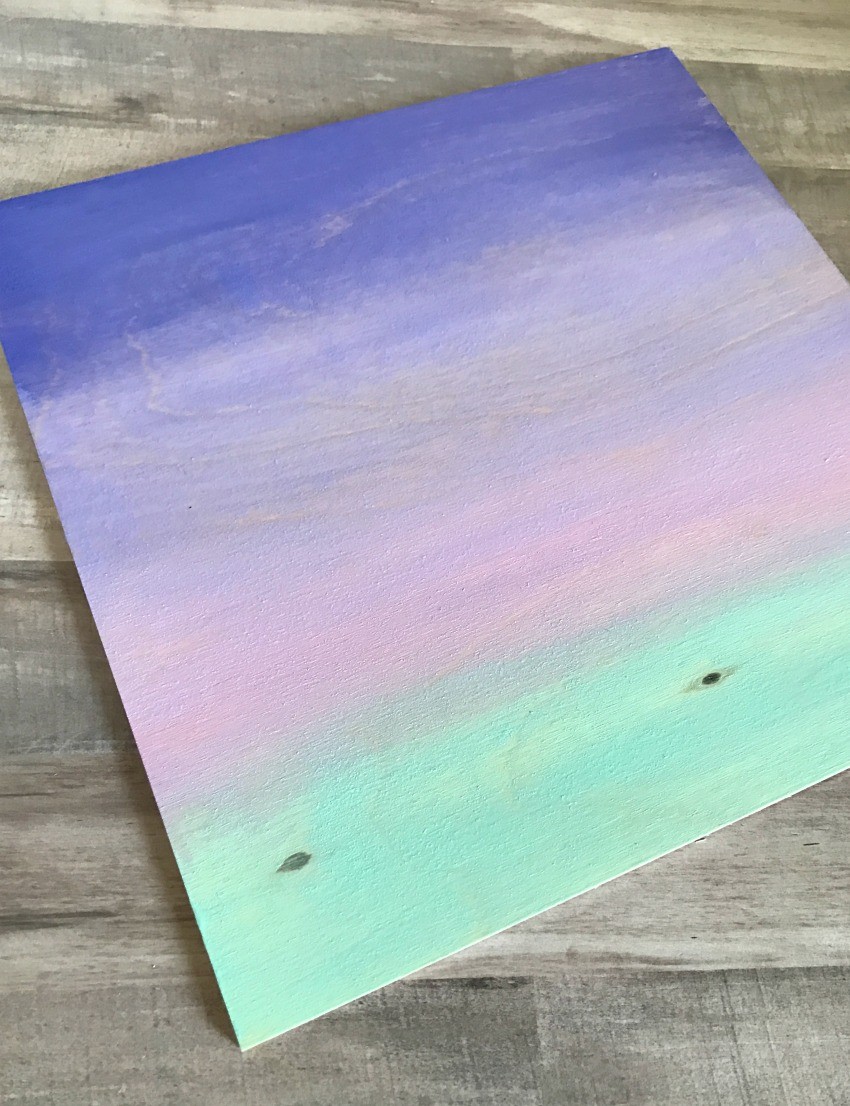
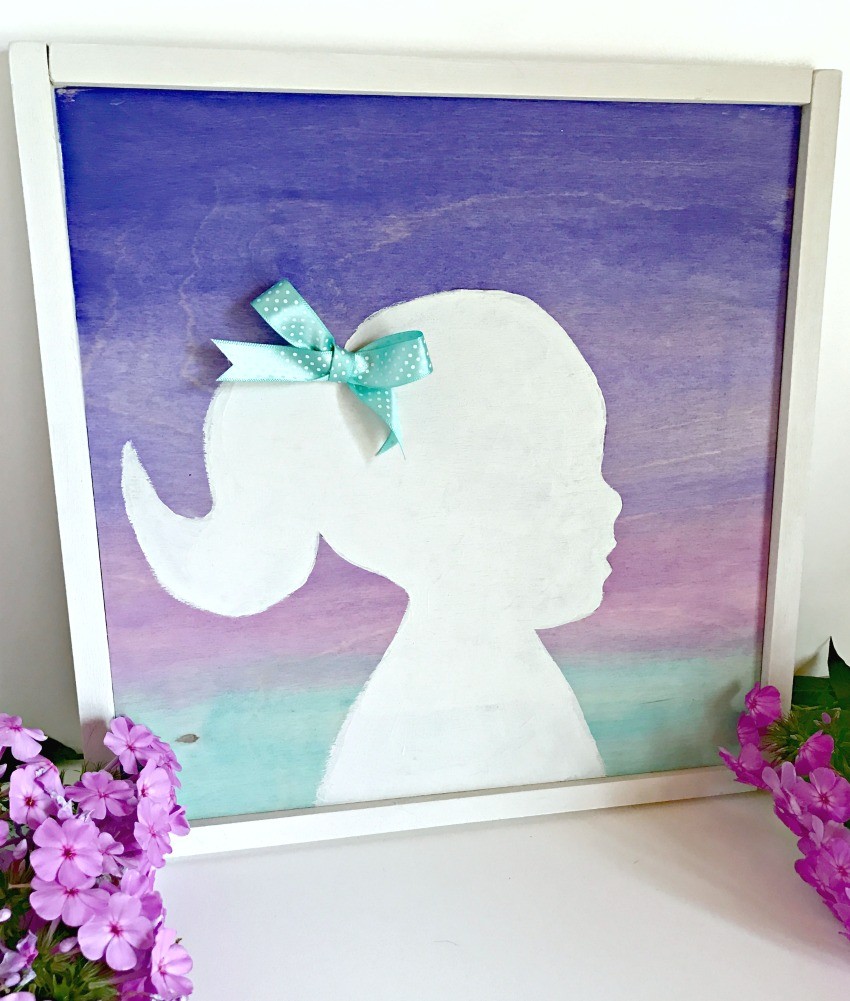
I started by painting the ombre on the board. I painted in order of the colors listed in the supplies from darkest to lightest. For the watercolors, I like to get a tupperware lid, squirt a little paint onto the lid, then use my Martha Stewart Watercolor brushes and get them really wet and start mixing. I mix several time until the paint is fairly diluted and then I start painting the wood. This allows the paint to get a great watercolor look and still allow some of the wood grain to show through.
Another tip is to wet the wood down with your brush a little bit (without paint) before adding the watercolor paint. This also helps the paint get a great watercolor look. If you notice below, you’ll see the the wood is already wet on the next section before I start adding more paint.
I add each color and slightly blend the two layers together in between so it gets a great ombre look.

You’ll also notice below that my paint is very thin and diluted, this helps me achieve the watercolor look desired for this project. You can use this paint as is and it’s gorgeous, but the color will be much more saturated if you don’t water it down first. This also allowed me to easily blend the colors between layers.
After I let the board dry, I took a side photo of my daughter with my phone and printed it out on 8.5 x 11″ paper on my printer. Then I used a pencil to lightly outline her silhouette in the photo so that I could cut it out easier. Next step, cut it out!
Funny side story, she was crying when I was taking this photo, so her eyes are all wet in the photo LOL.


Next up, use your paper as a stencil and trace onto the board.
I originally traced as is, but then I adjusted it a bit and added to the bottom and ponytail to make the whole thing look a little better. Once you’ve traced, then you use a paintbrush and some simple acrylic craft paint to fill in the silhouette on the board. I did about two coats of paint and while it was drying I painted my pieces of wood for the sides and marked where they needed cut.
Finally I cut my wood pieces for the framing on the sides and glued them on. Michaels makes these great 3/8″ pieces of wood that did perfect for this project. Then I added a little polka dot bow to her hair for good measure and glued it on.
I love how it turned out and it matches her bedroom, perfectly. I want to hang it over her bed this week. 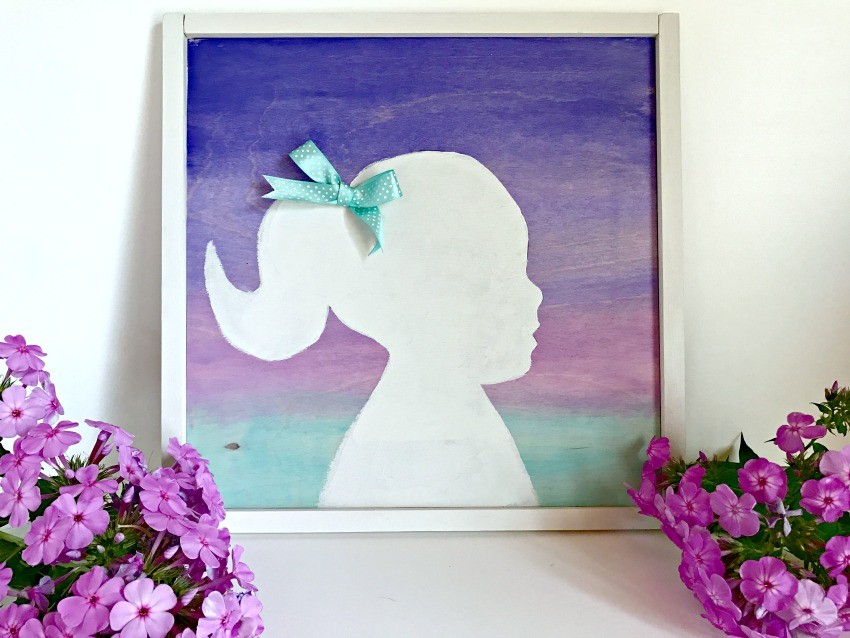
I simply adore how this turned out and I cannot wait to continue playing with these Martha Stewart Watercolor paints. They can be used with most stencils too, which is awesome, but it’s recommended that you use adhesive stencils due to the viscosity of the paint once it’s watered down. Stencils that don’t have the adhesive backing have trouble keeping the paint out. They also have these amazing refillable brushes for handlettering or watercoloring on the go!
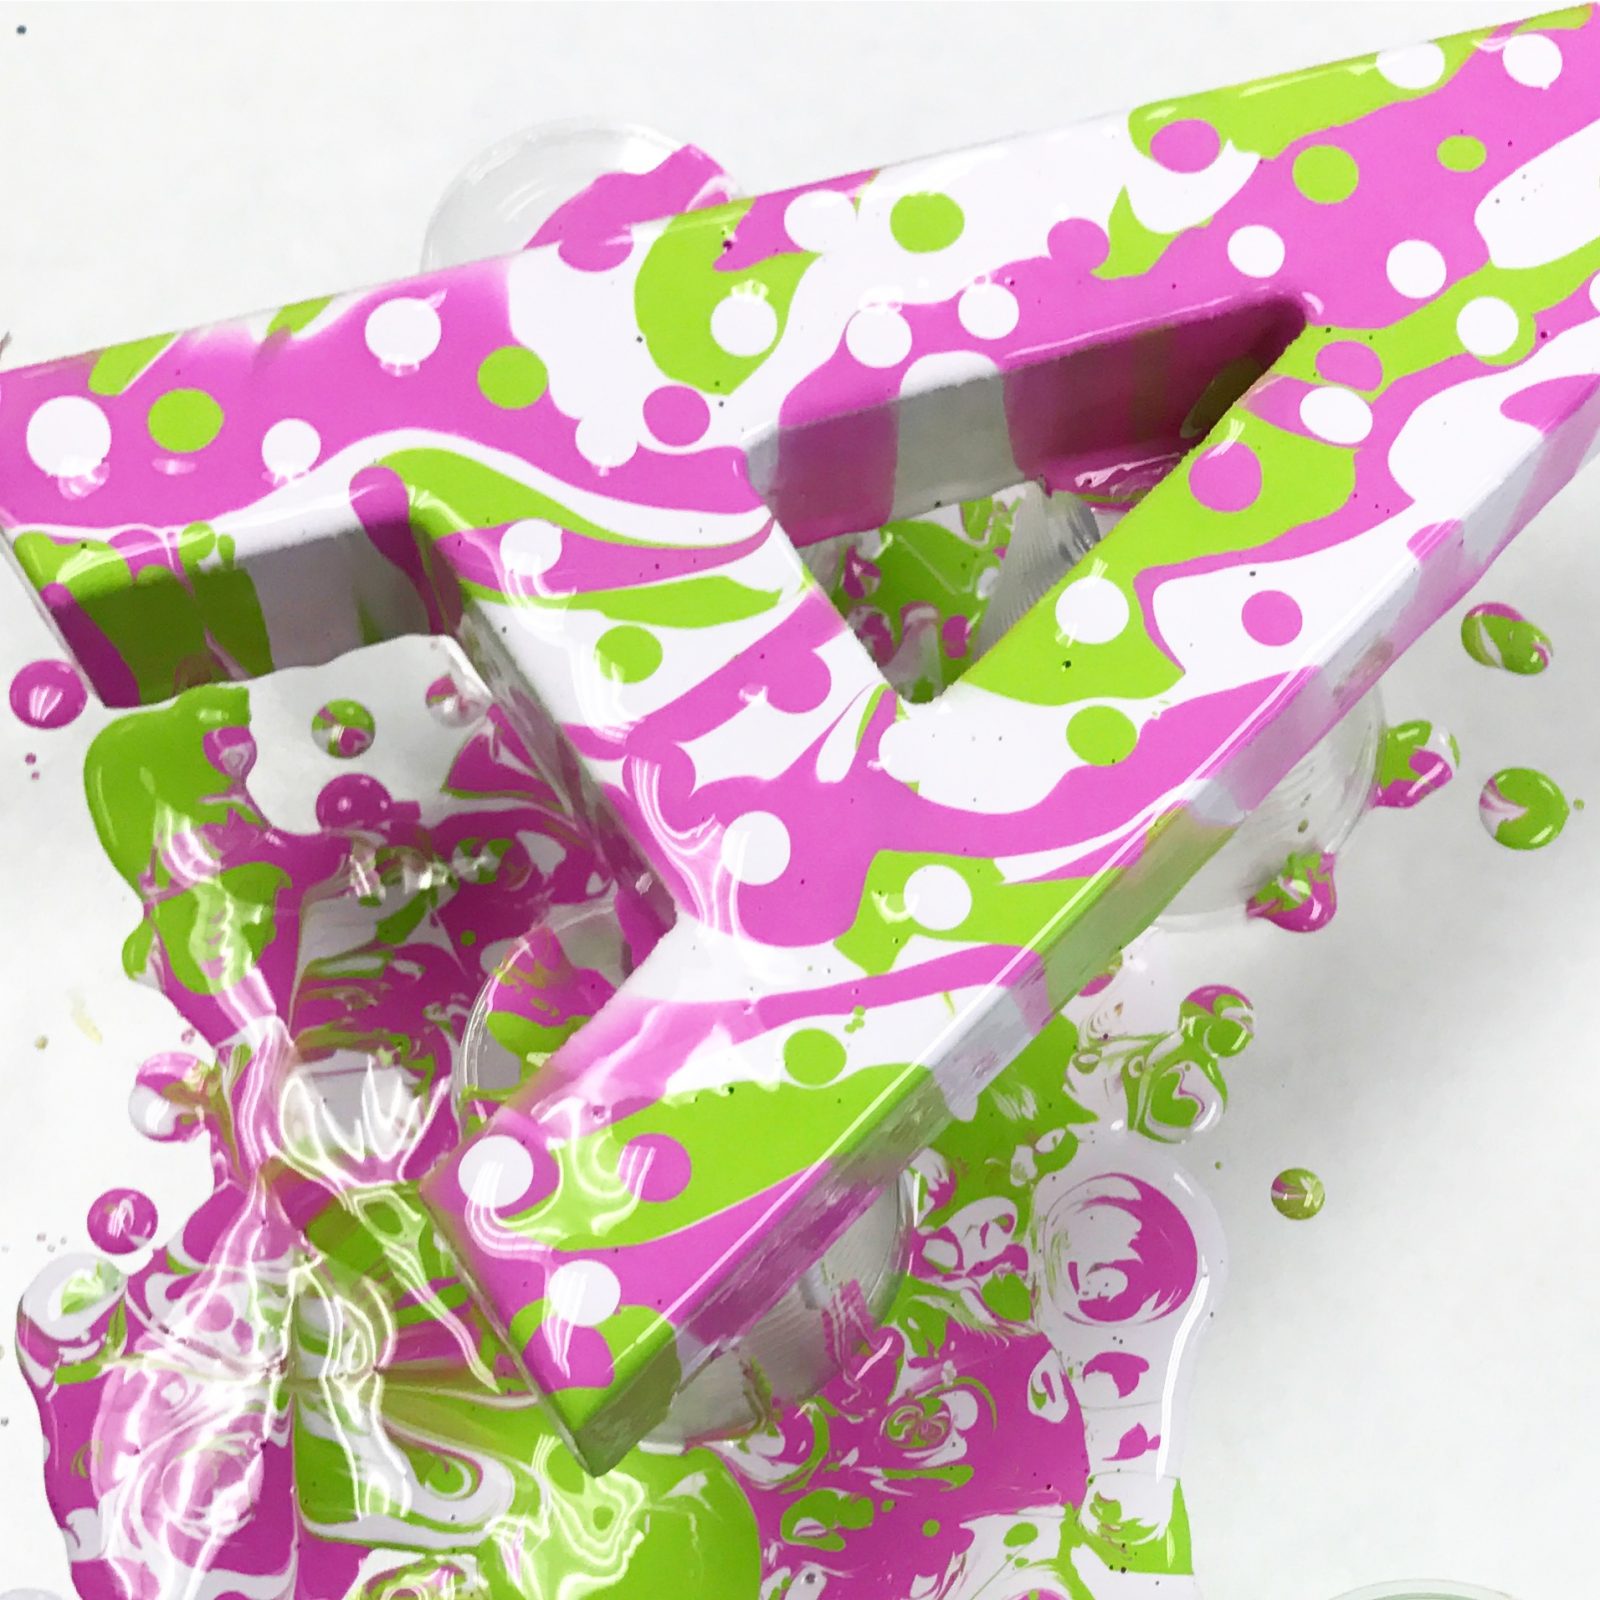
Another product you might enjoy? The new Martha Stewart Marbling Medium is SO fun! It can be used with the Multi-Surface Acrylic Craft paints to get an amazing marbled look on anything you want for your home!
There are so many goodies out from Martha Stewart at Michaels right now…be sure to check out all the fun stuff and more projects to come very soon!
Pin it for later:


