


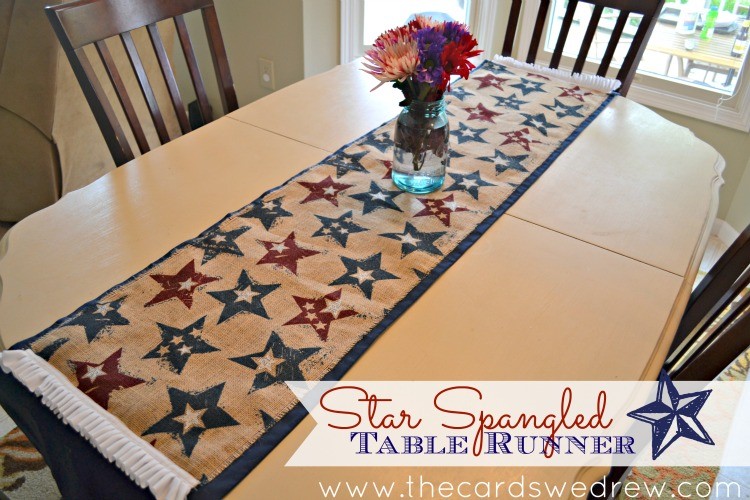
Most of you who have read my blog for a while know, I’m not really the sewing type. Matter of fact, I RARELY sew. But I found this fun red and blue star burlap fabric at JoAnn’s a few weeks ago and I had to have it and make something awesome with it. So with the help of my mom, we made this Fourth of July Table Runner in Star Spangled tradition!
This is probably considered a pretty basic sewing project for some, but for me it was tricky. I’m not going to pretend to know what to tell you to do exactly on this, but I’ll give it my best shot!
Here’s what you need:
Sewing machine/blue thread
about two yards of burlap and contrasting back fabric
1 yard of ruffle
Scissors
Iron and ironing board
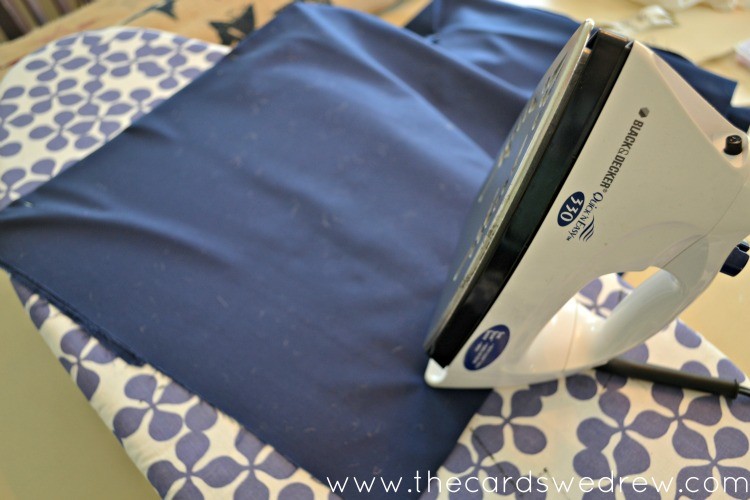
I started by measuring my table and determining how long I wanted it to be. I used the entire length of the fabrics I purchased, so that made it pretty easy length wise. Width wise I folded it over on my table and came to about 15 inches, then pinned it every few inches so I could iron the crease into the fabric.

The next step is to iron the whole runner with the pins in it, taking care to make a nice crease.
After it was nicely ironed, we started by sewing up the remaining side of the fabric (since we folded it over, we only had one side to sew shut on the runner, which is less work for you!). We didn’t actually do any fabric trimming at this point. First we sewed up the one side and then we trimmed the excess off the sewed side…because we’re turning it inside out, it’s not imperative to make your cuts perfect then!
You’ll see on the photo below, trim off the excess on the right side.
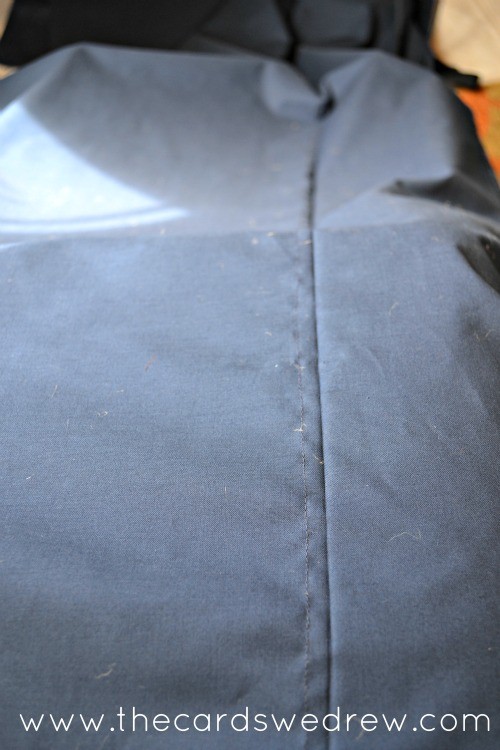
After you’re done trimming, open up your seam and iron it nicely so that when you turned it inside out and it’s showing on the other side it looks nice.
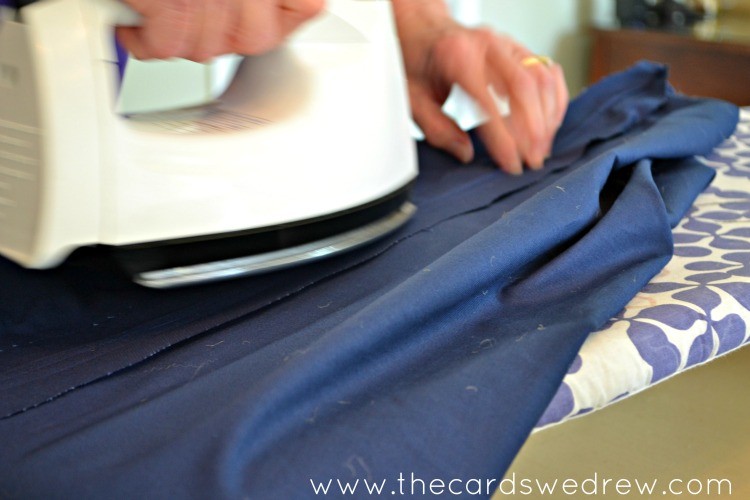
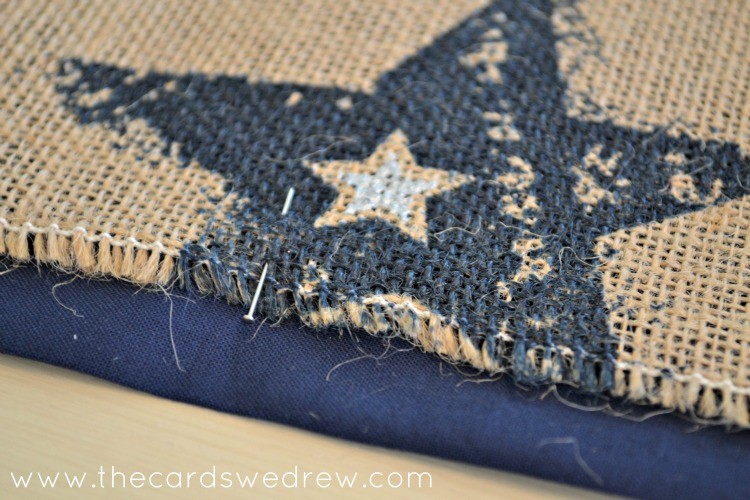
After that turn your runner inside out and get ready to move onto the burlap. For the burlap, we laid it out on top of the navy fabric trying to determine how wide we wanted it. Then we cut the burlap and pinned it onto the fabric to make it stay in place while sewing.
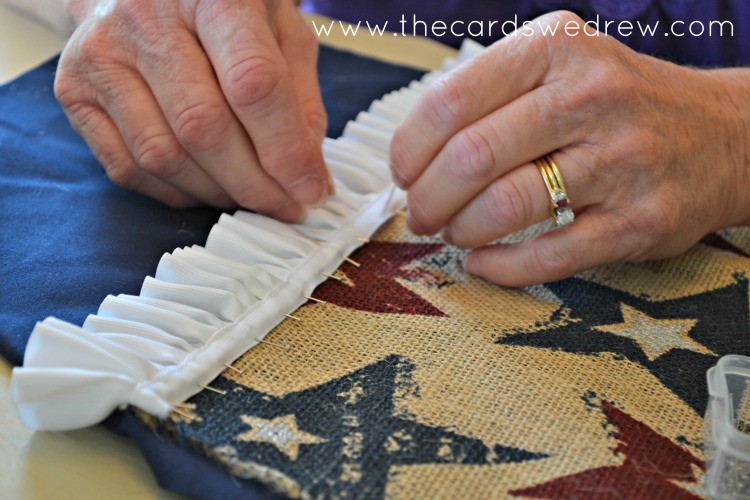
After we sewed the burlap onto the runner, which isn’t hard at all. We went ahead and added our ruffled edge to the bottom of the burlap edge. We laid the ruffled out and very carefully pinned it down (used a TON of pins) and then sewed it on. We did change our thread to white thread during this step so it blended in better with the ribbon.
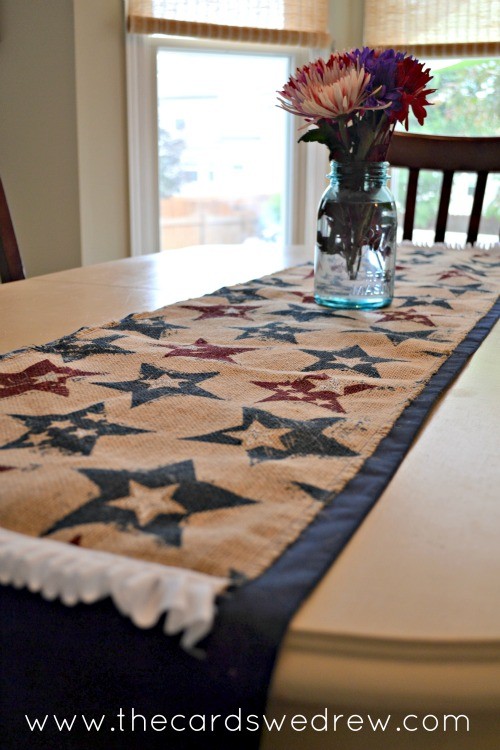
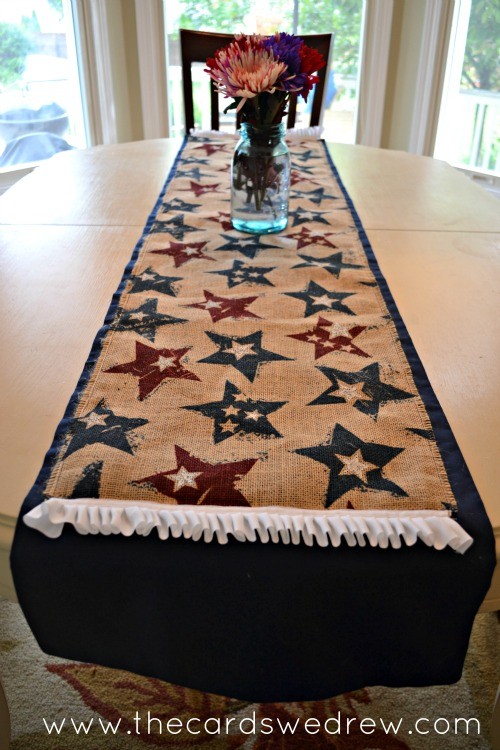
And after this you’re done! Wahoo! It’s probably the easiest project ever for seasoned seamstresses, but I was really happy that I played a part in making this (my mom helped a lot). Here’s some beauty shots!
I’m part of the Red, White and Blue Series at Sugar Bee Crafts this week! For more ideas click below!


hi! Just popping over from sugar bee. I’m also part of the red white blue series, so I’m checking everyone out :o) I love that burlap!!!!
Emily @ Nap-Time Creations
Oh my goodness…that burlap is adorable. Great idea to make a runner out of it so you can enjoy it all day long!
Cute! and great job sewing! 🙂
I love it! <3 Nice job.
Love the paint on burlap! This is a darling table runner!
I LOVE this table runner!! I so wish I could sew. Very cute!! I’m part of the RW&B series too, so stopping in to see everyone’s projects!
Kate @ Uniquely Undone
That is absolutely gorgeous and if I saw it in a store I would totally buy it! Very talented!
WOW I LOVE this! Such a great shabby chic runner!
I love this runner you made. My sewing machine is in retirement so I will be honest and say I just cut a strip of the burlap, frayed the edges, and placed it on the table. You are much braver than I! Great job.
Your new table runner is just so cute!
I love this. Pinning it so I can find it again!
What a creative and fun craft project! I’d love it if you would bring this over to my Saturday Spotlight party to share. https://angelshomestead.com/saturday-spotlight-23/ Hope to see you there!
April
Angels Homestead