Tree House Sign and Decor
This is a sponsored conversation written by me on behalf of Cricut. The opinions and text are all mine.
Last year my dad and husband built my son a large treehouse in our back yard, which still awes all the kids that come over to visit and play at our house. This year, for Easter, we decided to start decorating and styling his treehouse to make it more homey and a place where the kids can hang out. No tree house is complete without a cute Tree House Sign and fun decor, so my sister in law convinced me to spend Easter Sunday working on an easy sign made with some leftover scrap wood and my Cricut Maker! 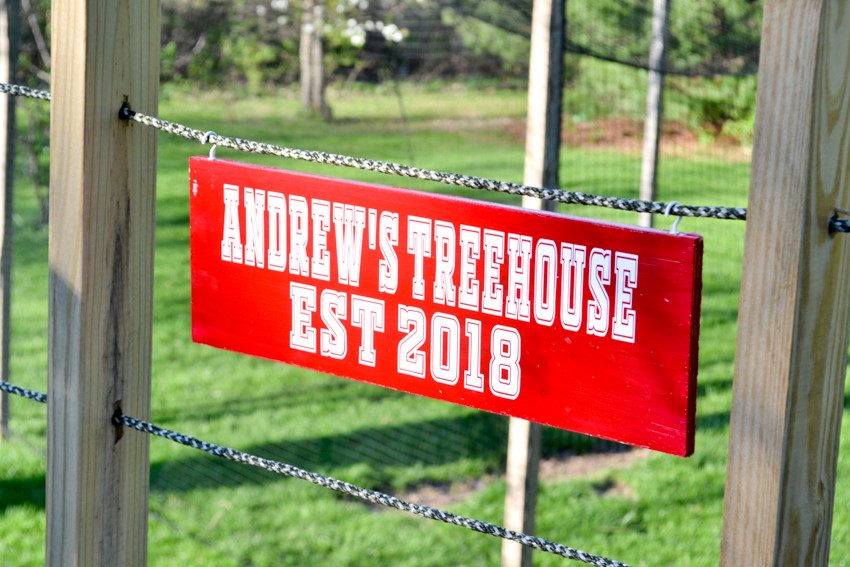 What you need:
Cricut Maker or Explore Cutting Machine
Scrap Wood (this is size 6″ x 18″)
FolkArt Red Paint
Outdoor Mod Podge (optional, but added layer of protection)
Eye Hooks
How to:
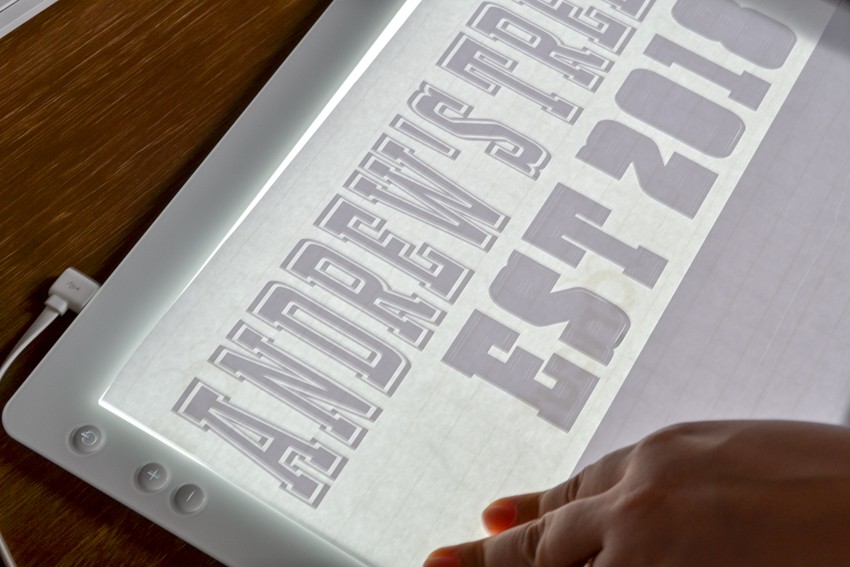
We started by using the Cricut Design Space to design the sign. We wanted a fun, athletic look for the font, so my sister in law did the design and then used the Cricut to cut White Outdoor Vinyl to fit the sign. 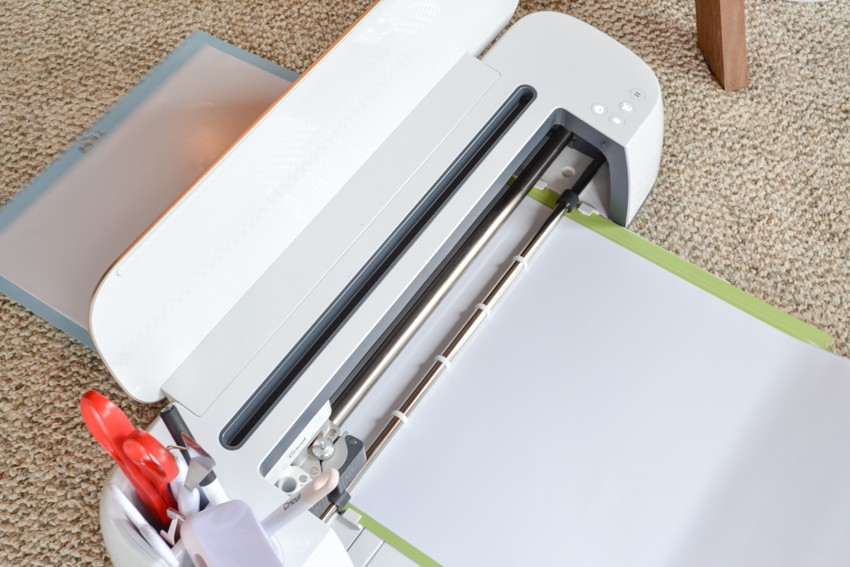 Once we cut the vinyl, we used the Cricut BrightPad and tools to weed the vinyl (meaning you pull off the vinyl that’s not going onto the sign). The weeding is so much easier with the BrightPad because you can really see the lines and what needs to come off.
 Once the vinyl was weeded, we laid a piece of Cricut Transfer tape over top of it and used the tools to firmly attach the vinyl to the transfer tape. You gently pull the transfer tape up to transfer the vinyl you’re using to the transfer tape so that you can stick it onto your sign directly.
 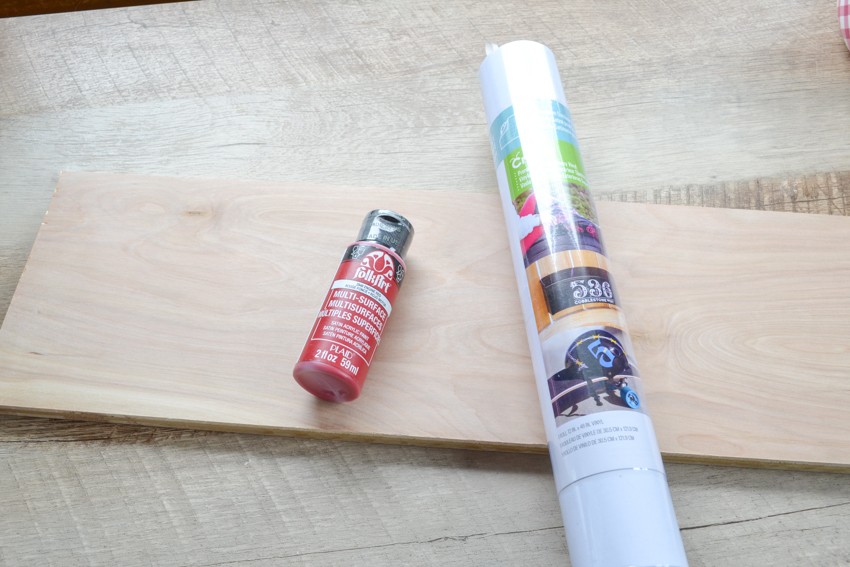 Once the vinyl is ready to go, you can paint your sign with the red FolkArt paint and let dry, then apply the transfer tape sticky side down directly onto the dried sign. Using a credit card or a scraper, you’ll run the side of it along the vinyl to get it to adhere to the sign, then you’ll gently work to pull the transfer tape off the sign, leaving only the vinyl.
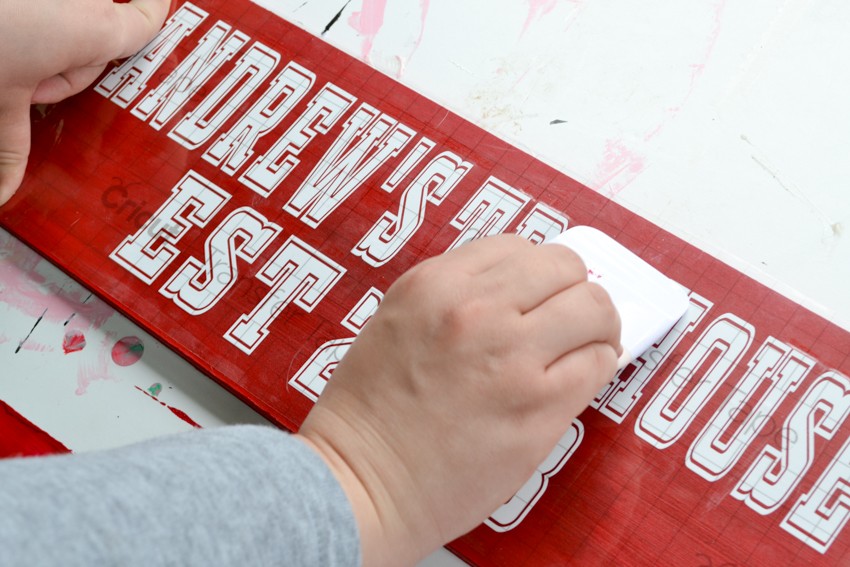
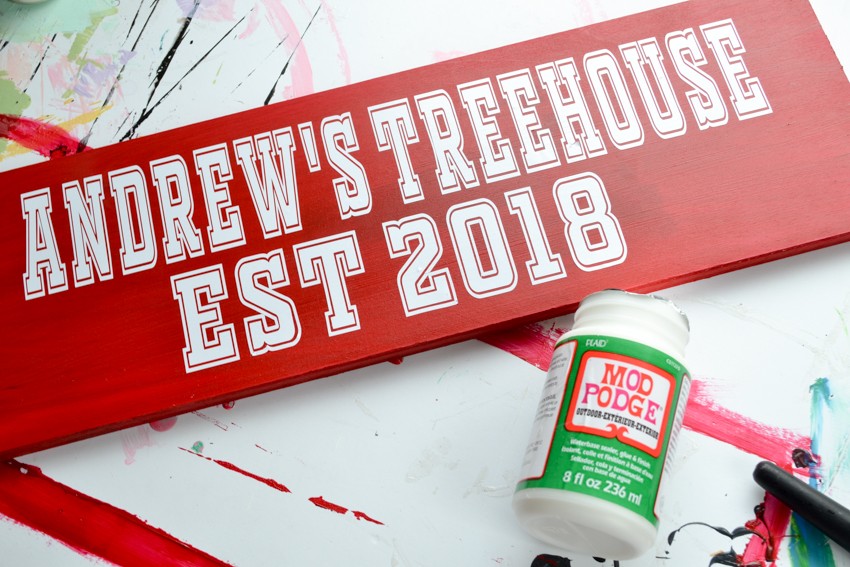 Once the transfer tape is removed, you can finally enjoy all your hard work! I quickly added a thin coat of outdoor mod podge to my project to protect the wood. It’s not necessary, but I want the sign to hold up well so this seals the paint and the vinyl on the wood well. Let dry for 72 hours. We added eye hooks to the top of the sign so that we could hang it from the rope on the treehouse…
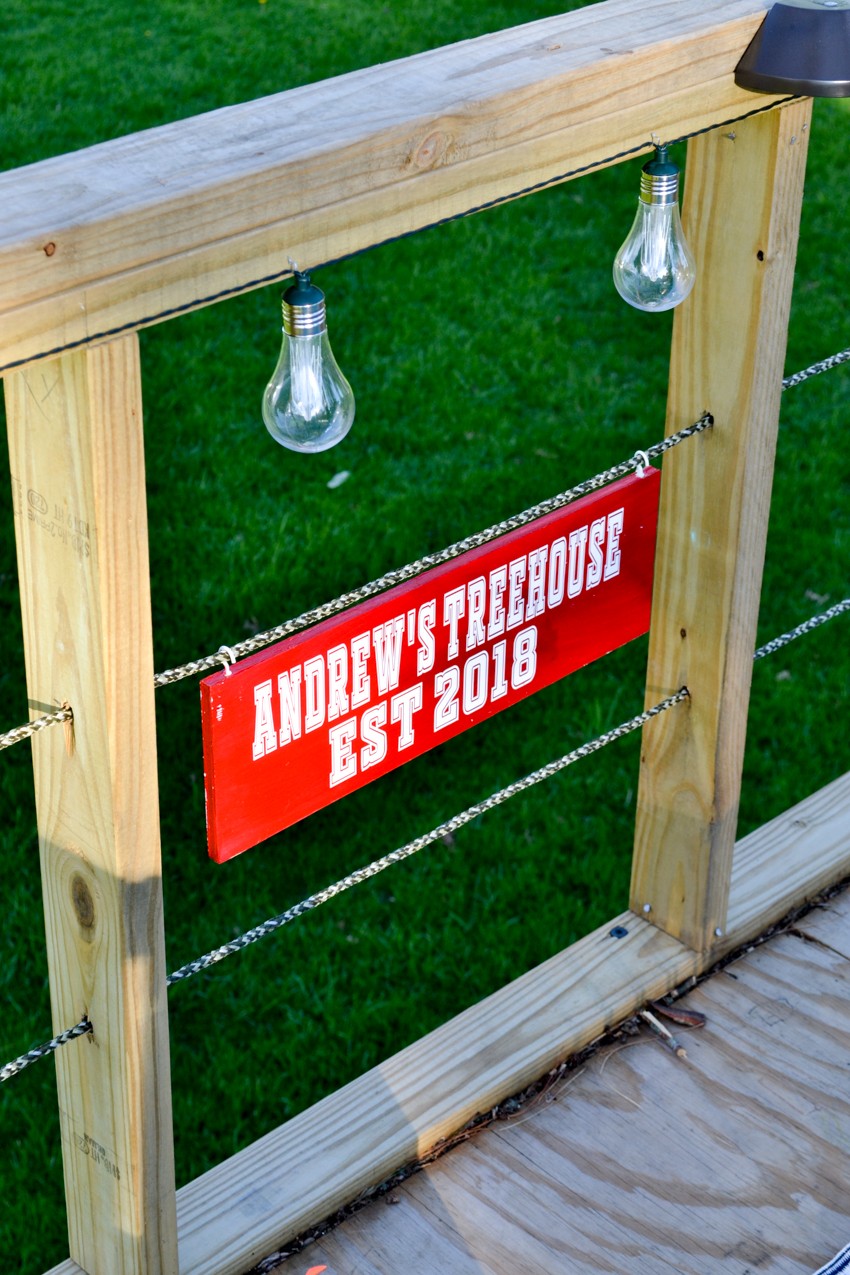
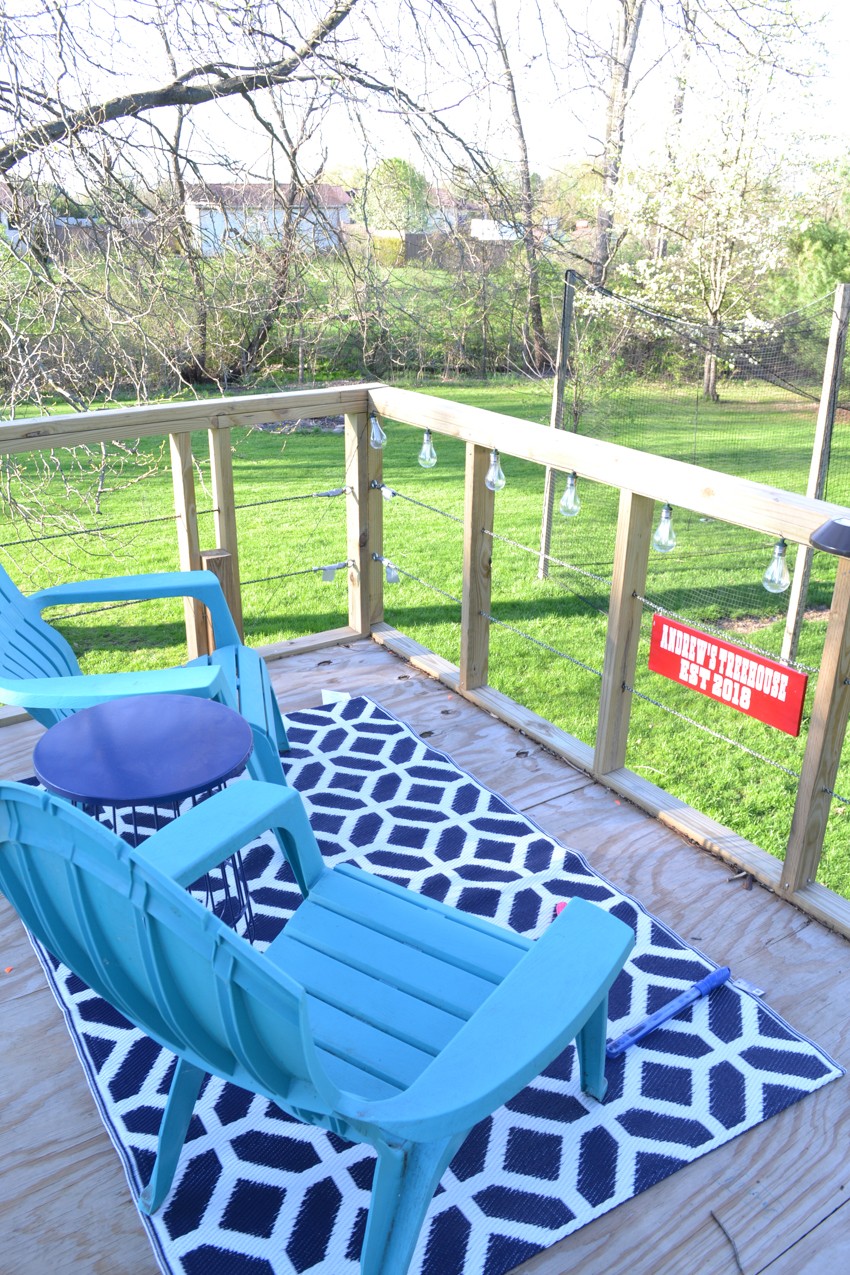 Now with the cute outdoor rug, chairs and table, solar lights, and the cute sign, my son has the best seat in the whole backyard to enjoy the day! Next up, we need to paint the whole treehouse!
  And yes…that’s our batting cage in the background…we just love to have outdoor backyard options. 😉
 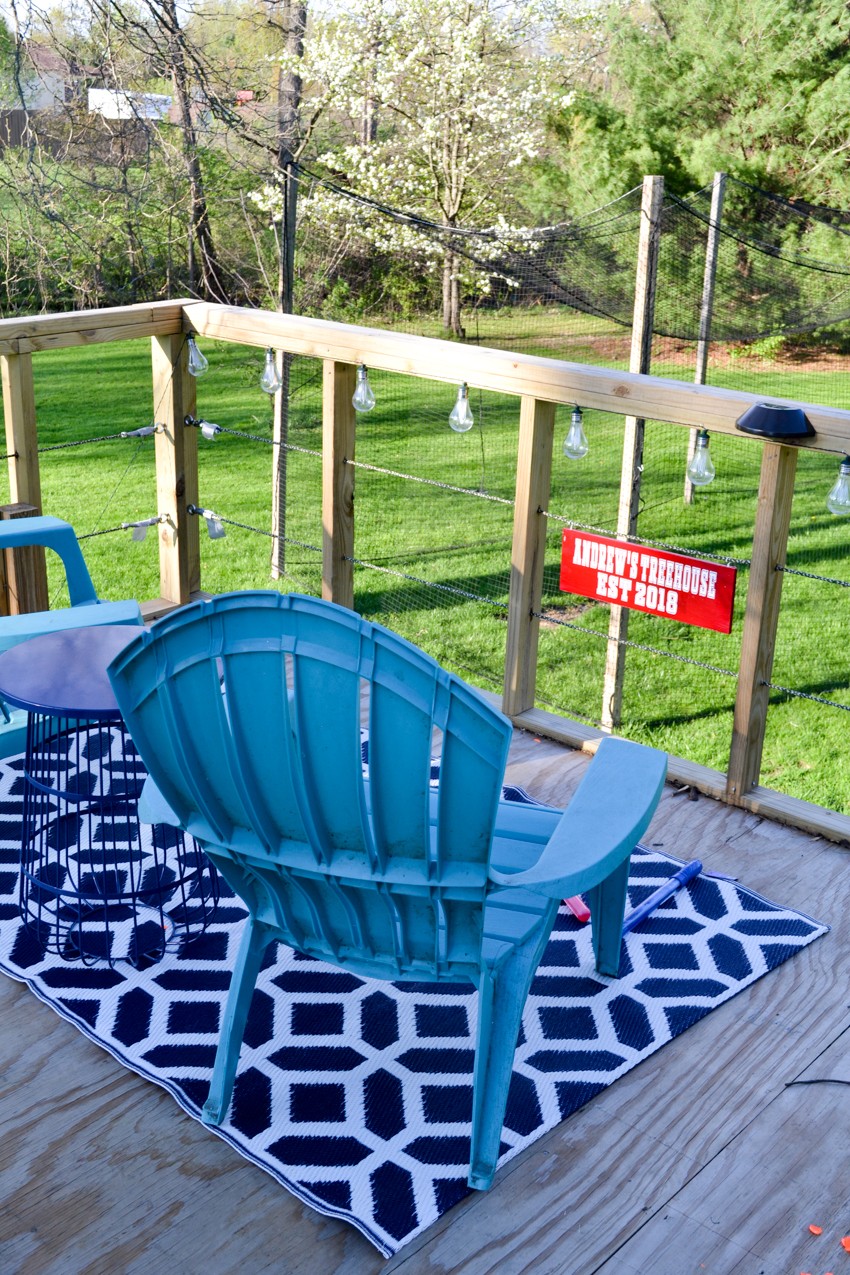 I hope you enjoyed this fun and easy Cricut project idea…special thanks to my sister in law for all her help on making the sign (the weeding was a labor of love). I have more coming soon about our treehouse, so leave any questions you have in the comments below!
This is a sponsored conversation written by me on behalf of Cricut. The opinions and text are all mine.