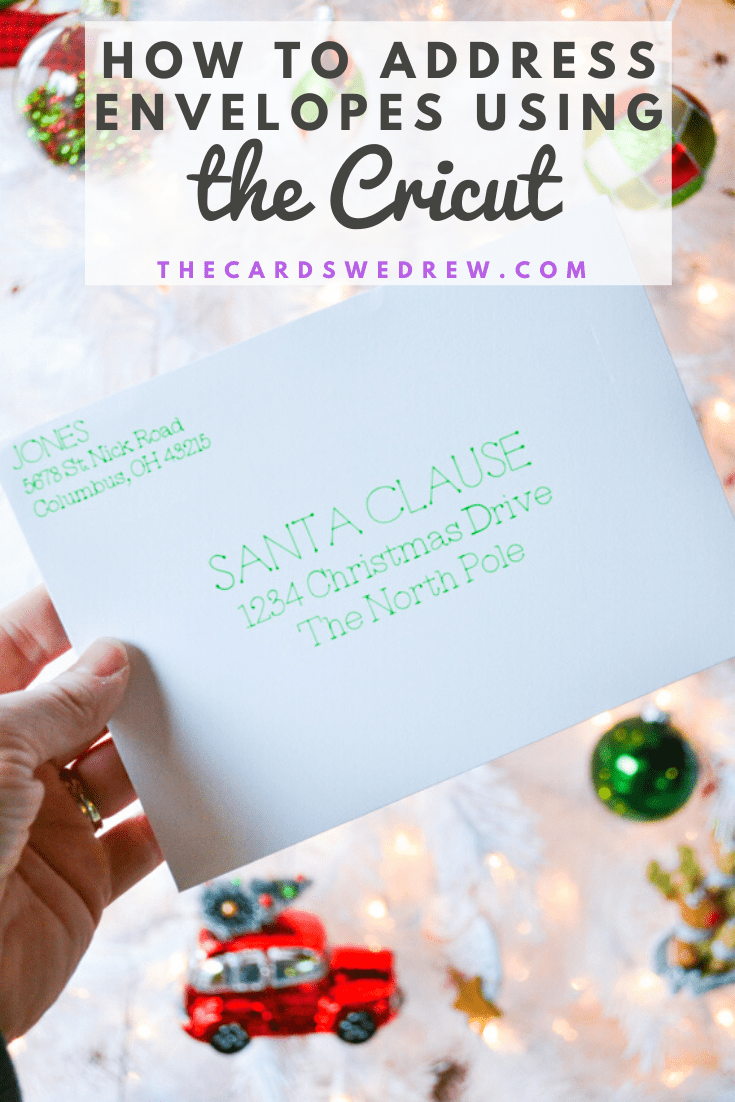
How to Address Envelopes using the Cricut
I don’t know about you guys, but one of my LEAST favorite things to do is to address envelopes. I really despise it, but I’ve always envied people with beautiful handwriting that send in these gorgeous cards that are perfect from the time they hit my mailbox to when I open it up and see all their smiling faces on a Christmas card. This year I was determined to learn how to address envelopes using the Cricut Maker. This saved me time and the envelopes turned out to be complete perfection!! Although it seems tedious at first, once you’ve done one or two it’s really not hard at all and I even made a 5×7 envelope template for you to start out with if you’re really struggling. Let’s walk through how to address envelopes using the Cricut….

What you will learn from this tutorial:
- Learn how to address envelopes using Cricut
- How to write with Cricut Maker
- How to write on a card with Cricut
- Free Cricut envelope addressing template
- Cricut Writing Fonts
Table of Contents
A few important items to note first…
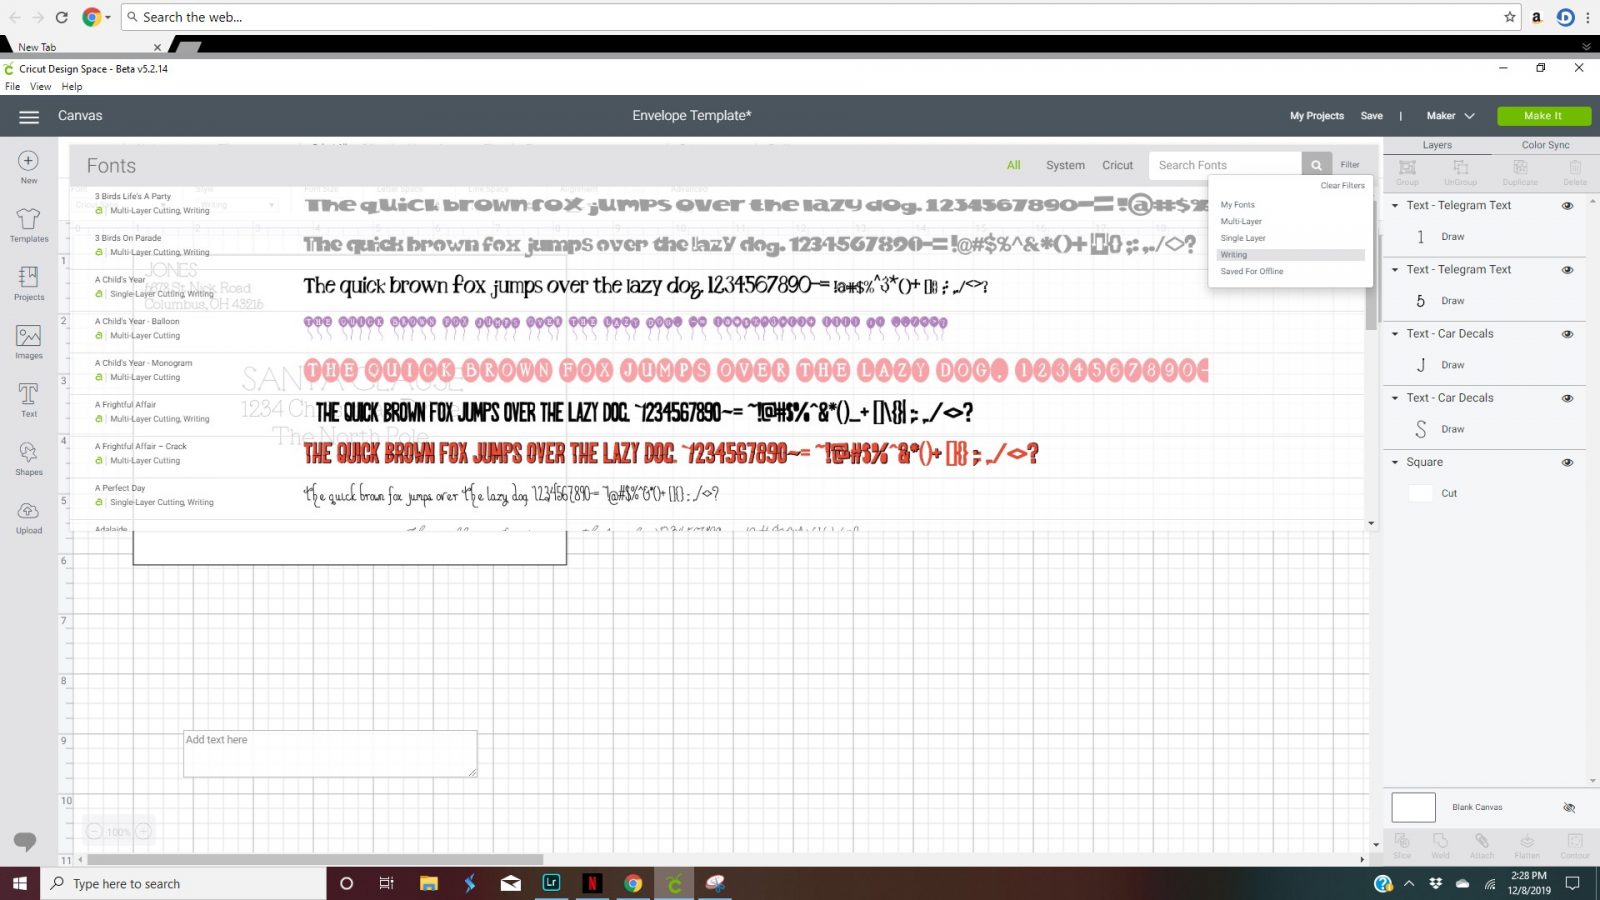
Choose Cricut Writing Fonts
Side note about the fonts, if you decide to change the font, it’s important that at the time you are designing your envelope, you choose fonts that are “writing” fonts. See screen shots below of what I’m talking about. It’s a filter setting in the font selection process. Writing fonts ensure that you get what you think you’re getting from a font versus just the outline of the font if you choose a non-writing font. I hope that makes sense.
Also, cursive fonts can be tricky because you will have to do a lot of moving letters around to get them all to connect nicely. I LOVE the look of cursive fonts on envelopes, but it’s not overly practical if you’re addressing a lot of envelopes *unless you just LOVE the minutia and have tons of time on your hands! LOL
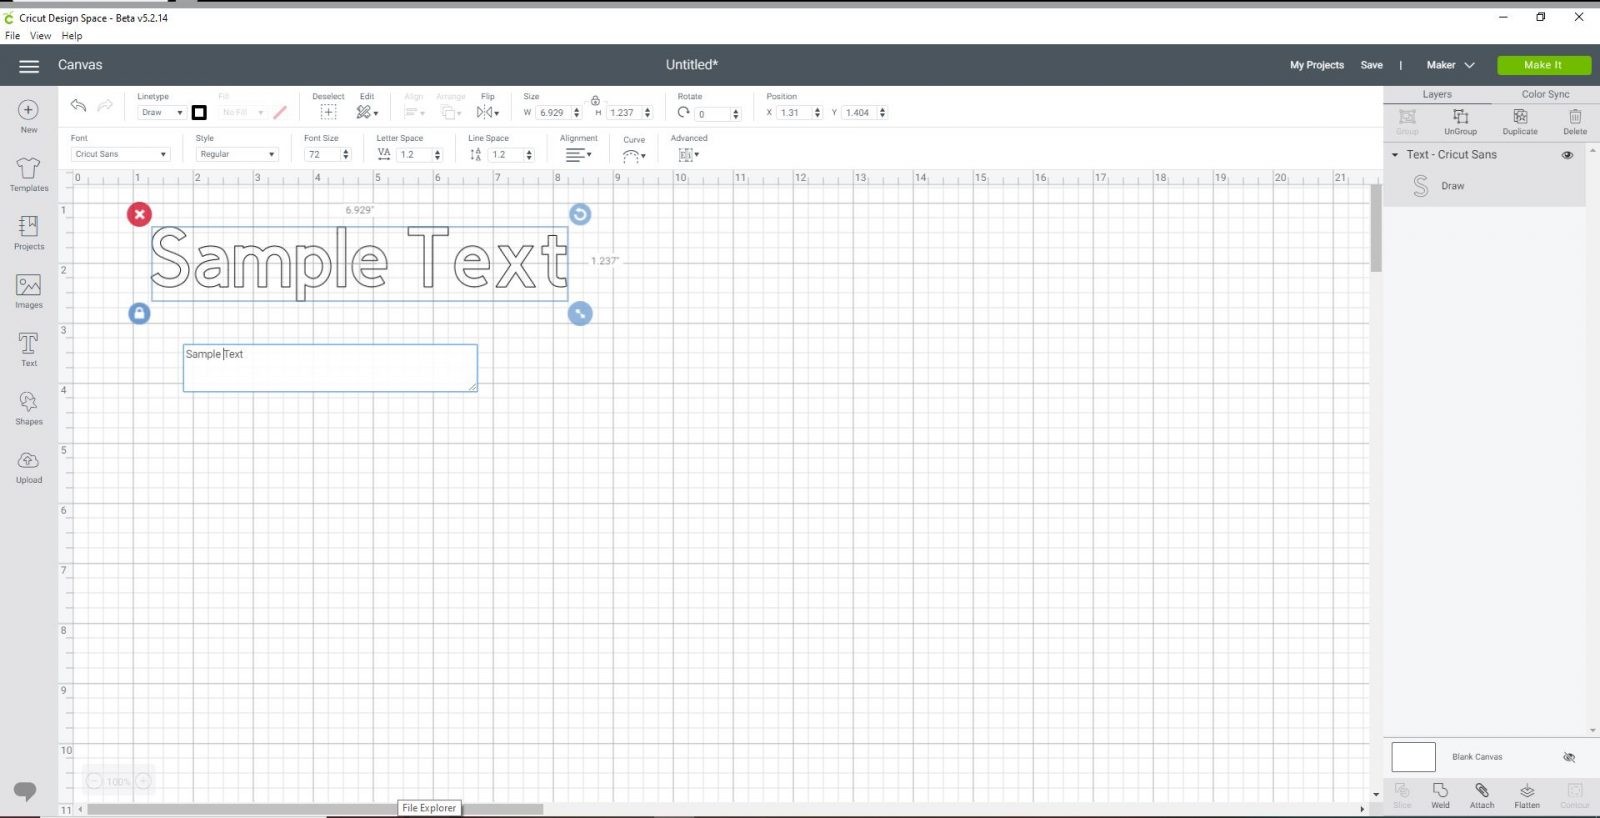
Draw Setting in Cricut
Another important part, if you do not use my template, is to be sure that when you are adding text that you change the line type in the upper left corner to the Draw setting. This is what tells the Cricut that it’s going to Draw instead of cut. This is super important! My template already has this taken care of for you, but if you’re going rogue, this is an important step!!
How to Address Envelopes Using Cricut
Step One
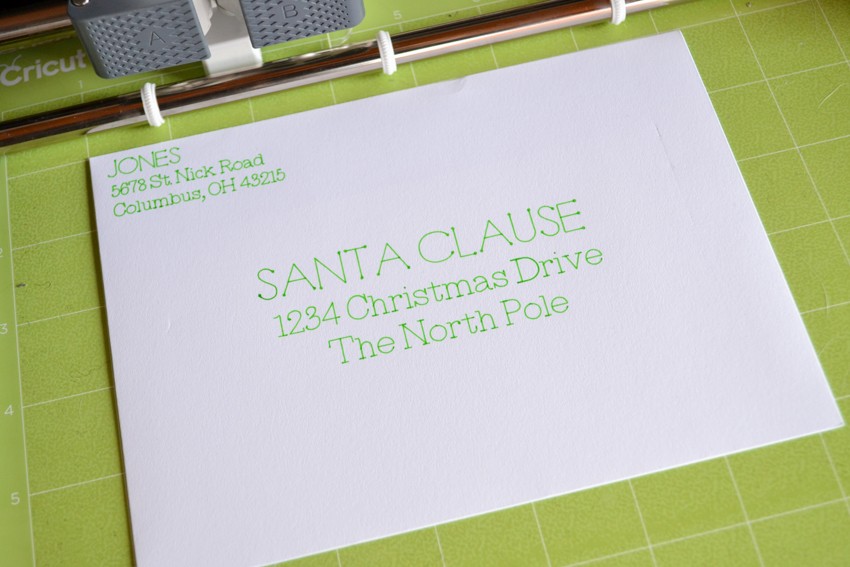
So let’s get started. You can use my Free Cricut Envelope Template here if you want to get started and have them look the same way as mine. Basically, I started by creating a 5×7 rectangle in Cricut Design space so that I had a template for my 5×7 envelope. You’ll notice my template is just a hair larger than 5×7 and this is because my envelope was just a hair larger, as well. If you have a larger or smaller envelope, adjust the rectangle accordingly. The rectangle is really only being used as a template for sizing and placement purposes and you will eventually be hiding the rectangle before you use the Cricut to address the cards.
You will use the fonts to adjust the address names/roads, etc. so that everything looks the way you would like.

Step Two.
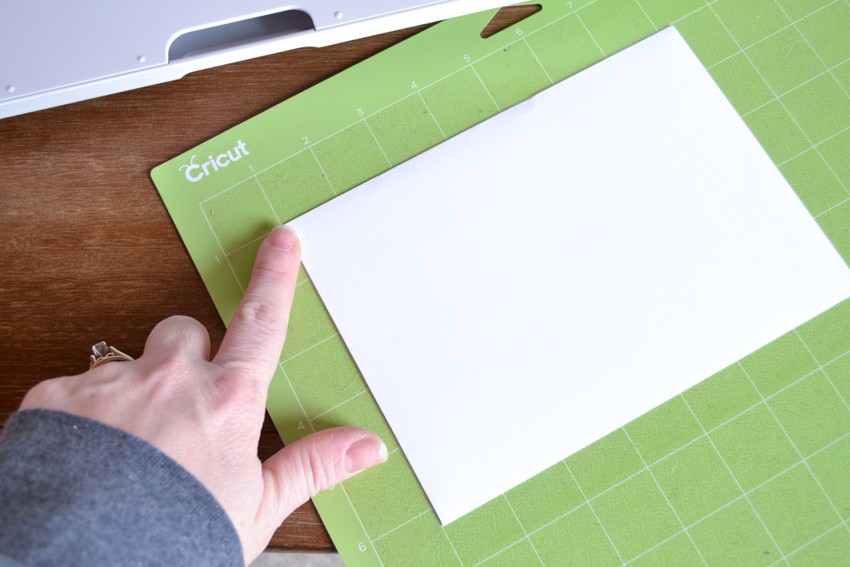
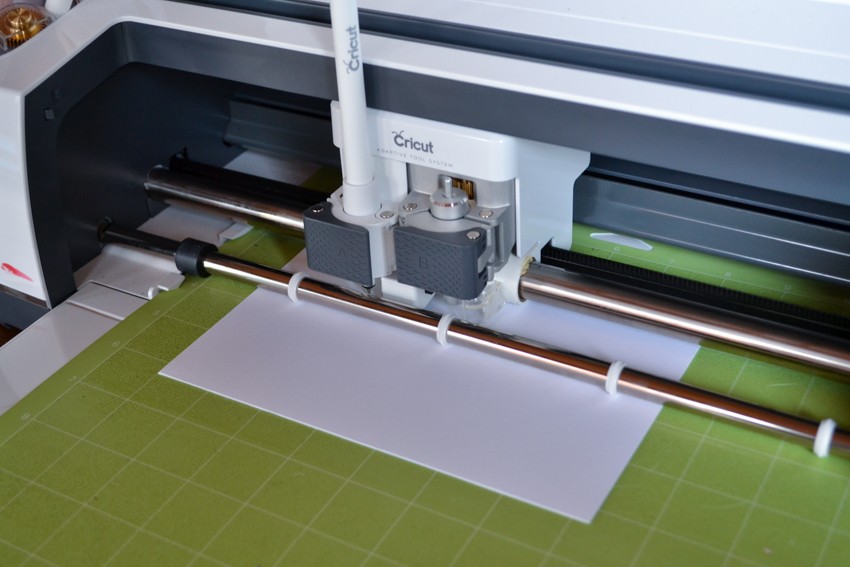
Using a Standard Grip Cricut Mat, you will line up the envelope on the same markings that you used in Cricut Design Space. Mine are lined up at the 1″ x 1″ mark. This is where I will place my actual envelope on a Standard Grip Mat and load it into my Cricut Maker.
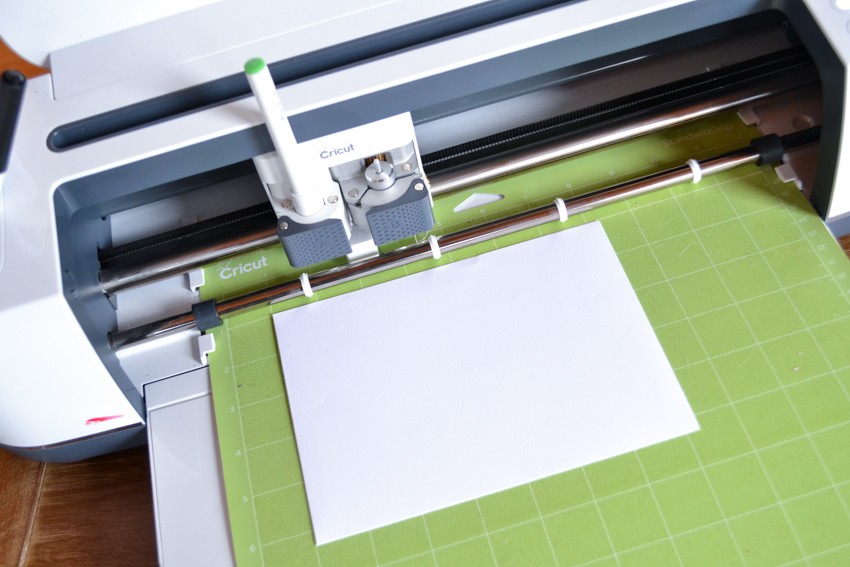
Step Three
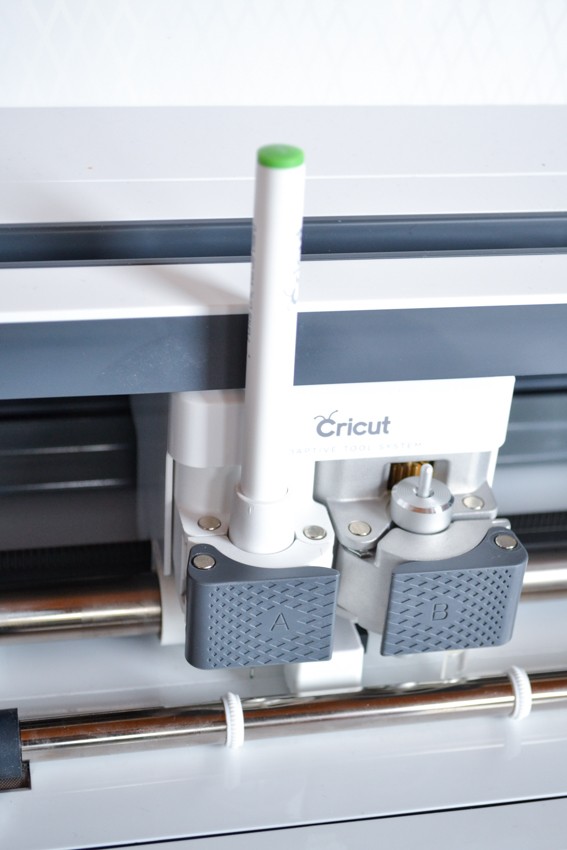
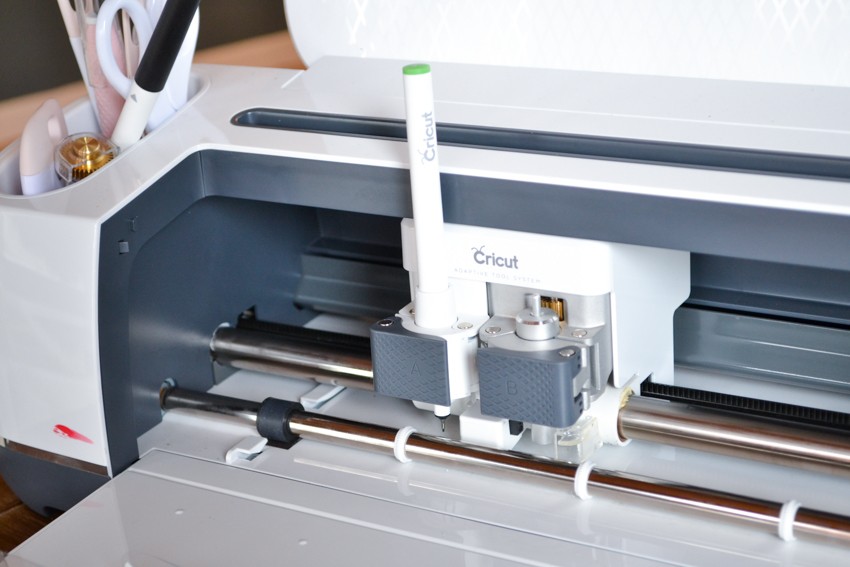
The envelope is loaded into the Cricut Maker. Next, we load our Cricut Pens. I used a green fine tip pen for this job. I loaded it into the left slot of the machine and clamped it into place.
Step Four
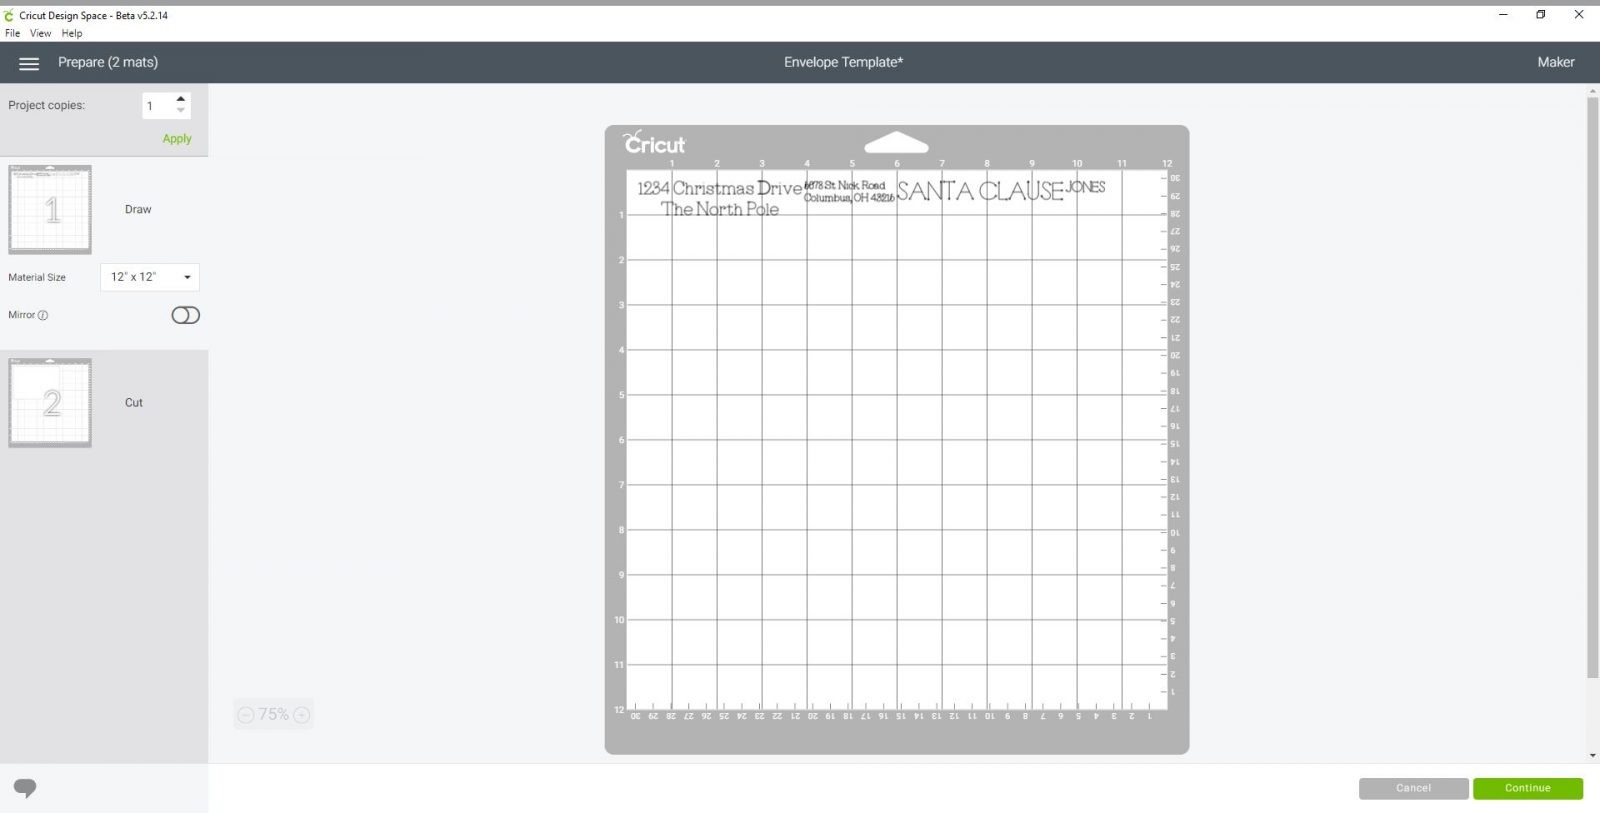
We get to arranging our mats. When you hit “Make it” the machine automatically organizes what it thinks it’s cutting and drawing into two mats. We’re going to combine those mats and then eliminate the cutting portion so it’s only drawing.
Once you hit “Make It” in the upper right corner, it will take you to this screen…one thing I do NOT like about Design Space is that all that hard work you just did on the previous screen gets undone when it brings it over to the mats. Here you will see two mats. One for Draw and one for Cut.
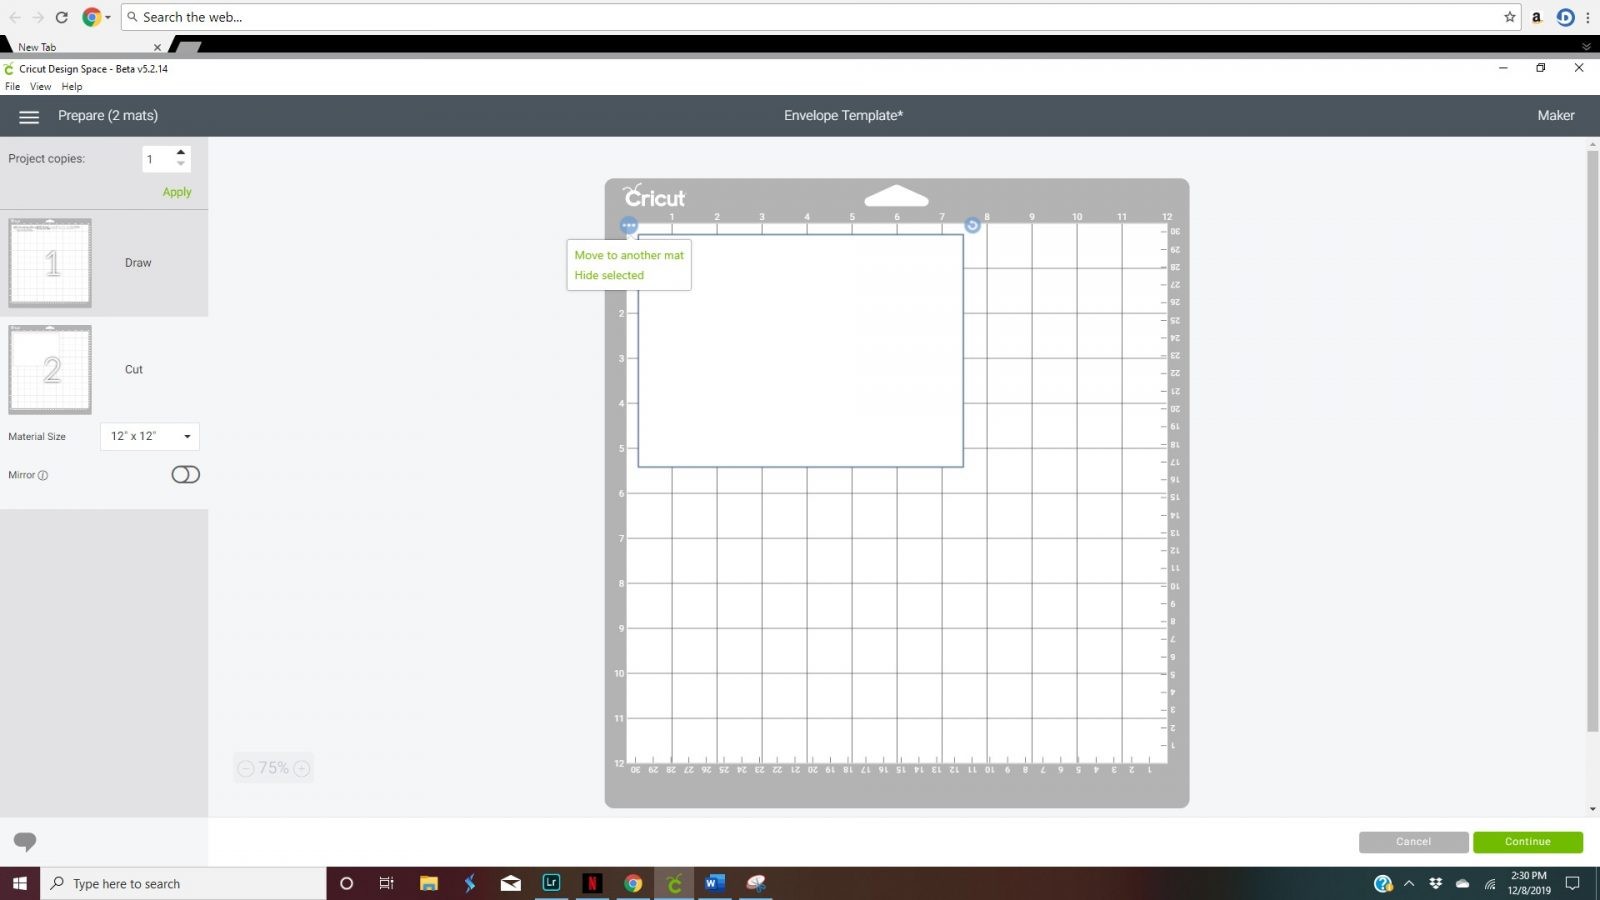
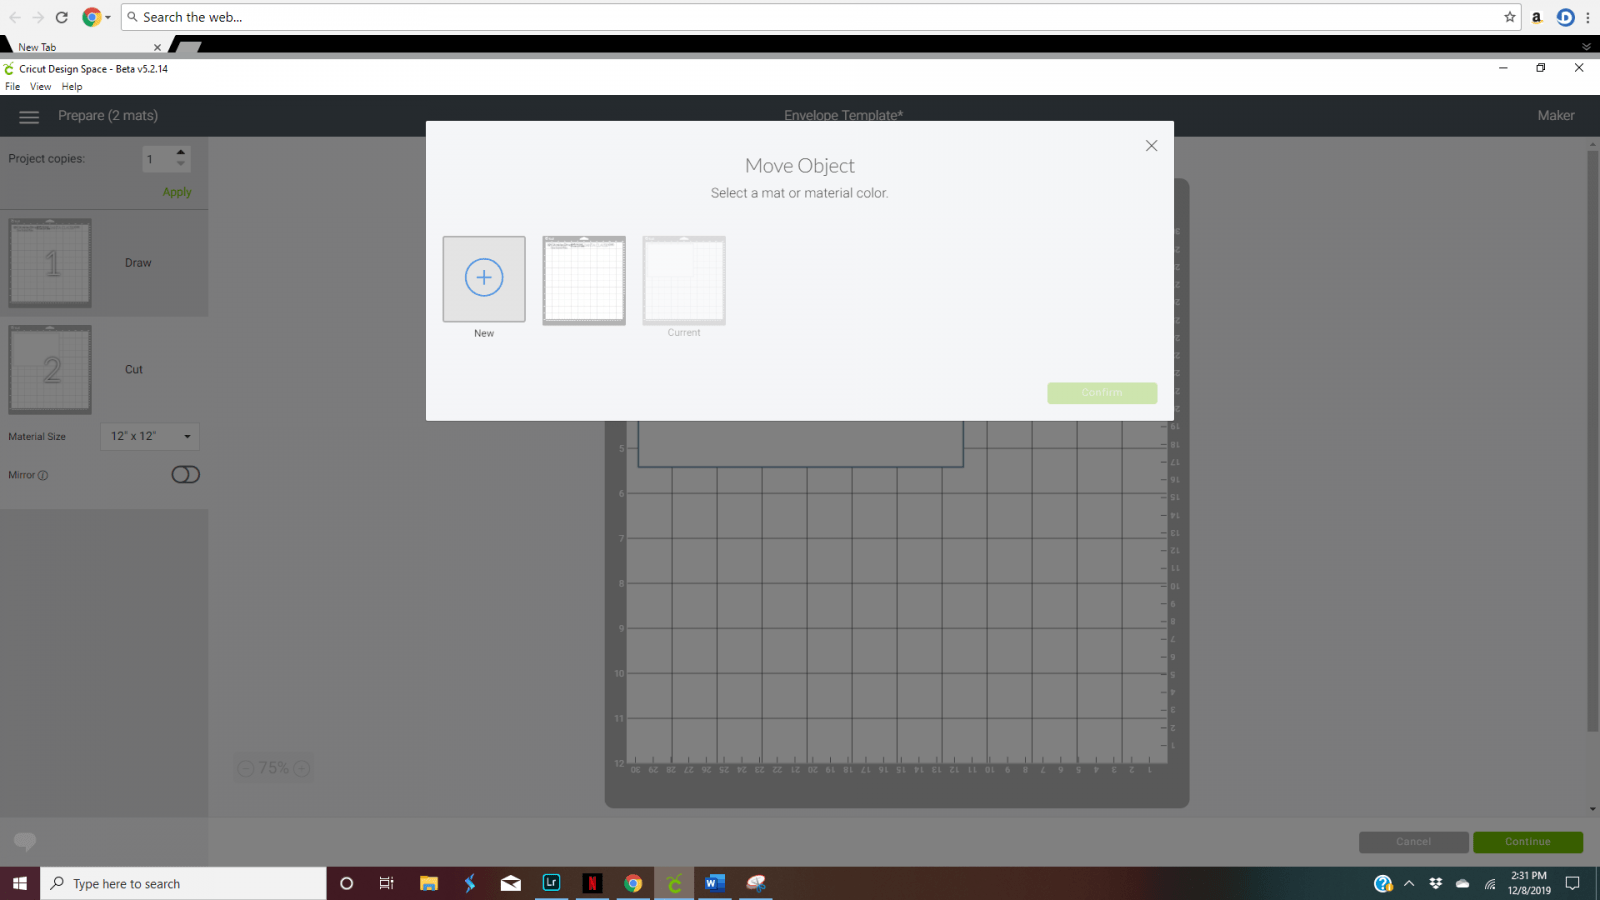
Start by selecting Mat 2 (the Cut mat) and hover over the rectangle until three dots appear in the upper left corner. Click on the three dots and select, move to another mat. Move it to Mat One.
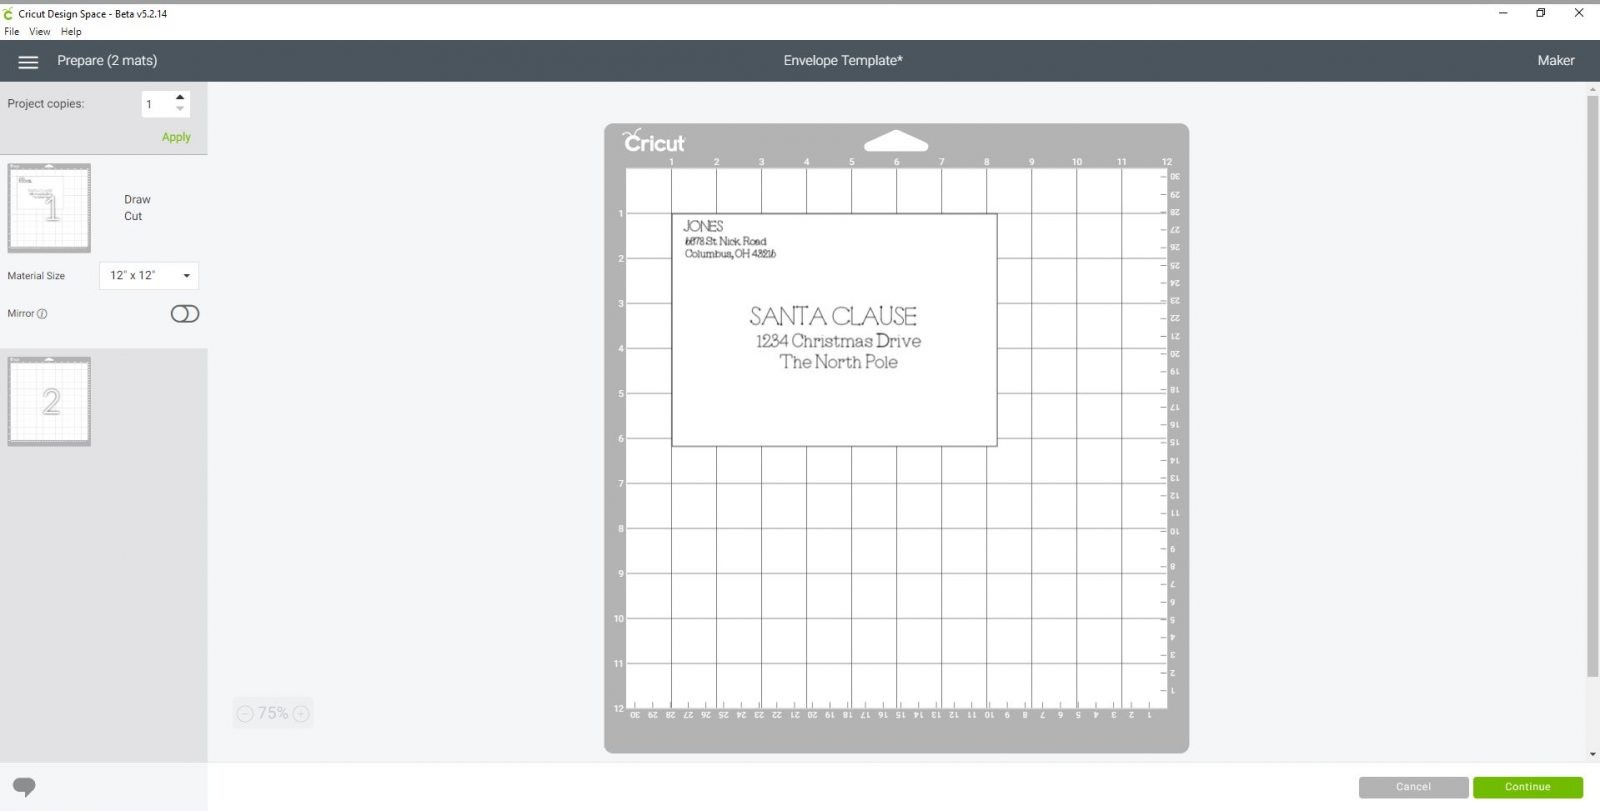
Step Five
Now that you have it all on Mat One, you will drag your rectangle back to it’s starting position (in this case we selected the 1″ x 1″ mark) and then arrange your text accordingly on the card. This is how it will look once you actually “draw” the envelope.
Step Six
This is a SUPER important step…and I accidentally skipped it several times!! Be sure that once your card is all set up, you hover back over top of your rectangle and get the three dots in the upper left corner to appear. At this step you will HIDE SELECTED…which is the rectangle. Hide the rectangle, otherwise it will cut your envelope!
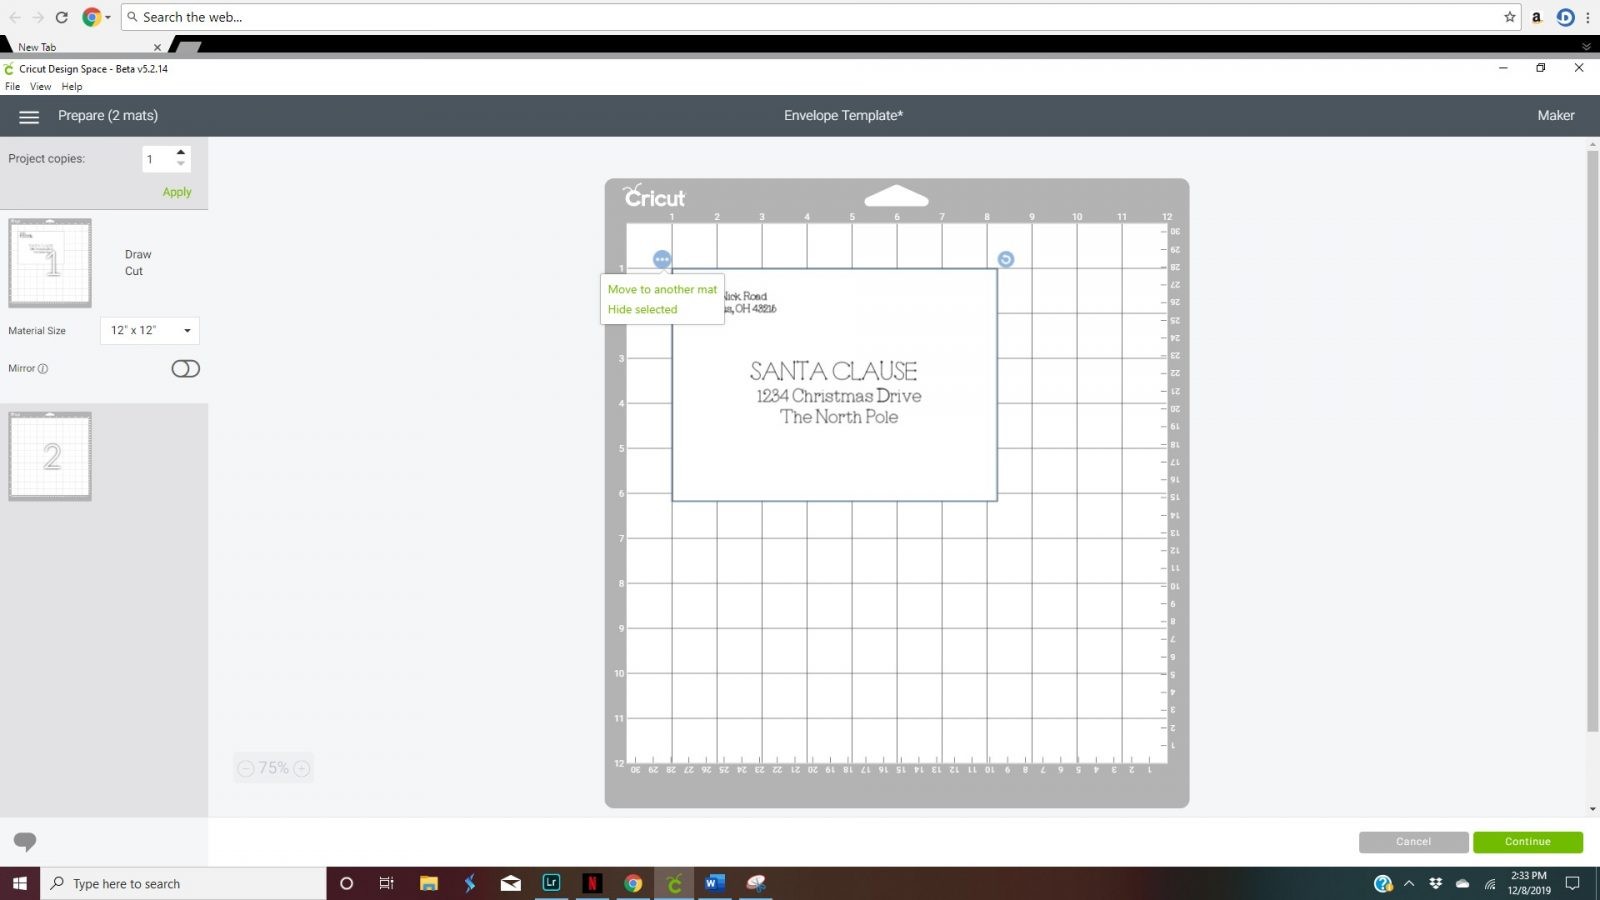
Once the rectangle is hidden, your template will look like this… and you will hit Continue in the bottom right corner to get to work.

Step Seven
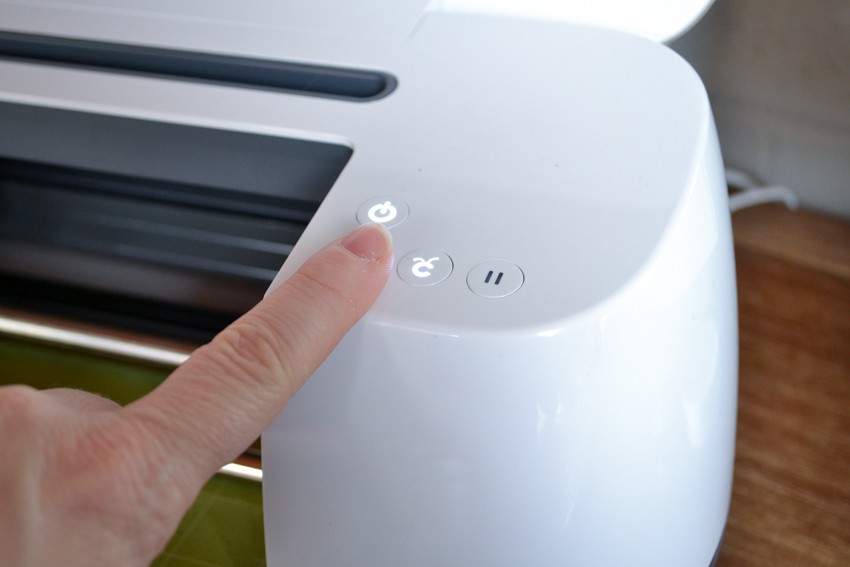
Select your material. Because “envelope” isn’t an option, I selected medium card stock. Then I selected my tool so that the Cricut knew it was using a Fine Tip Pen. Then I pushed the Cricut button to get started.

Drawing with the Cricut Pens isn’t the fastest job…so be patient. It’s really kind of satisfying to watch it draw!

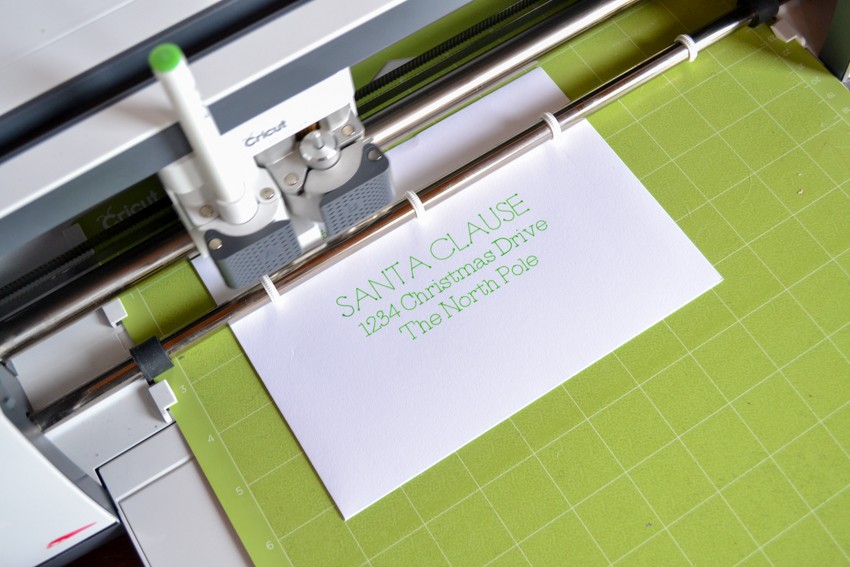
Once it’s done drawing, unload your mat and get your card or invitation inserted and you have a beautiful card all made up and ready to go!

This may seem like a ton of work and a lot of steps, but once you get one or two done…it takes maybe 5 minutes per card. I wouldn’t necessarily do this for hundreds of cards, but for 15-20 it’s fun and not hard at all.
Equipment list:
- Cricut Maker
- Cricut Mat
- Cricut Pens
I hope you enjoyed this easy Cricut tutorial…here’s some other Cricut posts you may enjoy:
Pin it for later…