DIY Upcycled Pumpkin Wreath
This post is sponsored by HomeRight, all opinions are my own.
One thing we bloggers rarely admit to is that we have SO MUCH decor and products from all the years of blogging. Think about it–we have to keep our ideas fresh, which means you start to accumulate things and more things and more things on top of that…so it’s hard to figure out what to do with all the old stuff you’ve replaced. Such is the case with my fall decor. I have a TON of traditional fall toned decor–reds, yellows, oranges, browns, yet I’m starting to want a change and I’m decorating with more cool tones to match the blues and tans in my living room. So today I wanted to remind you that sometimes you can just take what you have and make it better with something as simple as paint! Case in point, today I took some old plastic pumpkin fillers and I turned them into a DIY Upcycled Pumpkin Wreath just by painting them and adding some greenery!
How to Make a Fall Pumpkin Wreath
What you need:
HomeRight Max Finish Paint Sprayer
Craft Paint
Hot Glue
Plastic/Foam Pumpkins
Greenery/Faux Plants/Leaves
Embroidery Hoop Form
How to:
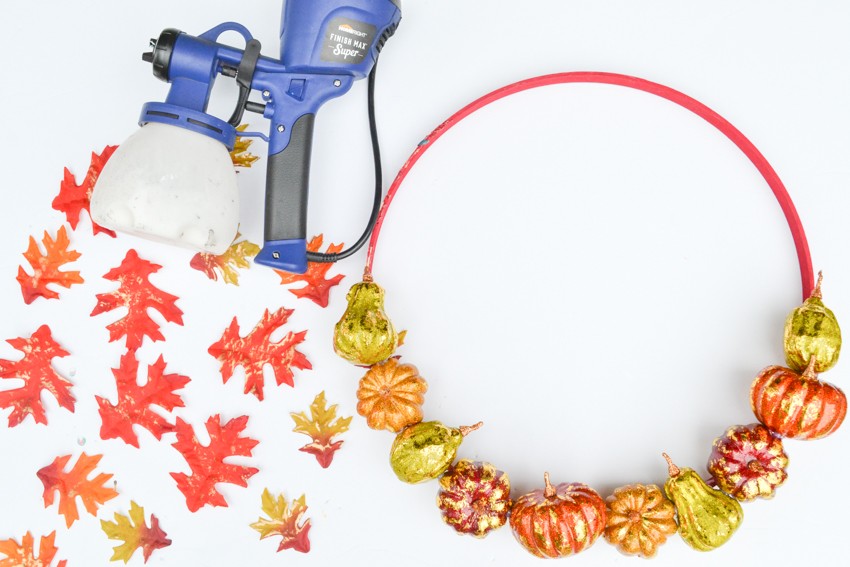
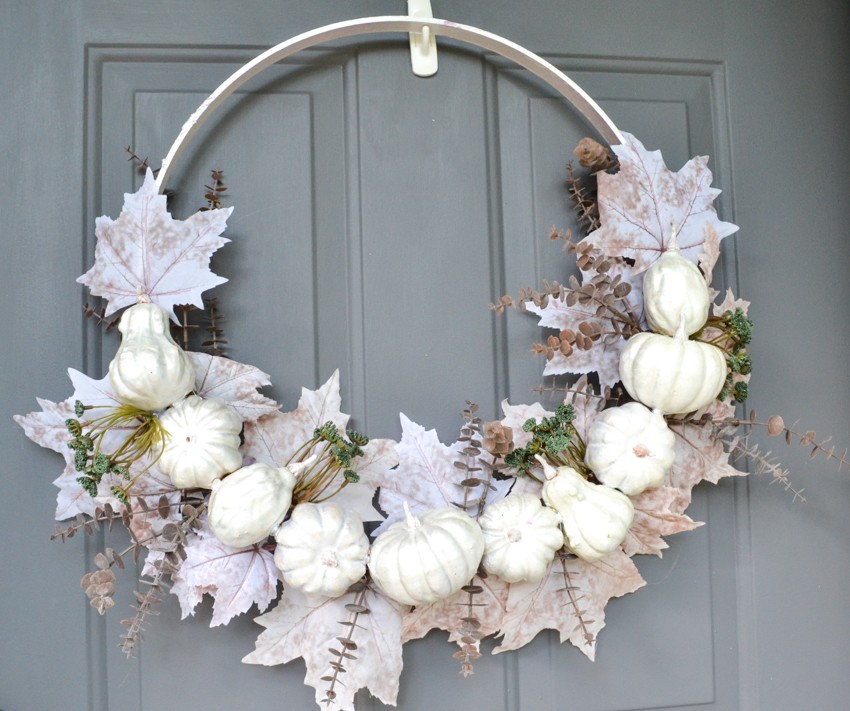
Start by fixing your pumpkins onto your embroidery hoop. I tried to fit them as close together as I could so that there were few gaps between the pumpkins. After they are secured on with hot glue, I then set up my HomeRight Spray Shelter and my HomeRight Max Finish Paint Sprayer. I added a bottle of craft paint to the sprayer, thinned it down with some water, and then applied several coats of pearly white paint to the pumpkins until covered and then let dry completely.
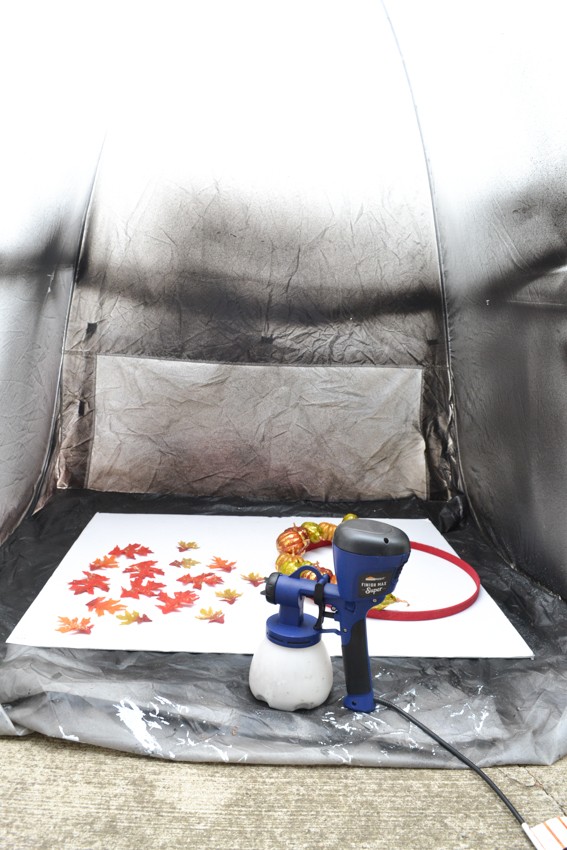
The HomeRight Spray Shelter is amazing because it keeps all the mess in one place and eliminates the concern about blowing paint onto things you don’t necessarily want paint on. I may or may not leave my spray shelter up in my unfinished basement regularly because it’s so convenient to keep all the mess there (notice all the coats of paint in it!?).
After I’ve painted my form, I get to arranging the greenery. I added layers of leaves all along the top and the bottom. I tuck them under the pumpkins and hold them in place with hot glue.
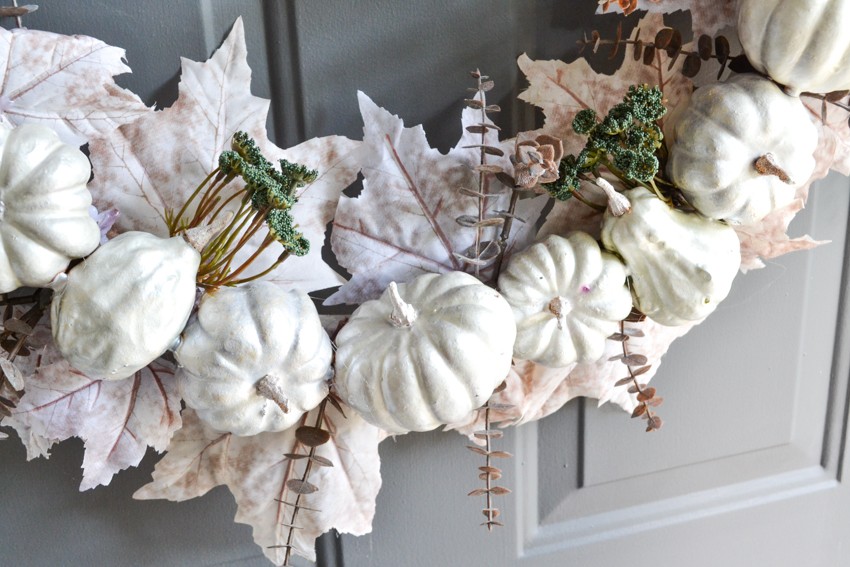
After the leaves were added, I went back and added the brown twigs and then teal little bits of greenery. You just use your best judgement with how to arrange them and make everything look even and cohesive. I try to select greenery that compliments each other, but also provides lots of different texture and elements that draw your eye all over the place.
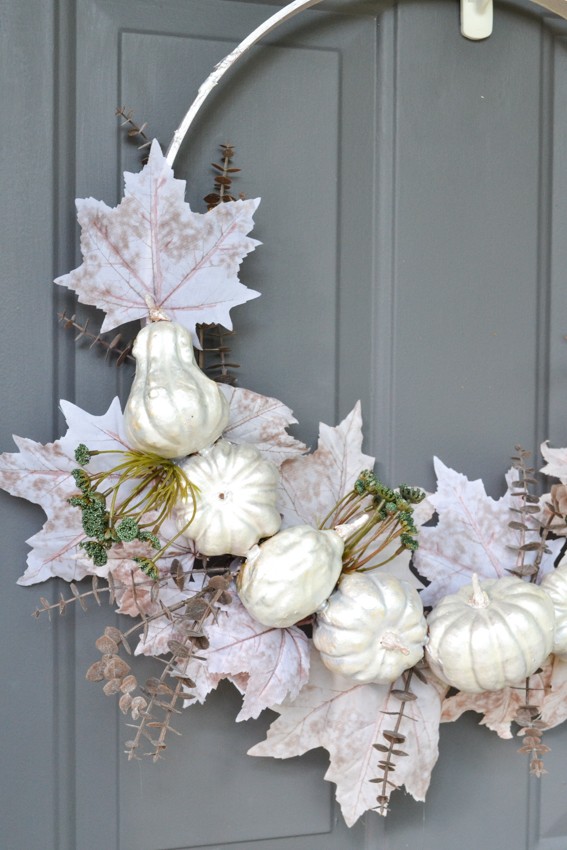
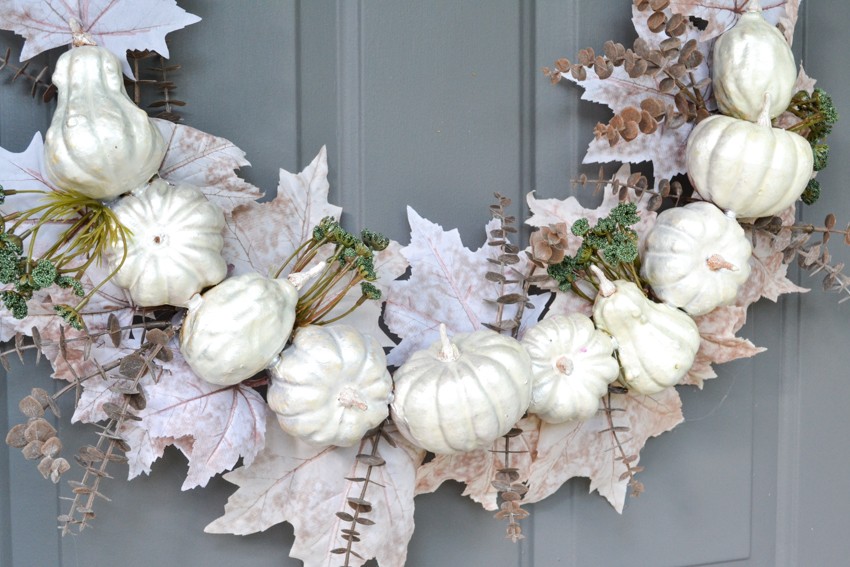
Once completed, I hung on my door and admired my work. I love that it’s kind of modern and chic and is a whole new take on traditional fall wreathes that you see in the stores!

What do you think?! Not bad for a few hours work, right? And all together it cost me under $15 using items I already had at home and upcycled decor I already had in storage. That’s a win in my book!
Pin it for later…