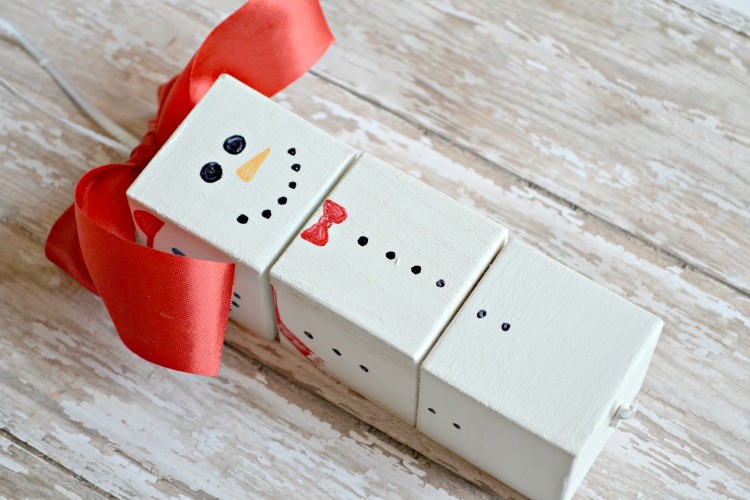
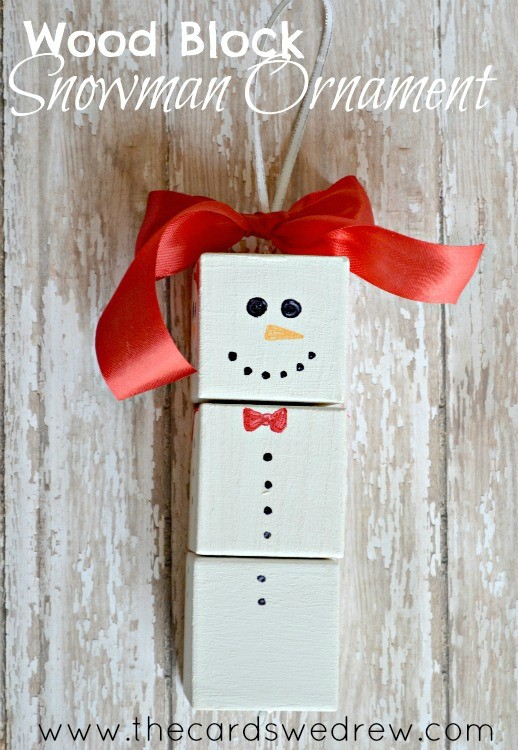
DIY Snowman Wood Block Ornament
Last month on Darice I shared this DIY Snowman Wood Block Ornament. I know Christmas is right around the corner, but if you’re seeking an easy DIY for a Christmas party or for a handmade gift, this may be the perfect thing!! I had some simple, unfinished wood blocks on hand, so I decided to create a rotating wood block DIY snowman ornament for our Christmas tree!
Wood Block DIY Snowman Ornament Supplies:
- Darice Medium Wooden Blocks
- White Chalk Paint
- Sharpie Markers OR Craft Paint
- Drill with Bit
- 7/8 inch Red Satin Ribbon & 3/16 inch Ribbon
 I started by drilling holes in the top and bottom of each wood block right in the center. I used a drill bit big enough to fit my ribbon through comfortably. After they were all drilled, I used tape and a smaller drill bit, cut my ribbon and taped it onto the drill bit, then pushed the bit through the holes. This was the easiest way to string the blocks that I found.
 After all three blocks were strung, I painted them white with Americana White Chalk Paint. Once dry, I added faces to the blocks using Sharpies but you could also use paint. I planned to use paint, but then recalled what a horrible painter I am and opted for the marker.
 After that you just decorate the blocks the way you want, then they can rotate around and switch up faces and decor!
 I made a large bow and attached it to my white ribbon that was strung through the blocks to top the whole thing off. It adds a fun, festive look to this DIY snowman ornament.

I love how it turned out…I added a little cap to one DIY snowman, made a girly snow-woman with eyelashes, added a bow and a scarf to another…you decorate as you see fit! And if you have older kids, this could be fun to do with Santa or elf faces too!! Hope you enjoyed!


These are adorable!
I won’t be able to use a drill myself. But this is still cute!