
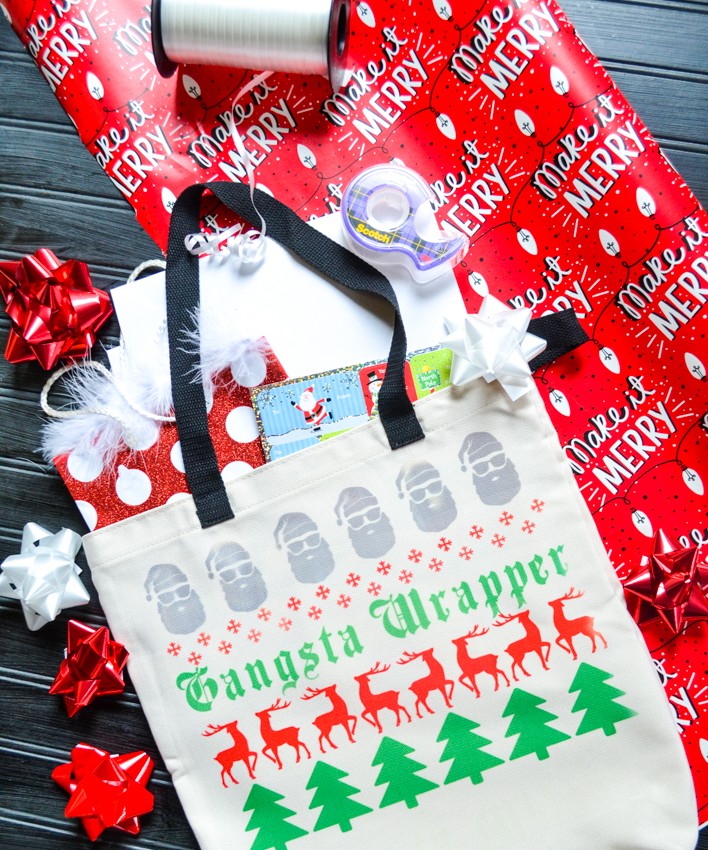
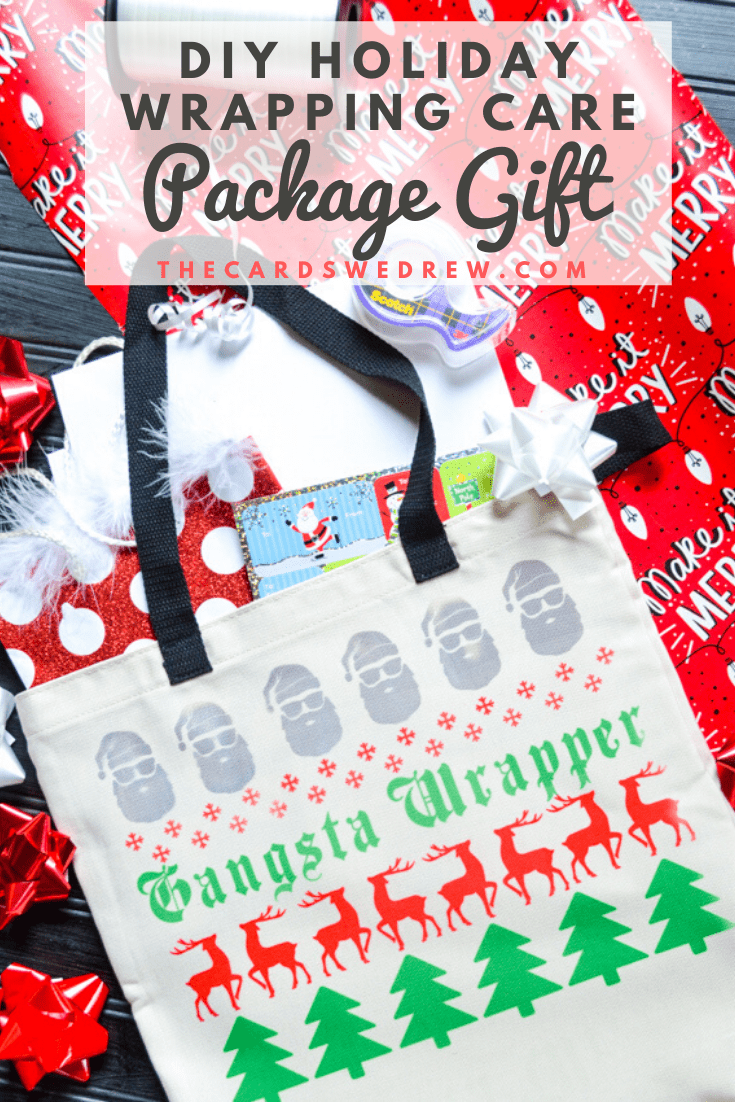
“Gangsta Wrapper” Holiday Gift Bag
This is a sponsored conversation written by me on behalf of Cricut. The opinions and text are all mine.
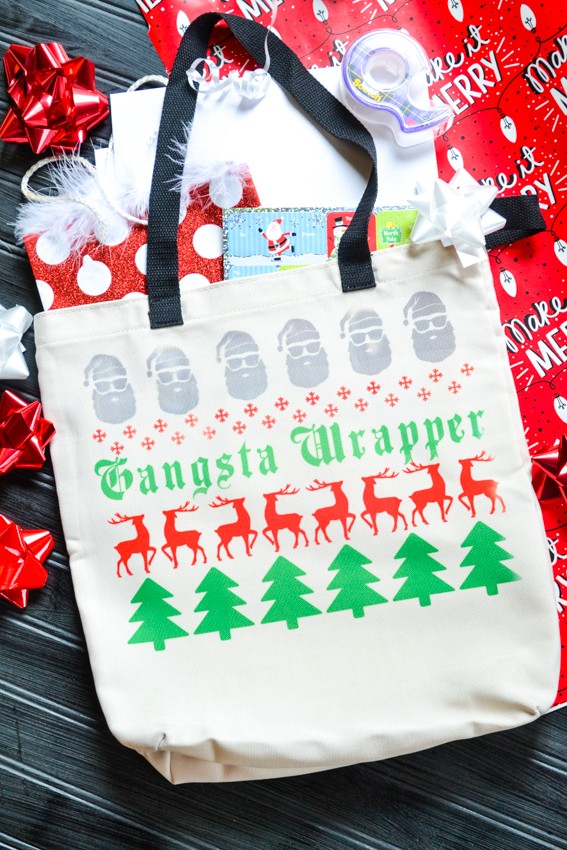
Each year I think we all struggle with what to give all the people in our lives. What should we get teachers for Christmas? What is a good neighbor gift idea? What should we get a special friend? The stores flood us with loads of stuff we don’t need and I find that months later, those cute little mugs and other items just end up getting pushed to the back of our cupboards or donated…because who really needs another mug and we ALL have plenty of candy and sweets for the holidays. I’m really trying harder to be more deliberate with my gift giving like this Neighbor Gift Idea from last year. Give people things that they will use, that will make their lives easier, or that they will have to buy already. For example, today I want to show you my idea for a Gangsta Wrapper Holiday Gift Bag idea. We ALL have to wrap gifts around the holidays! We need tape, scissors, bows, ribbon, boxes, wrapping paper, gift tags, etc. So why not give the gift of making gift wrapping EASIER for the holidays!? You can buy ALL those items at the dollar store for very inexpensive, put them into a personalized cute bag like the one I’m about to show you that I made using my Cricut, and then gift them the peace of mind of not having to worry about collecting all that stuff this holiday season! Pretty cool, right? I’ll walk you through how I made this…
Gangsta Wrapper Holiday Gift Bag Instructions
What you need:
Gangsta Wrapper Cricut Design HERE
Cricut Infusible Ink Tote Bag
Cricut Infusible Ink (red, green, and gray)
Cricut EasyPress
Gift Wrapping Supplies (Dollar Store)
How to:
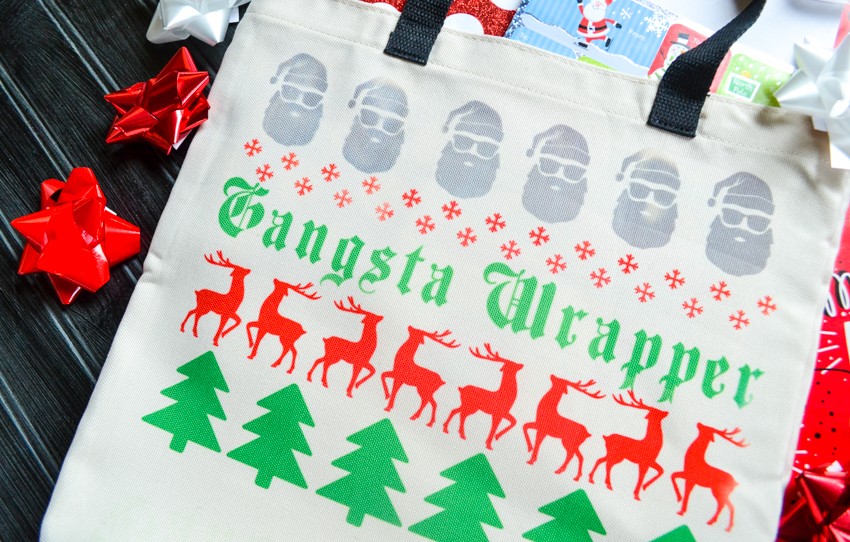
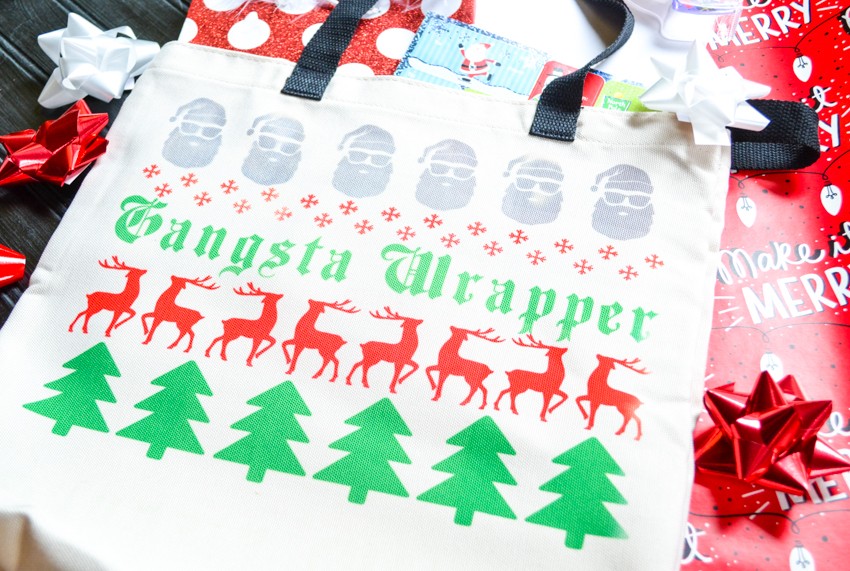
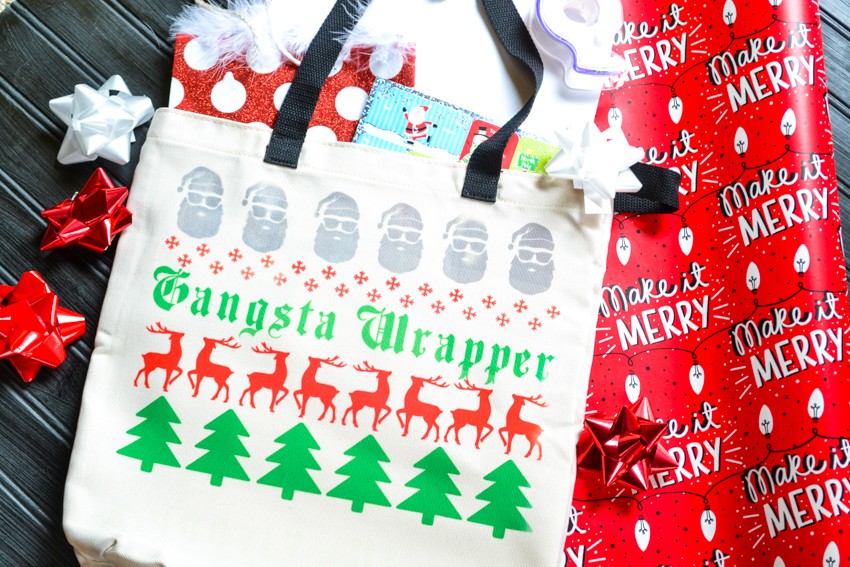
The best part of this gift, in my opinion, is the cute tote bag that I made using my Cricut Maker. I designed it in Cricut Design Space and then cut the designs out on Cricut’s Infusible Ink. You can download the Gangsta Wrapper cut file HERE and then follow the instructions on how to cut out the design. Depending on how many colors you use, there will be more cuts. For this bag, I used green, red, and gray Infusible Ink, so I had three mats to cut and weed for this tote bag. But you can make it easier on yourself (and cheaper) and just use one color if you so choose. I think this would actually be really cute in all black too.
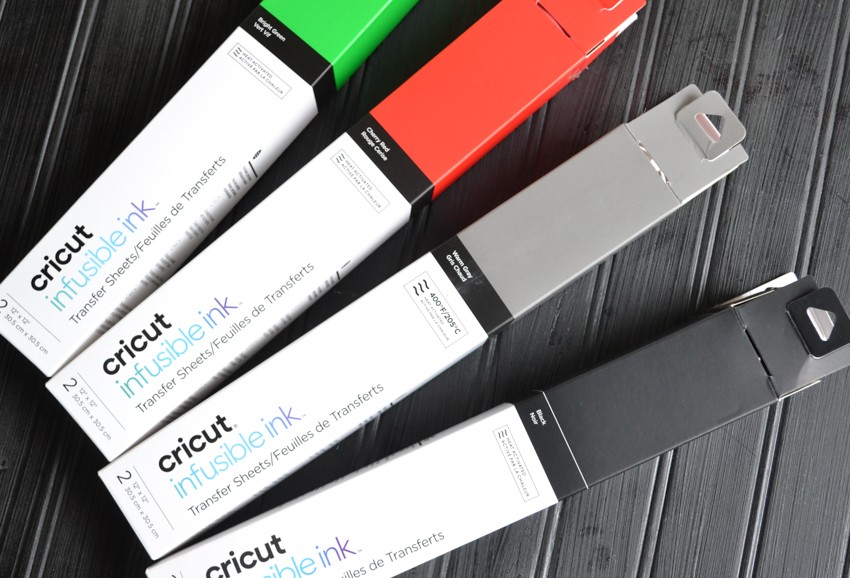
If you haven’t heard about Infusible Ink yet, you’re missing out. I love working with Infusible Ink because it gives you more of a “screen printed” look versus what heat transfer vinyl gives you. There are pros and cons to both, but I really love how Cricut Infusible Ink works. For this post though, it’s important that you realize that you MUST use a Cricut Tote Bag in order for the Infusible Ink to work (a down side of Infusible Ink is that you have to use Cricut specific products for it to work right, unlike vinyl where you can use anything).
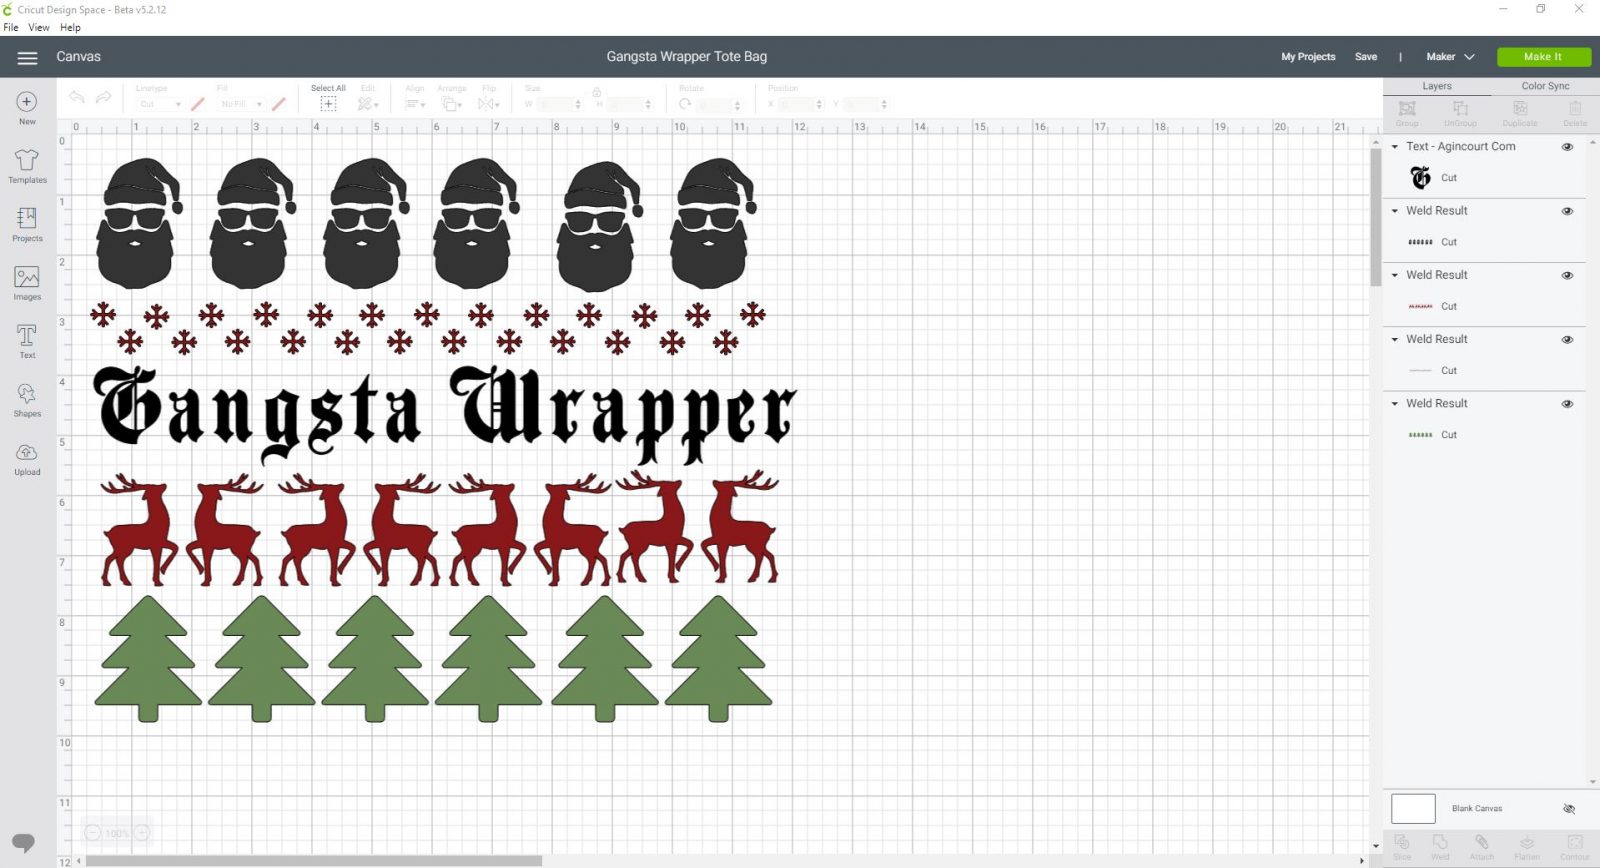
You will want to pull up the Design in Cricut Design Space and then you can adjust things as needed for the size and colors of your design. In the upper right corner, you can select “Color Sync” where you can adjust the colors of each design so that they group together according to the color Infusible Ink you wish to use, thus reducing waste and cut time. Once you’re ready to create, remember that for the wording you will need to Mirror your image. If you don’t Mirror the image at the time of cutting, it will read backwards on your tote bag!

The machine will group your cuts into different mats and you can adjust the sizes and layouts of all the cuts before getting going. For this project, I used a 12×12 Standard Grip Mat to hold my Infusible Ink on it. You place the Infusible Ink sheets color side up and then load them into your Cricut Machine and push the little “C” button to get started. After each piece cuts, you will have to weed the cut to only reveal the design that will transfer over to the tote bag. The weeding takes the most time.
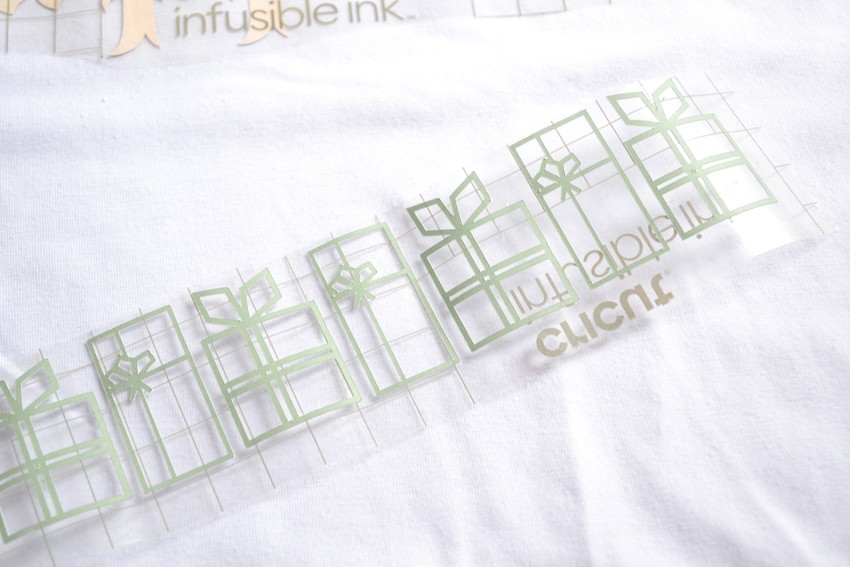
You’ll notice that the Infusible Ink sheets themselves look MUCH lighter than how they appear on the bag and that’s normal. The colors become much more vibrant once applied to the tote bag or shirt. Once everything is cut out, you will want to look up the Cricut Heat Guide to get instructions on how to apply and use the Infusible Ink. They give very specific instructions for how to put everything together for the best possible outcome.
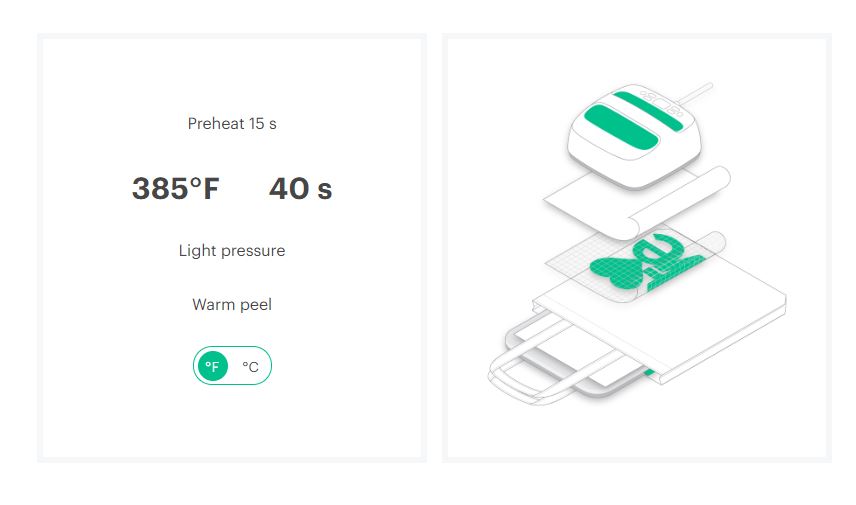
I layered all my pieces together according to the heat guide and then I used my Cricut EasyPress to apply the Infusible Ink sheets. Because I used different colors and patterns, I had to do them once at a time. One thing I quickly learned was that the Infusible Ink from a previous design can lift up onto your butcher paper sheet and when used a second time, it can take that ink and place it somewhere you probably won’t want it to go. So if you’re doing multiple designs, keep the original infusible ink sheet in place each time, rather than lifting it up, to keep it from transferring to the butcher paper and transplanting ink where it shouldn’t be….if that makes sense.

After I placed all of my designs and used my EasyPress to transfer the ink, I revealed my end result….I had a few issues with the Santa’s at the top, but I actually ended up liking the faded effect on the Santa design, so I didn’t worry about fixing it.

Once my bag was cool, I stuffed it full of bows, tags, scissors, tape, boxes, bags, and wrapping paper and turned it into a cute little DIY Gift Wrapping Bag. This would be a great idea for a White Elephant Gift exchange or as a gift for a teacher or coworker. EVERYONE NEEDS GIFT PAPER for the holidays and even better is a way to store it all in one place or for on the go!!
I hope you enjoyed this cute little Christmas gift idea!! I love crafting for the holidays and hope that this inspires you all to get a head start this year and work to make some cute homemade gift ideas for your friends and family members!
Pin it for later…

2 Comments