Donut Sneakers
This post is sponsored by Plaid Crafts, all thoughts, words, and opinions are my own.
I’m pretty excited about this project today! As you may or may not know, I’m a big time lover of Mod Podge and it’s one of the first crafting tools I ever started using. I’ve done mod podge projects like THIS and THIS and THIS in the past, but today I’m going to share a fun little Mod Podge Project turning a simple pair of white Keds type sneakers, for around $5 at Walmart, and turning them into cute little drool worthy donut sneakers for my little girl. I made them using Mod Podge Photo Transfer, so I was literally able to search the Internet for the perfect donut clip art image, print it off, and turn it into a cute pair of donut sneakers for my little princess!!

What you need:
Mod Podge Photo Transfer
Donut Image printed on Laser Printer
Paintbrush
Keds Sneakers
Scissors
Fabric Mod Podge
Martha Stewart Crafts ® Paint
![]()
How to:
First, I started by searching for my donut image on the internet. I ended up finding one, saved the image, and then saved it to a Word Document. Since it’s not my image, I can’t link it here, but if you search “Donut Clipart” and look at the images, you’ll find it quickly! I saved the image in the Word Document in several different sizes ranging from 1.5 inches to 2.5 inches and printed them all off. This way I could cut them out and decide what size worked best. I believe the 1.75″ x 1.75″ image fit this pair of shoes the best.
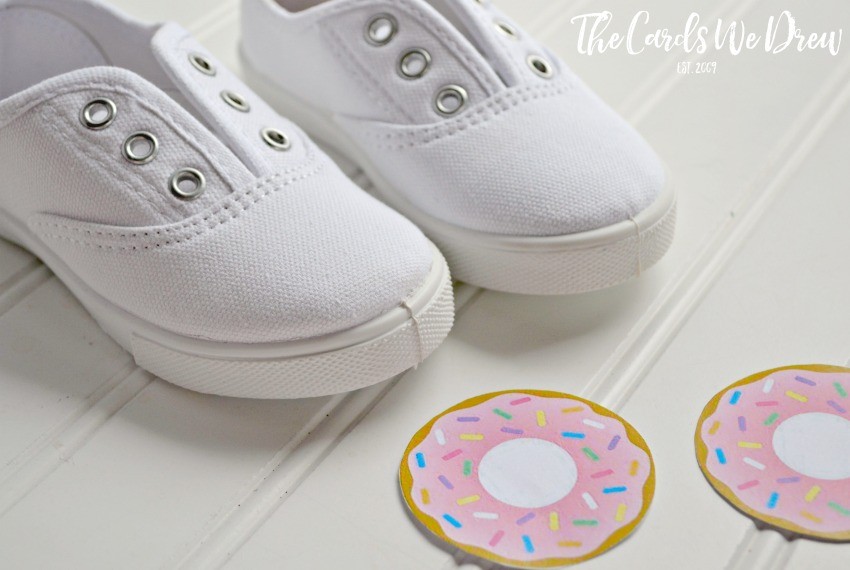
My next step was to cut out the donut image, place it where I wanted on the shoe, and cut off any excess paper. I wanted the donut image to kind of loop around the toe of the shoe, but if you wanted to just do the full image, this isn’t necessary.
![]()
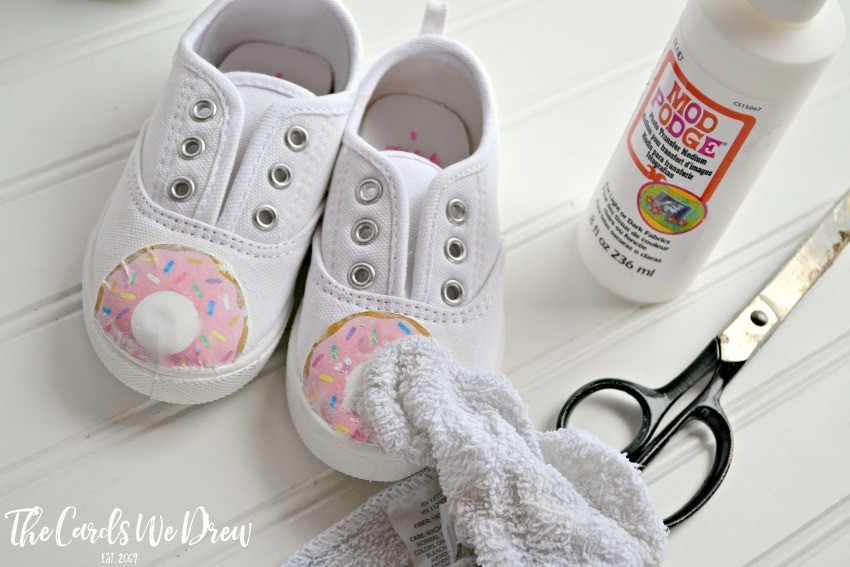
Finally the fun part! Pull out your Mod Podge Photo Transfer and using your paintbrush, put a thick coating of the photo transfer directly onto the FRONT of your image. Your image will go face down onto the shoe. The Mod Podge Photo Transfer should be thick enough that your image doesn’t show through.
![]()
Then you place your image directly down onto the shoe and carefully smooth out any wrinkles. This can be a little tricky due to the rounded edges of the shoe, so just keep working it around the edges and if needed, cut a little slit in the image and overlap it just a little bit so that it will lay flat. Wipe any excess off the edges of the image, then let sit for a full 24 hours.
![]()
Come back the next day with a wet washcloth and start to gently wet the images on the shoes. In a circular motion, start to rub away the excess paper until your image shows through. You may have to do this several times because as it dries you’ll see that more paper may still remain on the shoe. After it’s all washed away, you should have your original image on the shoe! The final step here was to seal the image on using Fabric Mod Podge. This isn’t normally required, but because shoes have a lot more wear and tear than a standard image transfer, it’s best to add a “sealer” to protect the image.
My final step, which is totally optional, was to paint the tongue of the shoe and add painted “sprinkles” around the shoe to make it fun and cute. I used Martha Stewart Crafts ® Paint and a small paintbrush to paint the sprinkles on by hand. I used them in colors coordinating to my image. I also painted the tongue of the shoe pink and used Mod Podge Extreme Glitter over top to seal it and add a fun glittery look.

And that’s it! A cute pair of hand designed shoes for your little girl. Just think of all the options you could do–I already have a pair of fun reindeer shoes in mind for her next!