Fixer Upper Inspired Farmhouse Sign
Like what you see? Sign up for my monthly newsletter by clicking here!
This post is sponsored by Plaid Crafts, but all thoughts and opinions are my own.
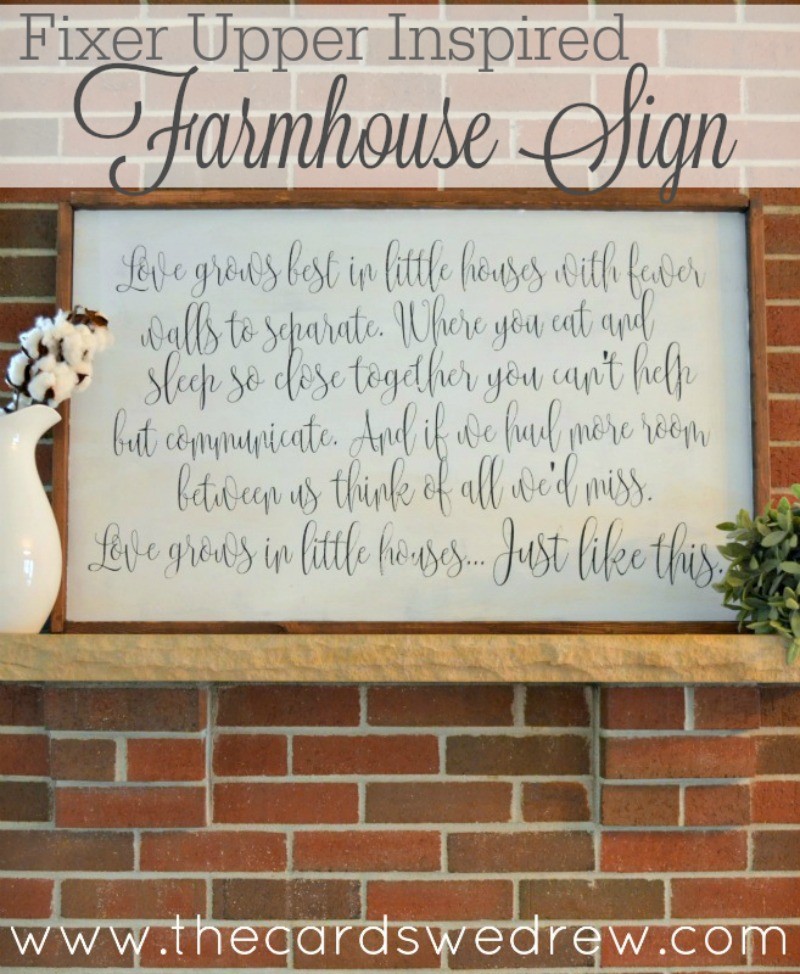
A few weeks ago you may have read about me getting to go to Waco, Texas to visit Magnolia Market–from this post HERE (home of Joanna and Chip Gaines’ show Fixer Upper on HGTV). While I was there, there was SO much that I wanted, but I had to keep in mind I was flying home and could only bring so much and one of the things I really liked were their farmhouse signs. They have a bunch of them on their website and I love the style and how pretty and simple they are. So this month, in honor of National Craft Month, I thought I’d show you how to recreate the Fixer Upper Farmhouse Sign with your own Fixer Upper Inspired Farmhouse Sign!!
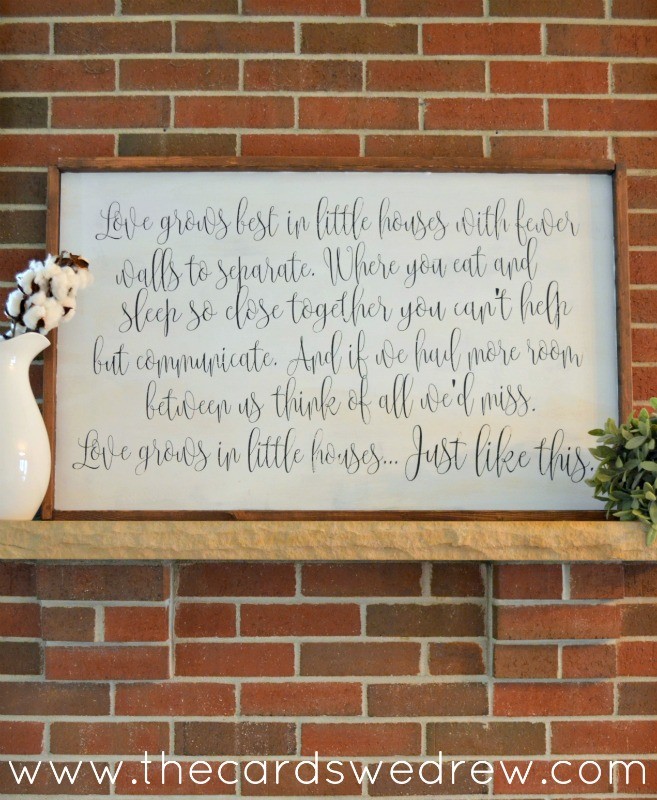
 Here’s the sign I really loved…and I loved the saying too, until I found something I loved more….

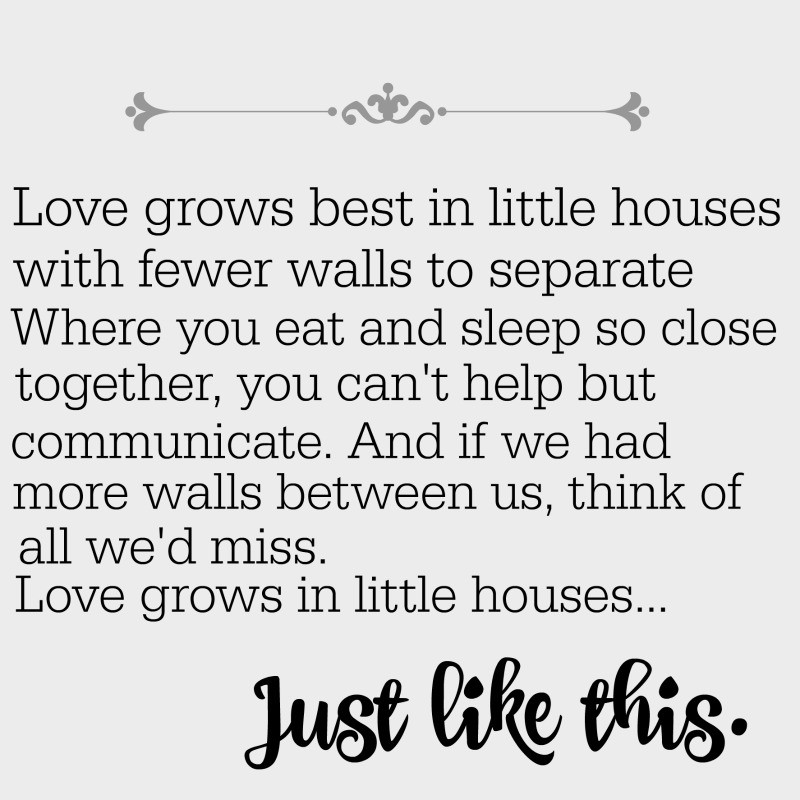
I saw this quote and it fit my home so wonderfully. I had to make it for this sign. We live in a small ranch home in a great neighborhood, on a large piece of land, in a great school District, with great neighbors. I’ve often thought how lucky I am that we live where we live, even with our “little house” (it’s around 1750 square feet).
So this was the message I wanted for my sign.
Here’s the supplies you need for your sign:
1 board cut 36″ wide by 26″ tall
1″ x 2″ piece of wood cut 38″ wide and 24″ tall to go around the outside for trim
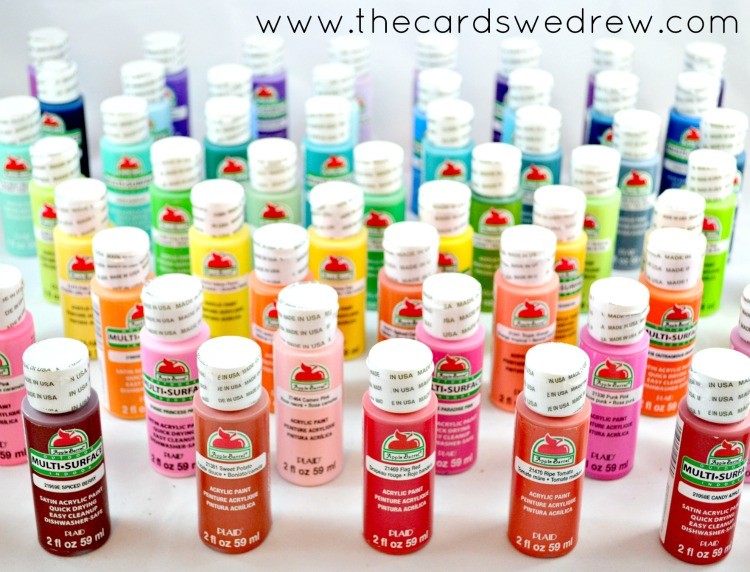
Apple Barrel® Paint in Pavement and Snowflake colors (shades of gray and white)
Folk Art paintbrushes
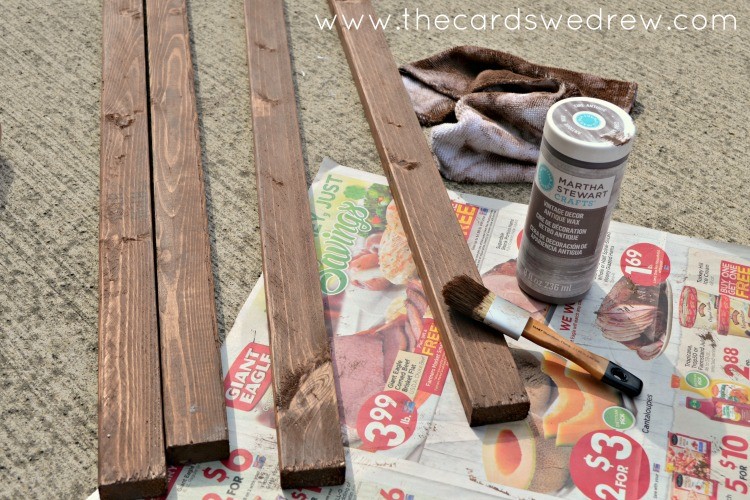
Martha Stewart Brown Wax
Waxing Brush
Vinyl and Vinyl Transfer paper
Cutting machine (or print them out on paper and use tracing paper to hand letter and paint)
Sandpaper
How to:
1.Start by heading to your local Home Depot or Lowe’s and picking up a piece of wood. I believe we just used plywood and had Home Depot cut it down to our measurements for above the mantel. Then we got a piece of 1×2″ and had them cut that down as well.
2. Once you get your board home, you’ll want to sand your board and trim pieces to get off any splinters.
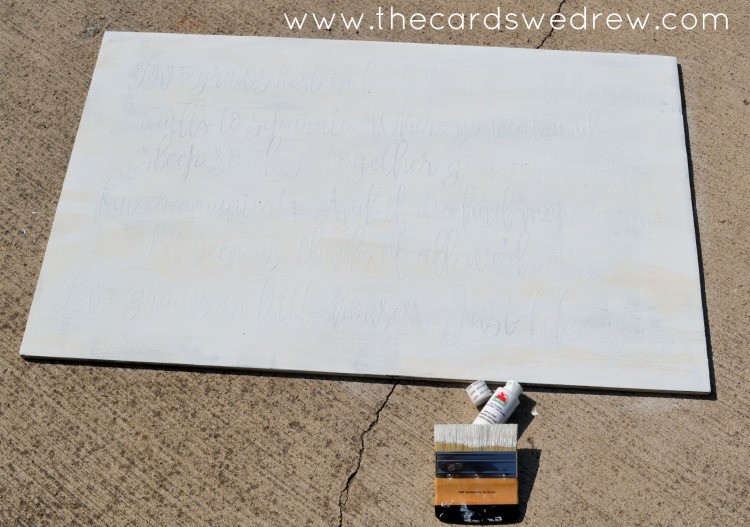
3.Next, you start by painting your board Pavement from Apple Barrel® (Apple Barrel provides great value, comes in Regular, Multi-Surface and Gloss formulas – find project inspiration and the largest selection at Walmart!) . It’s a great shade of gray that’s lighter than black, but still gives that great farmhouse look.
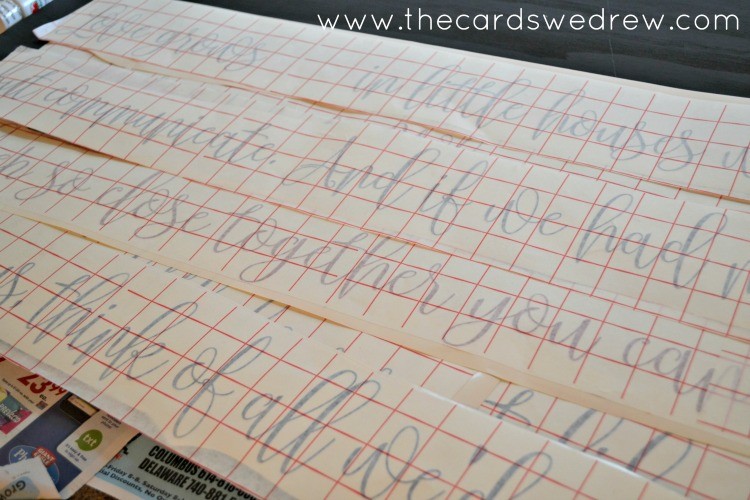
4. Let your base coat of paint dry, then get started on your vinyl. I downloaded a great font called Braveheart and used it to make my lettering for the words.
If you’d like my cut files for this project, please email me at [email protected] requesting them and I’ll send them to you for free.
5. I cut out all the words in vinyl using my cutting machine, then I transferred them to transfer paper to place on the sign. This is the most tedious process of them all. You just want the words left on the transfer paper.
6. After that, you’ll want to adhere them all onto your sign, being careful that they’re level and equally spaced. Mine are a hair off, but I could have probably been a little more careful about measuring and spacing them perfectly.
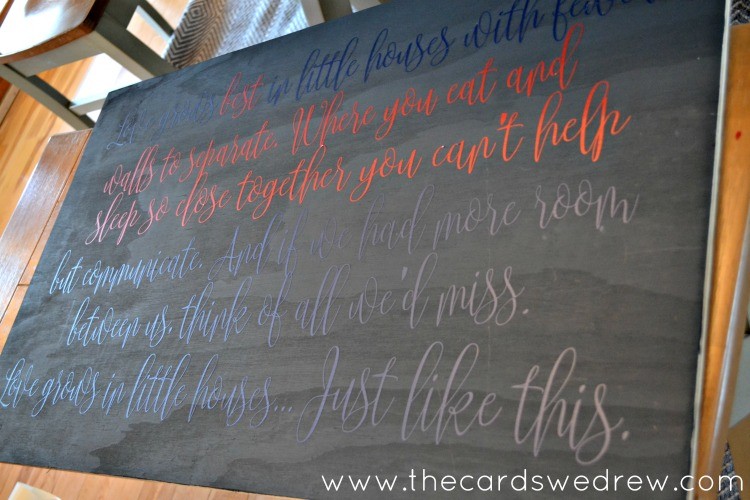
7. Place them on the sign, then peel off the transfer tape to leave just the vinyl letters.
*This next tip is optional. If you are concerned about the letters lifting or paint getting under the vinyl, my awesome friend Beckie from Infarrantly Creative taught me to spray it with some clear spray sealer to hold the vinyl down better and prevent running. I did this today and it worked like a charm.
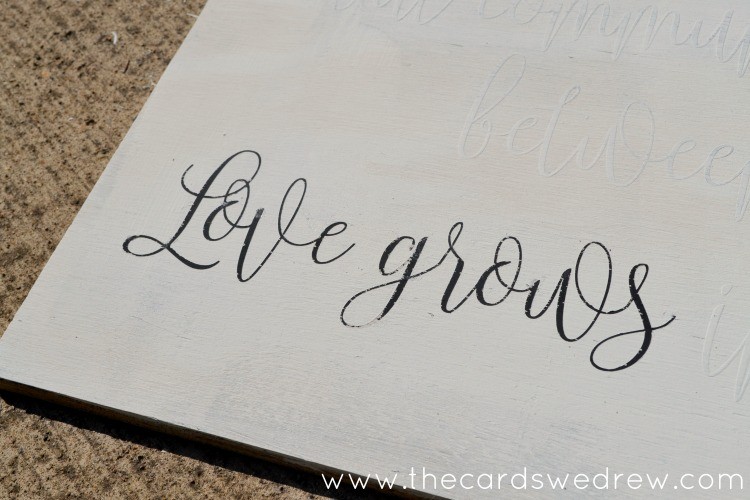
8. Your next step now is to add a layer of white paint over the top of your vinyl lettering. The nice part about it being Farmhouse is that it doesn’t have to be “perfect”. Mine has a lot of imperfections, but it actually adds a lot of character to the sign, which I love!!
9. After the paint on the board dries, the most tedious and boring part of the project starts…peeling off ALL THAT VINYL!!!
 10. Once all the vinyl is peeled off, the vinyl stages begin. You’re in the home stretch!! You’ll want to wax your trim pieces then adhere them to your sign. This is where you don’t do what I did…use a nail gun to secure your pieces onto the sides of the sign. I didn’t have a nail gun on hand today, so I glued them, but this weekend I intend to nail them down so they’re good and secure.
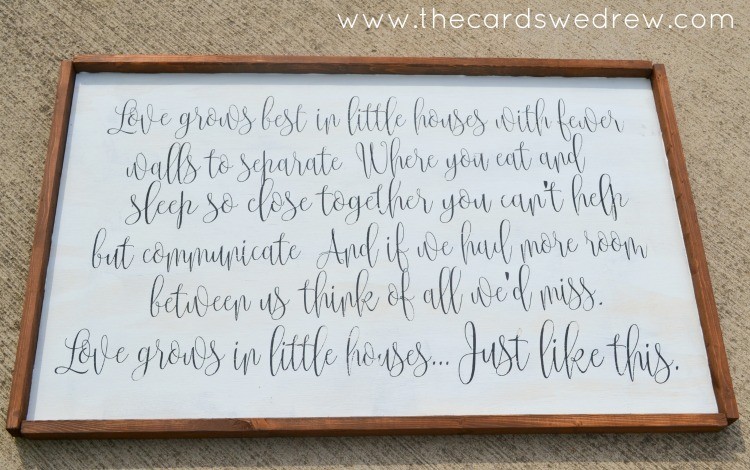
You’re done guys!! All that hard work!!
Today I had a friend come by and they asked me if I got the sign when I visited Magnolia Market in Waco. Can you even imagine how happy that made me?!
And this month is National Craft month…so can you imagine bringing out a few of your best gal pals, bringing your vinyl and paint, and making these signs (even mini-signs) together with some desserts and wine?! I can and I did with a group of Ohio bloggers in December. I actually should thank Beckie Farrant for helping us make Christmas signs at her house a few months ago using this same technique. Thank you Beckie!!
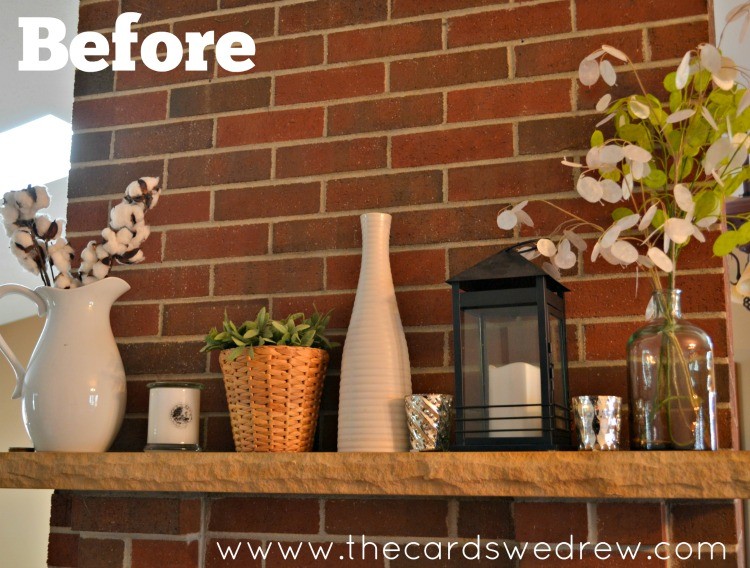
So here’s my before….
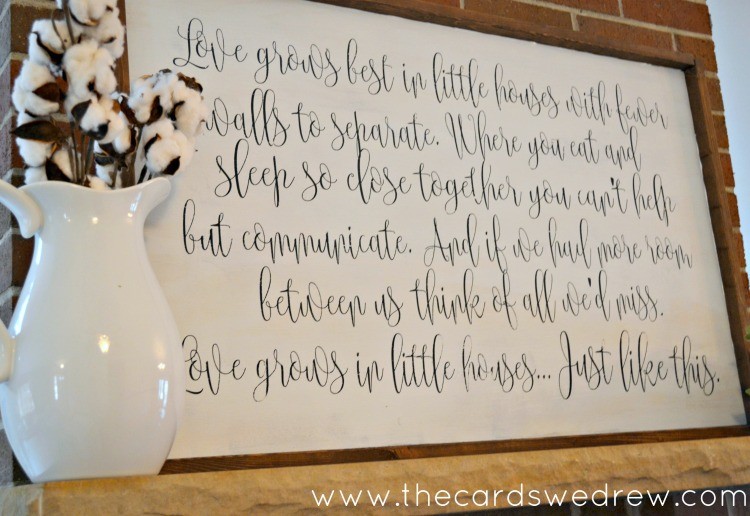
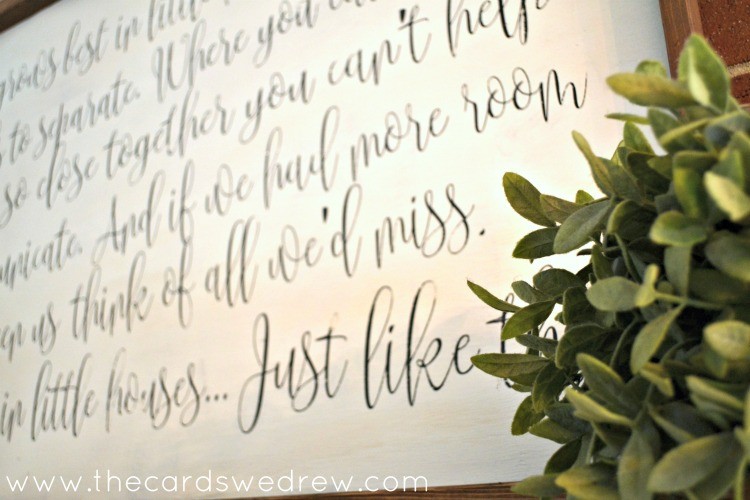
And the after….
I hope you guys enjoyed this tutorial!!
Crafting is such an awesome outlet and there’s nothing better than being able to say “I made that”, but it’s a great way to gather socially and connect with each other! Invite some gal pals over and get to creating this!! Have a Fixer Upper party on a Tuesday night, make mini-versions of these signs, and convince even the craft clueless that they have a creative bone too!!
Pick up some Apple Barrel paints today and get to crafting your own Farmhouse Signs!!
Such a beautiful sign and what a sweet quote!
Thanks for sharing this. It looks like getting the alignment right for the text would be a hassle, but once it’s exactly how you want it everything else seems like it would be more manageable. I think using a loopy script font like that definitely helps hide any alignment issues.
Hi John, thanks for the comment. You’re absolutely right on all accounts…it wasn’t easy and the loopy text helped. I honestly could have taken a “hair” more time and made sure they were perfectly spaced and aligned, but I just didn’t. 😉 In a perfect world, I’d get a 12″ cutting machine and just cut two sheets next time rather than the way I did it. That would be a lot easier. Another option would be to create a stencil one time and reuse it if making multiple signs (something that crossed my mind since I’ve had a lot of interest in buying these since I made them). It’s a lot of work, but I will say…it’s truly unique and literally everyone that visits comments on it and asks where I got it. That’s a good feeling! 😉
Thanks again for the comments. Love to hear what readers think!
Beautiful! Thank you for sharing. May I ask the name of the font you used!
I love this sign and this saying!! And it does look like it came straight out of Magnolia Market. Do you mind me asking what font you used?
I love this! What brand spray sealer did you use? I have had a hard time finding one i like
I love love love this! I’ve been dreaming of this exact quote for our sweet little home. And yours is SO beautiful! Do you mind sharing what cutting machine you use and where you got it?
Hi Allie, I use my Silhouette Cameo: https://amzn.to/2sVmF3K
Thanks for the kind words!
Please email me your cut files for “love grows best in little houses” sign. You inspired me to try. Thank you so much!
Please email me your cut files for “love grows best in little houses” sign …. it’s so cute. Thanks for sharing !
How thick was the plywood you used? Love the sign!
Please email me the cut file for “love grows best in little houses” sign. And what font did you use?
Which type of vinyl did you use?
Please email me the cut file. Love this
Please email me the magnolia font version of this quote if you could please!? My daughter has mentioned this sin to me several times in the last few weeks! I am thinking I will try to make it for her for Christmas ! I am a NEWBIE @ this CRICUT EXPRESSION BANWAGON! ❤️