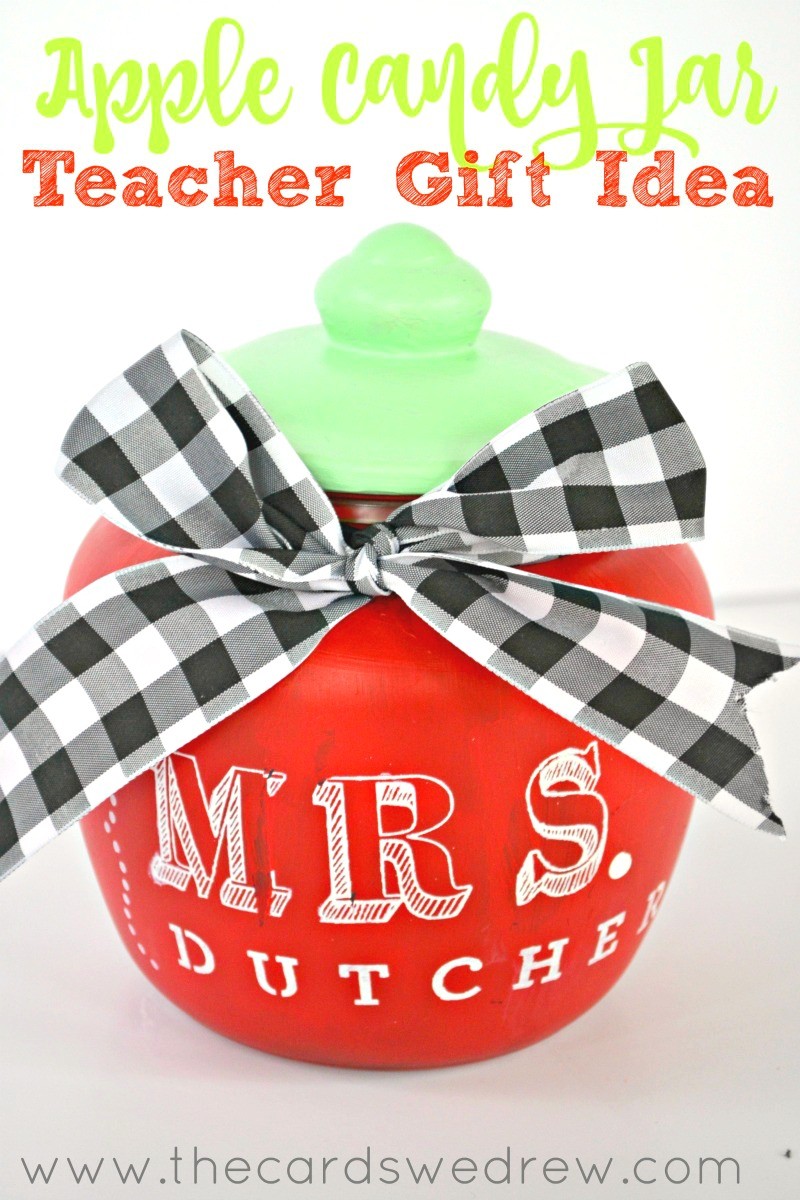
Apple Candy Jar Teacher Gift Idea
This week is Teacher’s Appreciation Week and believe it or not…my kids are out of school in TWO weeks! Where did the school year go?! So while this may be too late to make for this week, it’s an easy Teacher Gift Idea for end of year, as well. This Apple Candy Jar was made pretty quickly (just allow dry time) and is a fun and unique way to send in a special treat and thank you to your favorite teacher! Check it out….**this post contains affiliate links
You just need a few simple supplies for this project:
Round Jar (one I used is from Hobby Lobby)
Martha Stewart Light Green Paint
Martha Stewart Stencils (HERE and HERE)
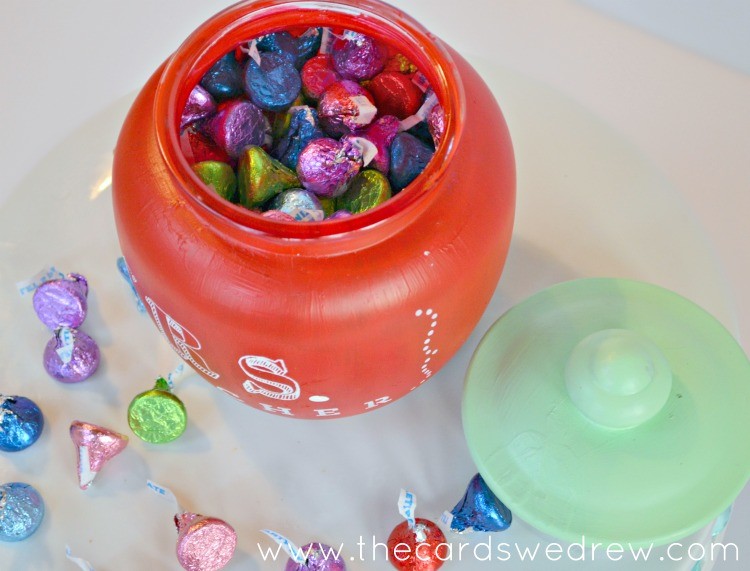
HERSHEY’s Chocolate Kisses
How to:
Start by painting the base of your jar with the red acrylic paint (link to what I used above).
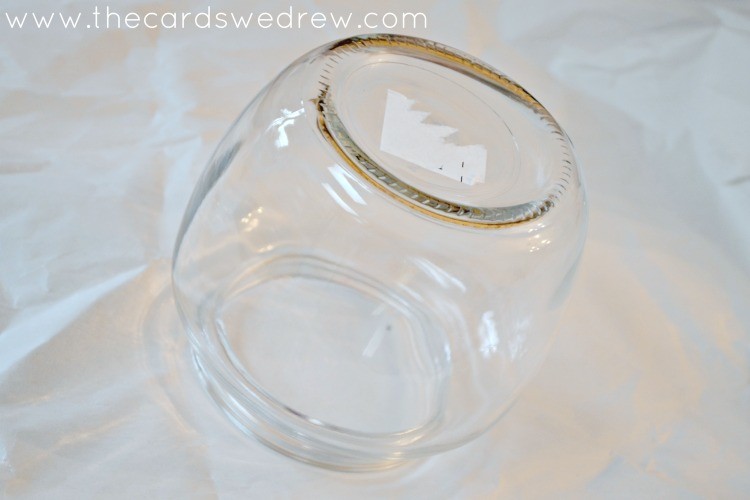
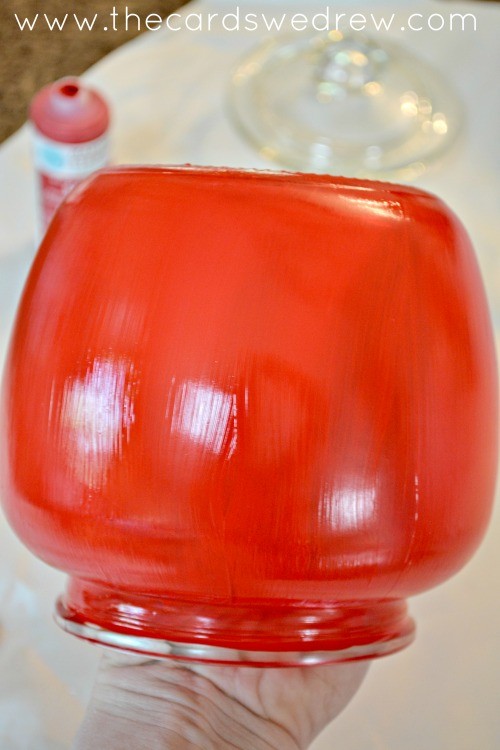
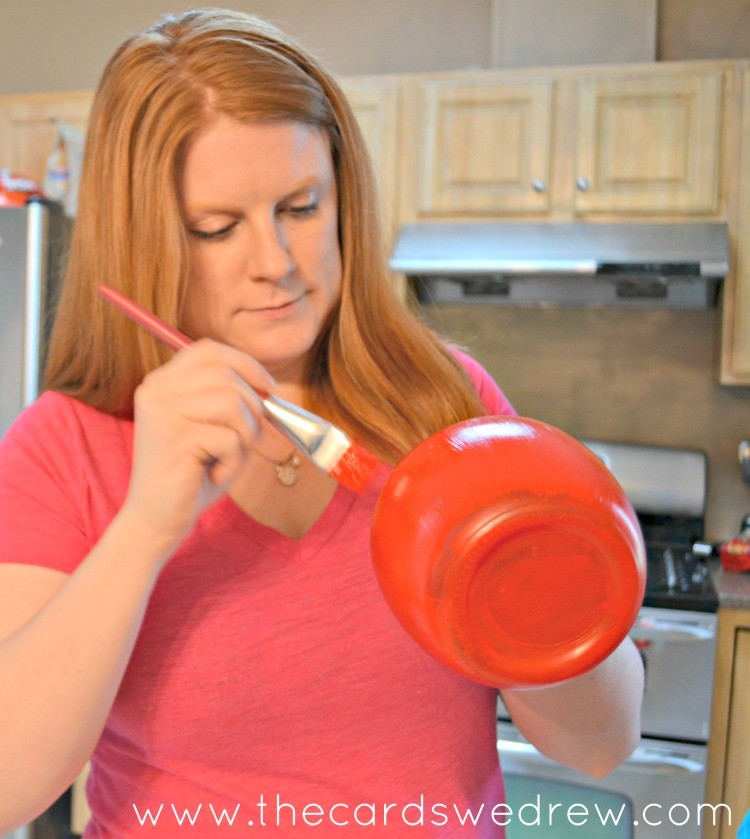
My sister in law took this little gem…but it shows you in action of how I painted the bottom part of the jar. I put my hand on the inside and it helps get it done quickly and evenly.
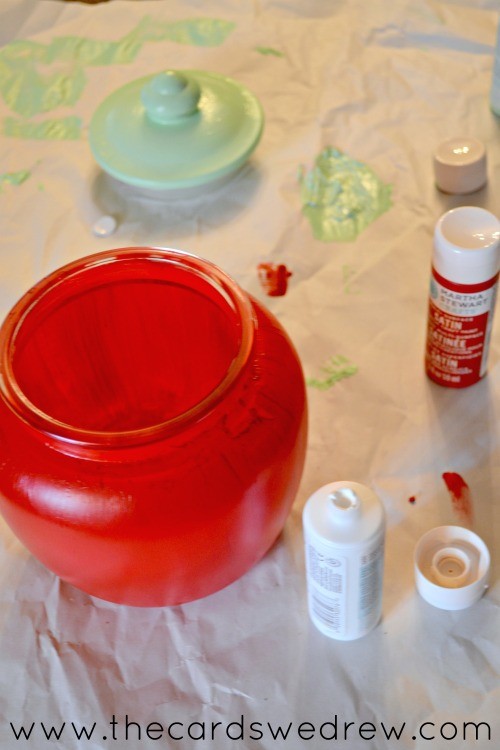
Set aside the base and let dry.
Then paint the top of the jar with the light green paint.
I opted for a minty green because I like the color better. 🙂
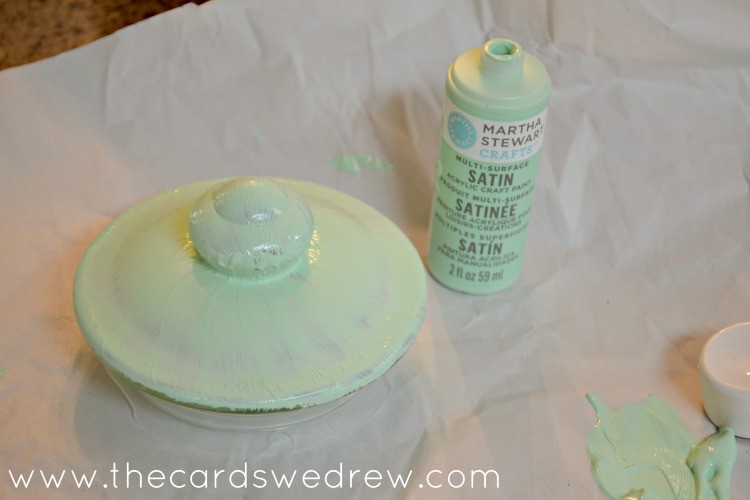
You’ll find that you’ll probably have to put two coats on each the top and the bottom to get a good coverage.
Once your paint has dried, then you get to do the fun part with the stencils. The stencils I used are linked above and are from Martha Stewart. They are reusable and I use them for ALL sorts of things!! They are so handy especially for those of you that may not have a cutting machine like a Silhouette or Cricut.
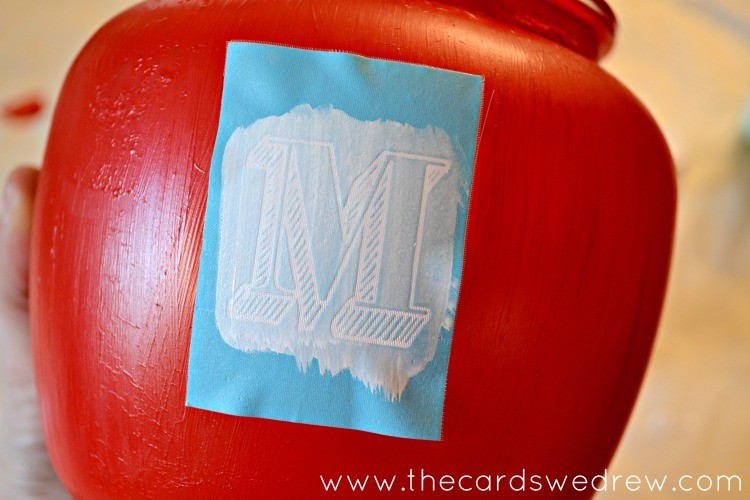
You apply your adhesive stencil gently onto the jar and then with a barely wet paint brush, apply your paint. If you use too much paint, you risk having the letter smear when you lift it up.
Also, learn from my mistake, and be careful when removing the stencil…it took off a bit of my paint on the M in the process.
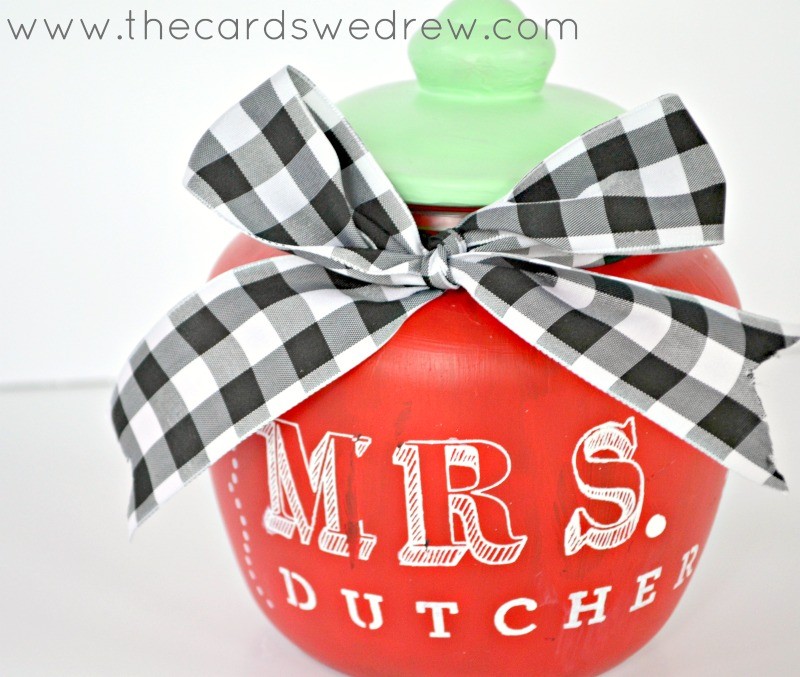
I used two stencils, the top with the large all caps letters and the bottom with her last name.
Some things I learned:
- Be patient and let the paint dry for a few hours before you try to stencil.
- Lift stencils carefully from the jar and be prepared to touch up the paint a bit.
- Carefully consider the placement of your stencils..you’ll notice my “S” is a little further to the right then I would prefer, but such is life.
- I made the “.” in Mrs. using my finger 🙂
Fill the whole thing up with goodies and put a ribbon on it and surprise your teacher with a cute, personalized, homemade gift!!!
I hope you enjoy your last few weeks of school and take a moment to send your teacher a special thank you!
You may also enjoy these other teacher gift ideas….
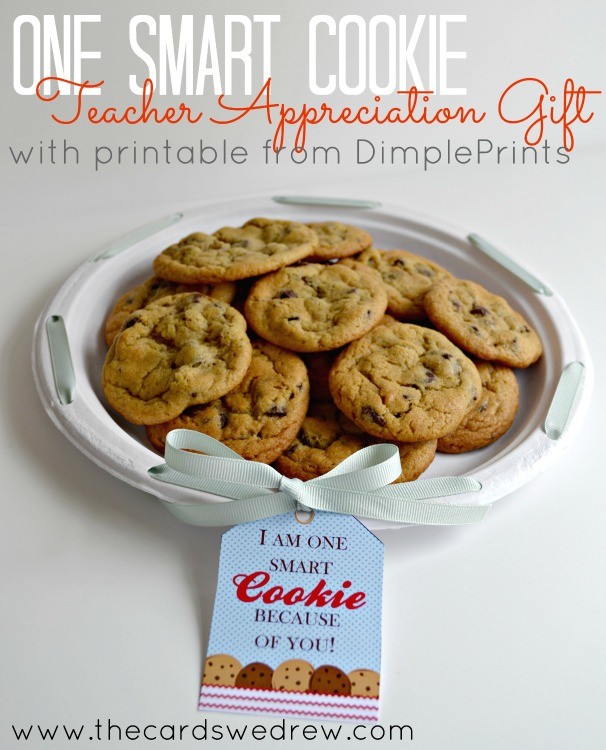
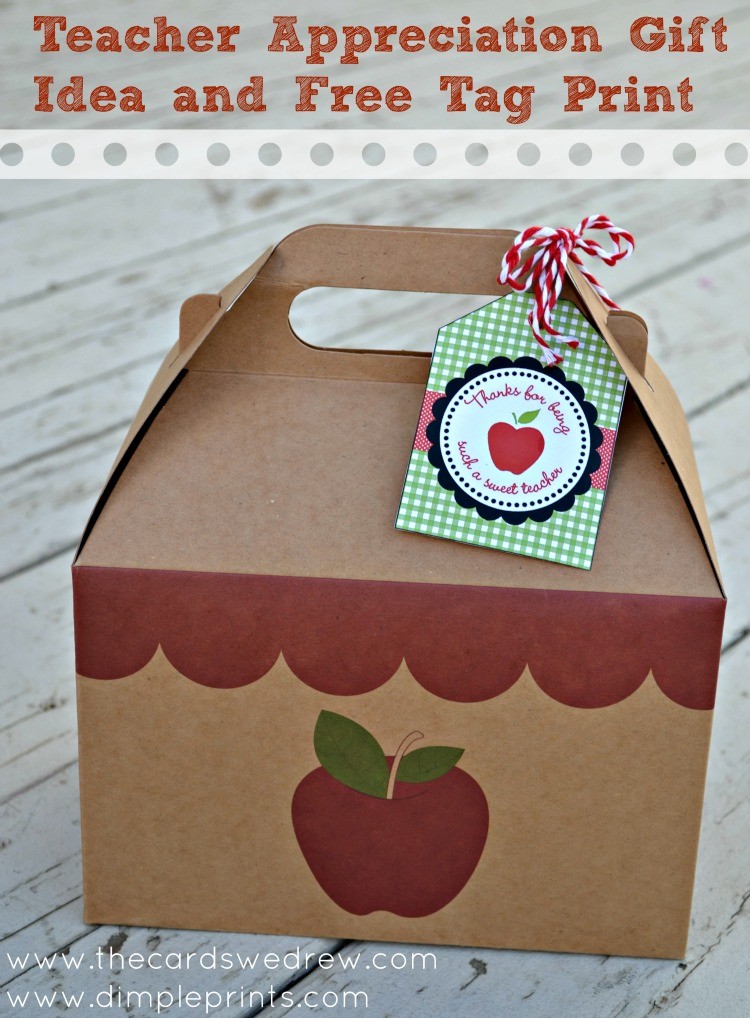
Teacher Appreciation Free Prints