How to Use Cricut Iron On Glitter Vinyl
This is a sponsored conversation written by me on behalf of Cricut. The opinions and text are all mine.
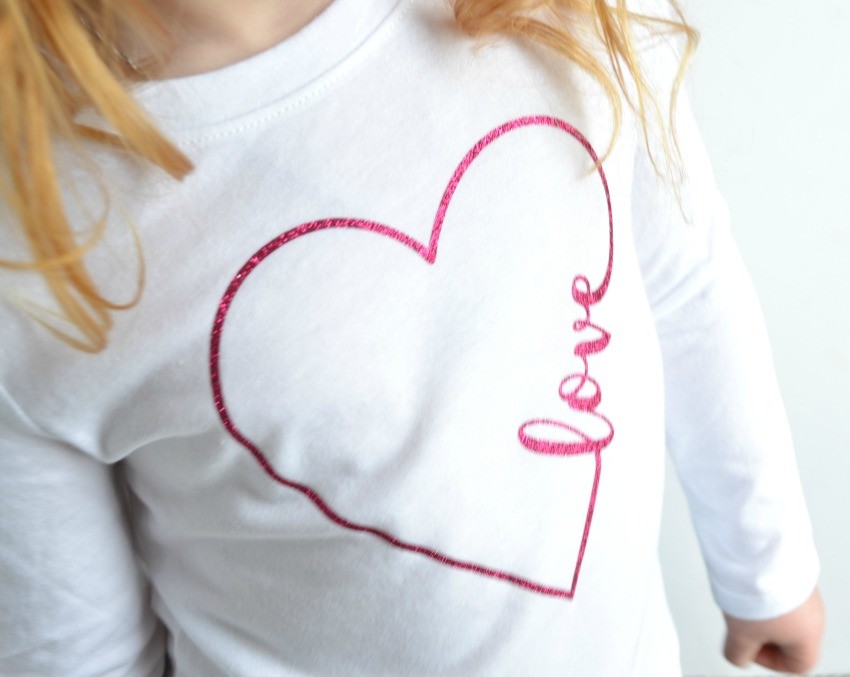
I recently shared with you guys how much I love my new Cricut Maker…it does everything! Today I’m sharing with you how to use Cricut Iron On Glitter Vinyl to create the most adorable designs on clothes, bags, and so much more! To demonstrate, I decided to make my daughter a simple and cute DIY Valentine’s Day outfit using a white tee and pair of jeans from Target and some glittery iron on vinyl from Cricut! It took minutes to make and it’s so fun to be able to add designs to anything you want to!! 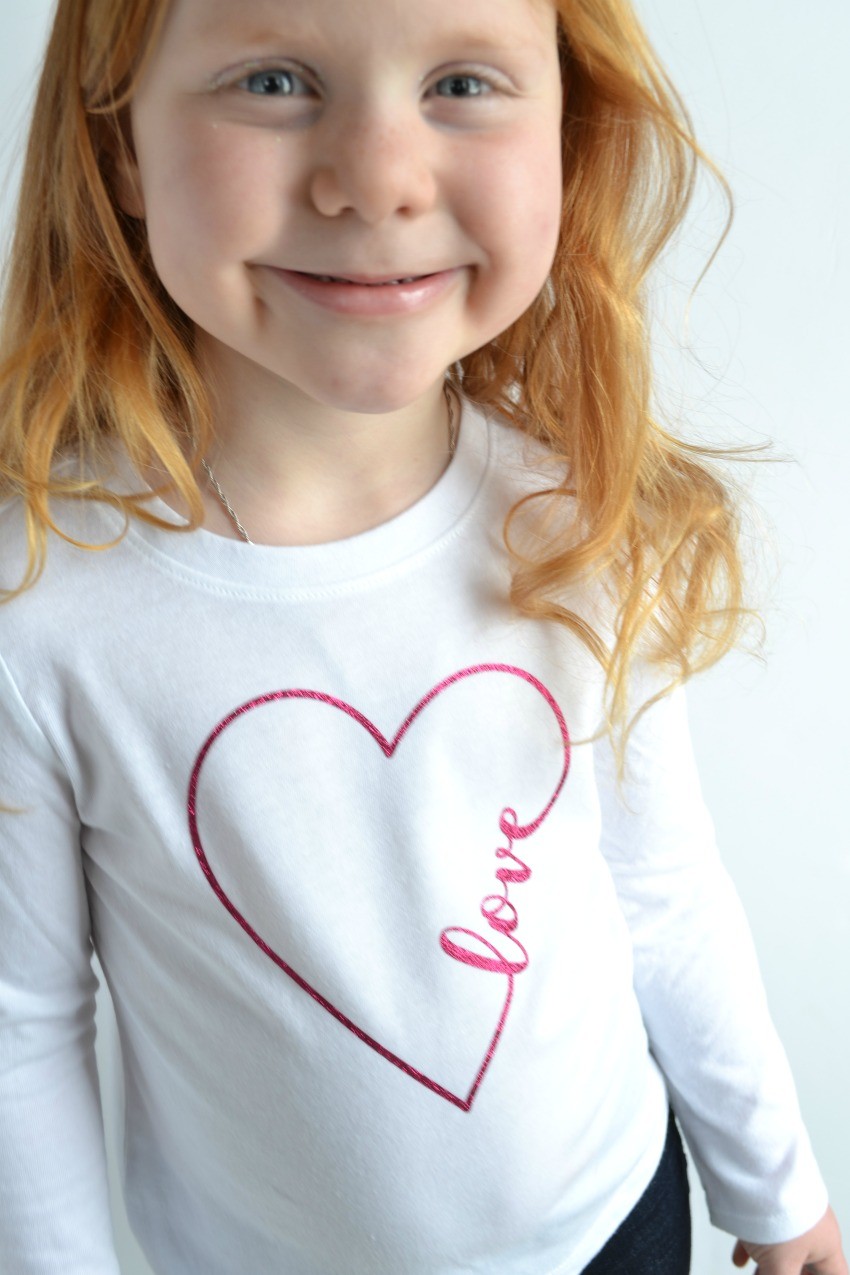
Table of Contents
What you need for this post:
Cricut Maker Cricut Glitter Iron On Vinyl Cricut Easy Press (optional, but AWESOME) Cricut Glitter Iron On Vinyl T-shirt and Jeans 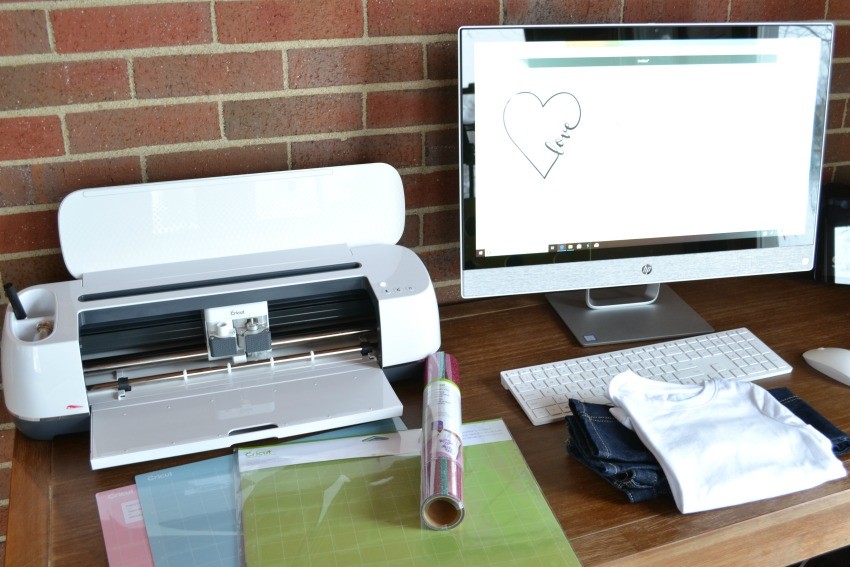
How to use Cricut Glitter Iron On Vinyl
I start by using the Cricut Design Space to set up my design. You can purchase designs in their store or you can download them for free or for inexpensive online. I downloaded a large SVG bundle for crafters and found this cute heart with “love ” in cursive that I decided to use for the shirt. I then just used simple hearts for the knees for the jeans. Cricut makes it SO easy to cut the designs with step by step instructions in the design studio. They ask what type of product you’re cutting, they tell you how to align the vinyl…in this case it goes face down. Then since you’re using iron on vinyl, they remind you to flip the image so that it goes onto your shirt the correct way…then you hit cut!! 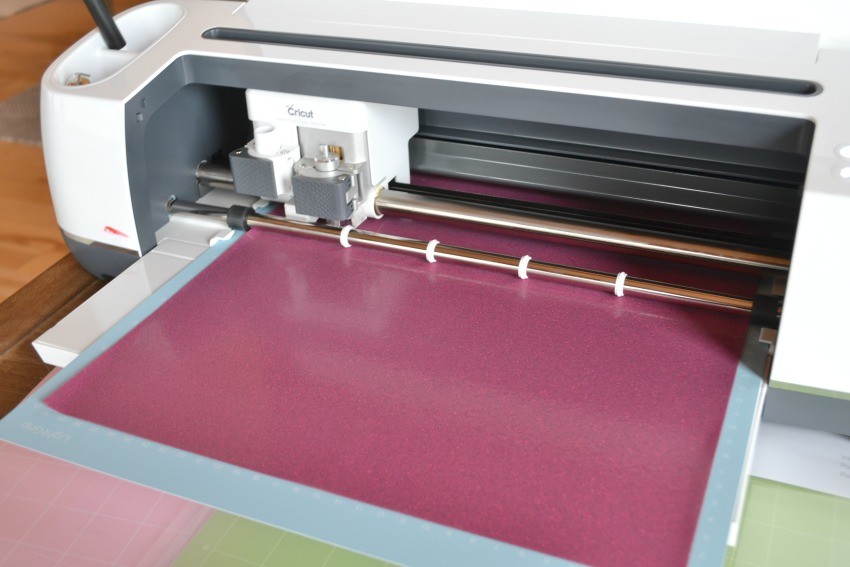 Unlike other cutting machines, I felt like Cricut ensures that you haven’t skipped any steps before you hit cut and that’s because they walk you through step by step. It’s very well thought out! Once my glitter vinyl was cut by the machine, I pulled it off the mat and trimmed off the portion I cut. Then I used my wedding tool to pull off the excess vinyl to reveal my design. This is what will go directly onto the t-shirt.
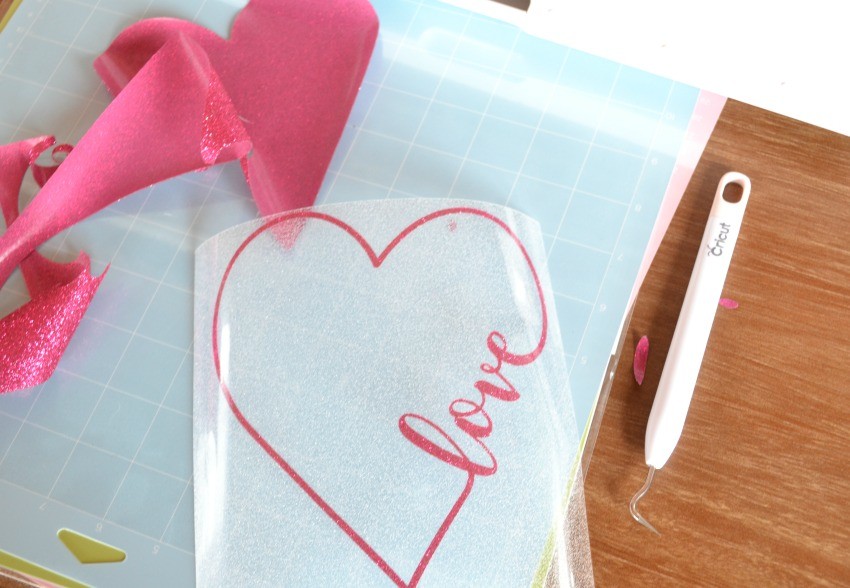
How to Use Cricut Easy Press
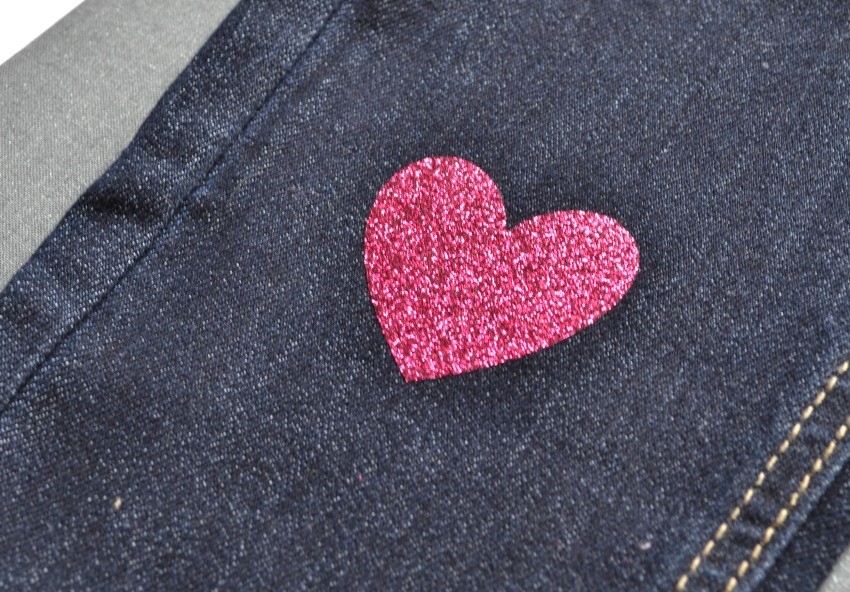
Next up, get your Cricut Easy Press fired up for use! The Easy Press is AMAZING because it takes the guess work out of the time you need to spend holding it onto the vinyl, as well as monitors the temperate for the perfect outcome!  You’ll warm your Cricut Easy Press and follow their instructions for use. It comes with a super cute little storage bag that you get to practice on first, which was so great! Follow the instructions that accompany the Easy Press, being sure to pre-press the item you’re adhering the vinyl to, and then get started placing your vinyl onto the shirt! You’ll set your timer for the suggested time and temperature and then let the Cricut Easy Press do all the hard work! Once finished, test a corner of the plastic over your vinyl and if it’s adhering well, then remove the plastic to see your design!
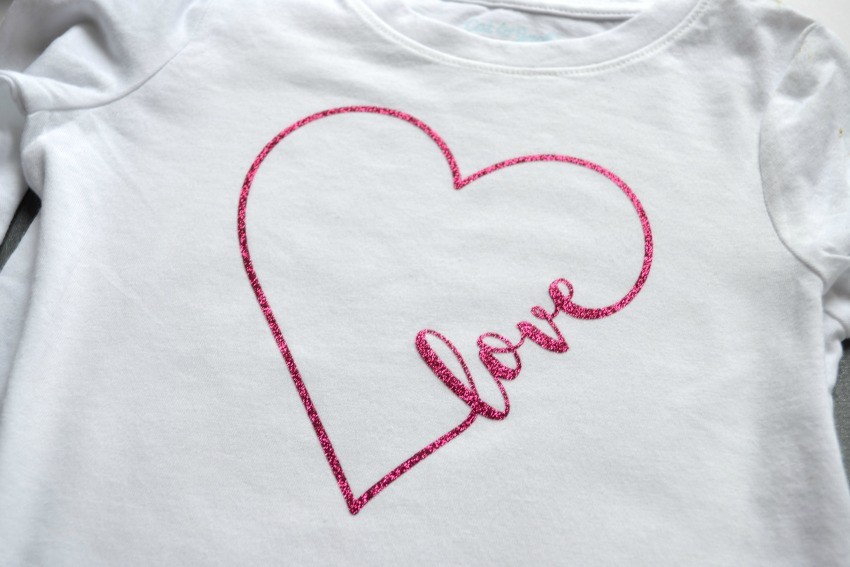
 I repeated the same process with the jeans too…
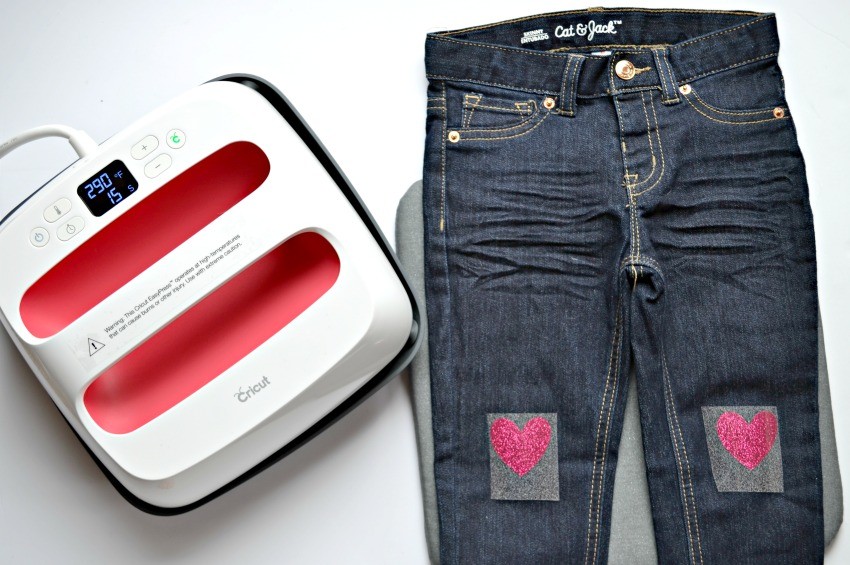
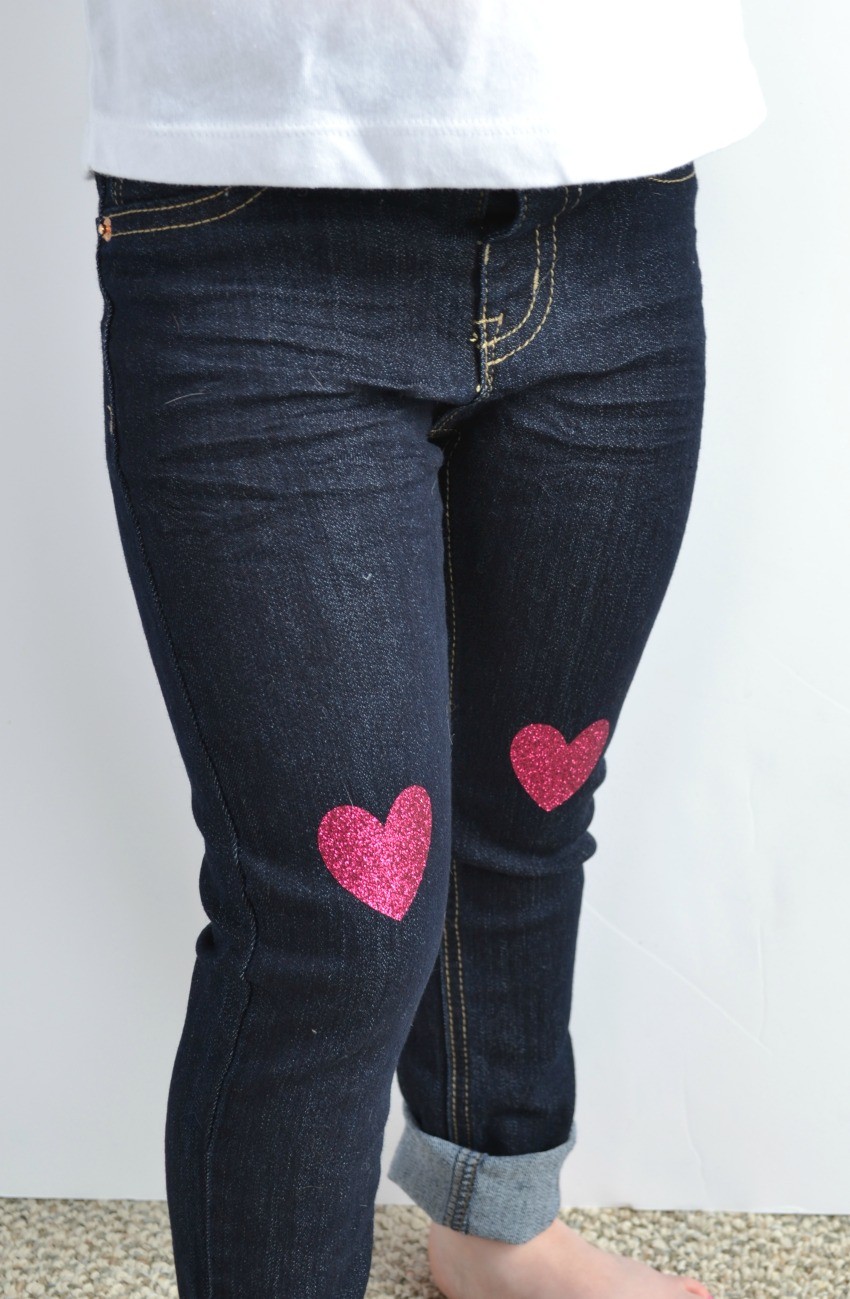 Didn’t they turn out SOOOOO cute?! And just think, you can make them in any colors on any shirts you want…the possibilities are endless!
 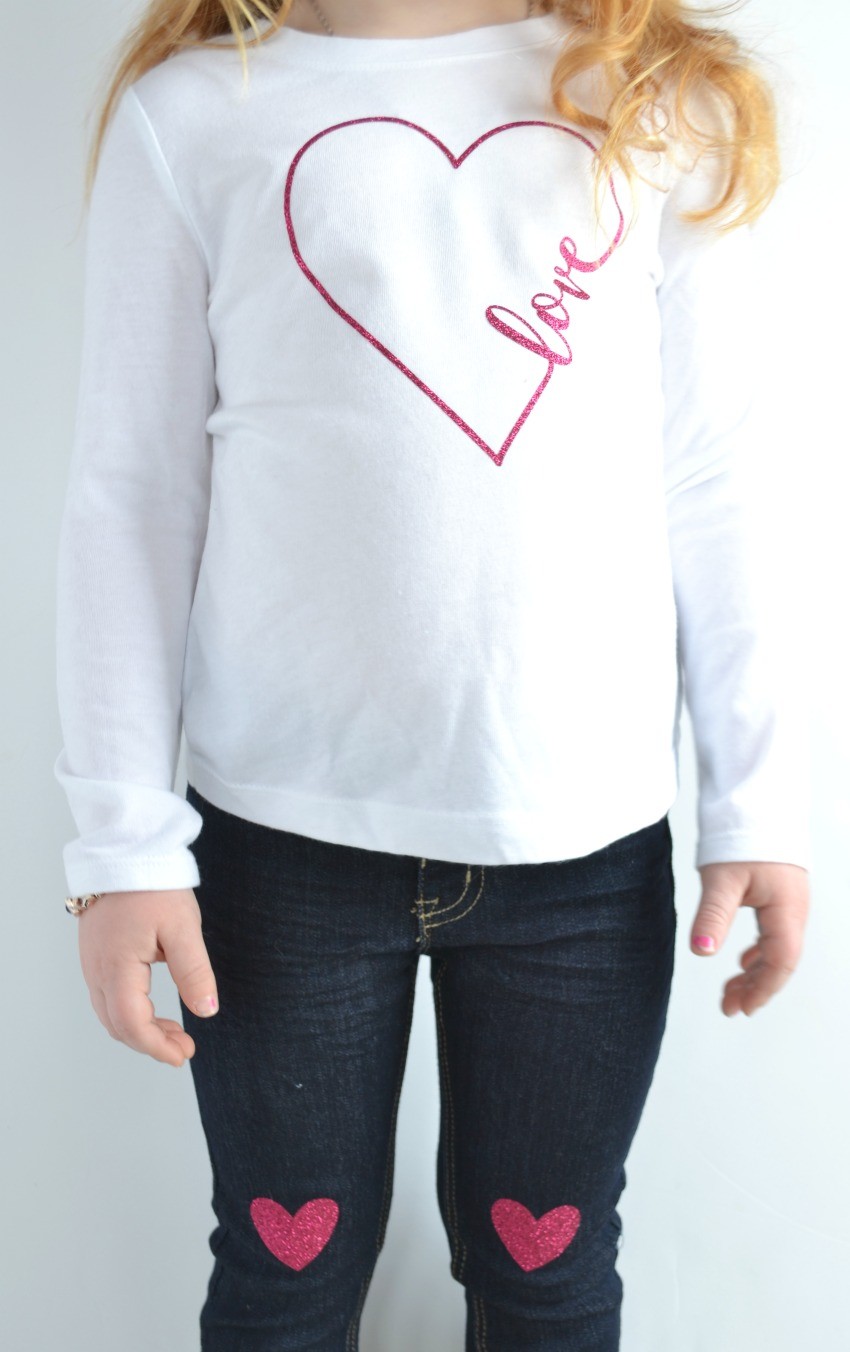 My daughter just loves how her cute little Valentine’s Day outfit turned out and I loved making my first project with my new Cricut Maker!!
See my first post about why I love my Cricut Maker so much HERE!
Pin it for later…