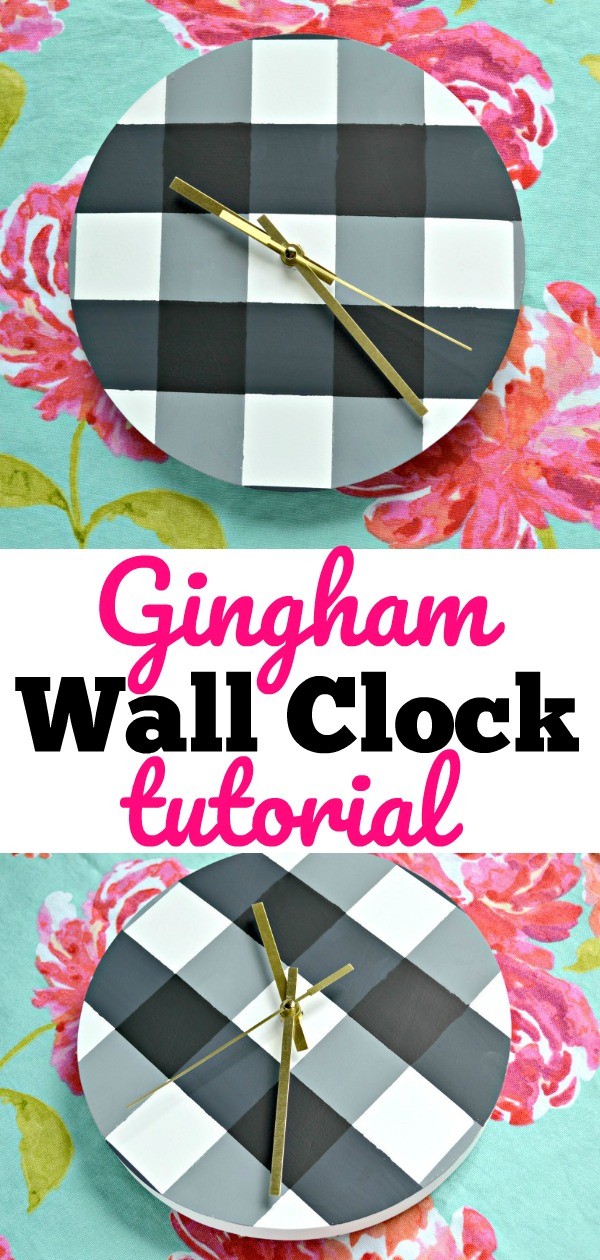
How to Paint Gingham: Gingham Wall Clock
This post is sponsored by Plaid Crafts, all opinions are my own.
Gingham is all the rage these days with both a modern and a traditional twist to it. Today I thought I’d share with you guys how to paint gingham with this easy Gingham Wall Clock tutorial using Delta Ceramcoat® Acrylic Paint at Target! You can find Delta Ceramcoat® Acrylic Paint at Target in 22 colors and six new Flash Metallic colors at Target in the craft aisle or at Target.com. I love this because now when I’m out shopping at Target, I don’t have to make a separate stop at the local craft store to get my craft on! Target really does have it all! Let’s jump right into this fun tutorial….
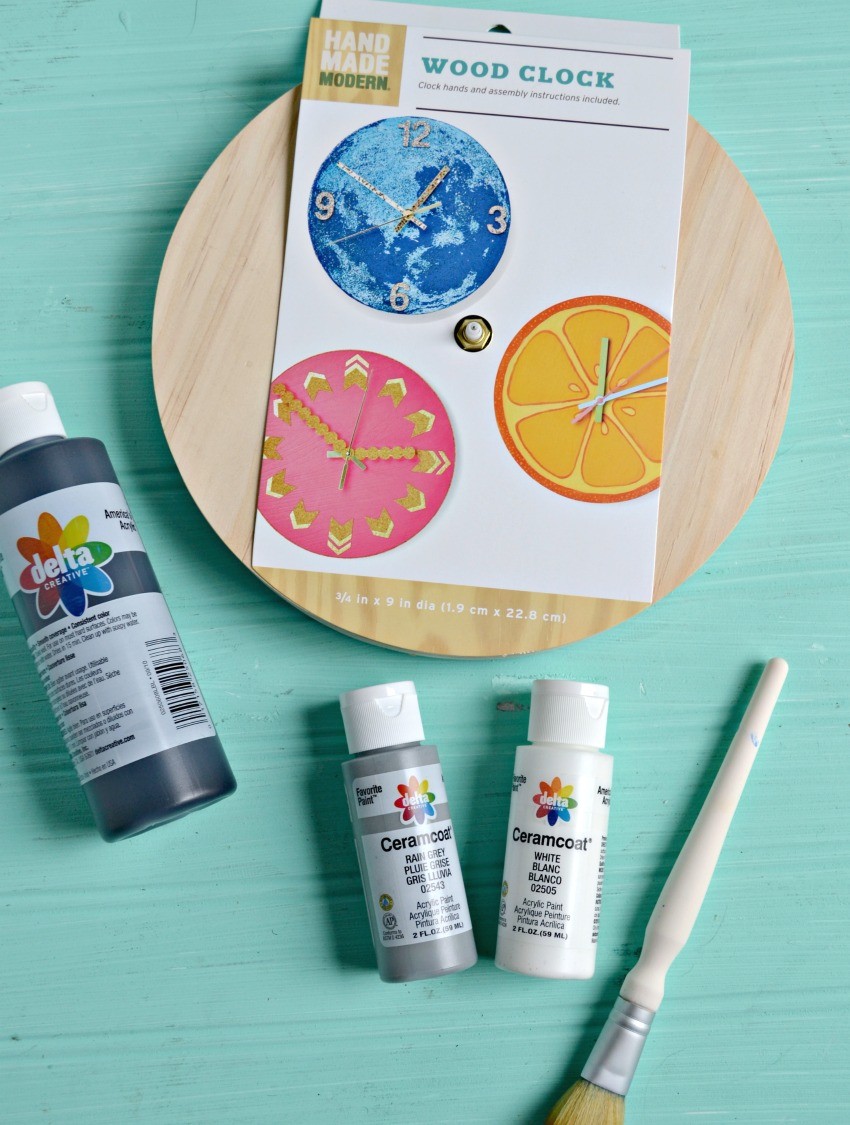
What you need:
Acrylic Paint in Rain Gray, White, and Black
Paint Brush
Target Handmade Modern Wood Clock
Tape
How to:
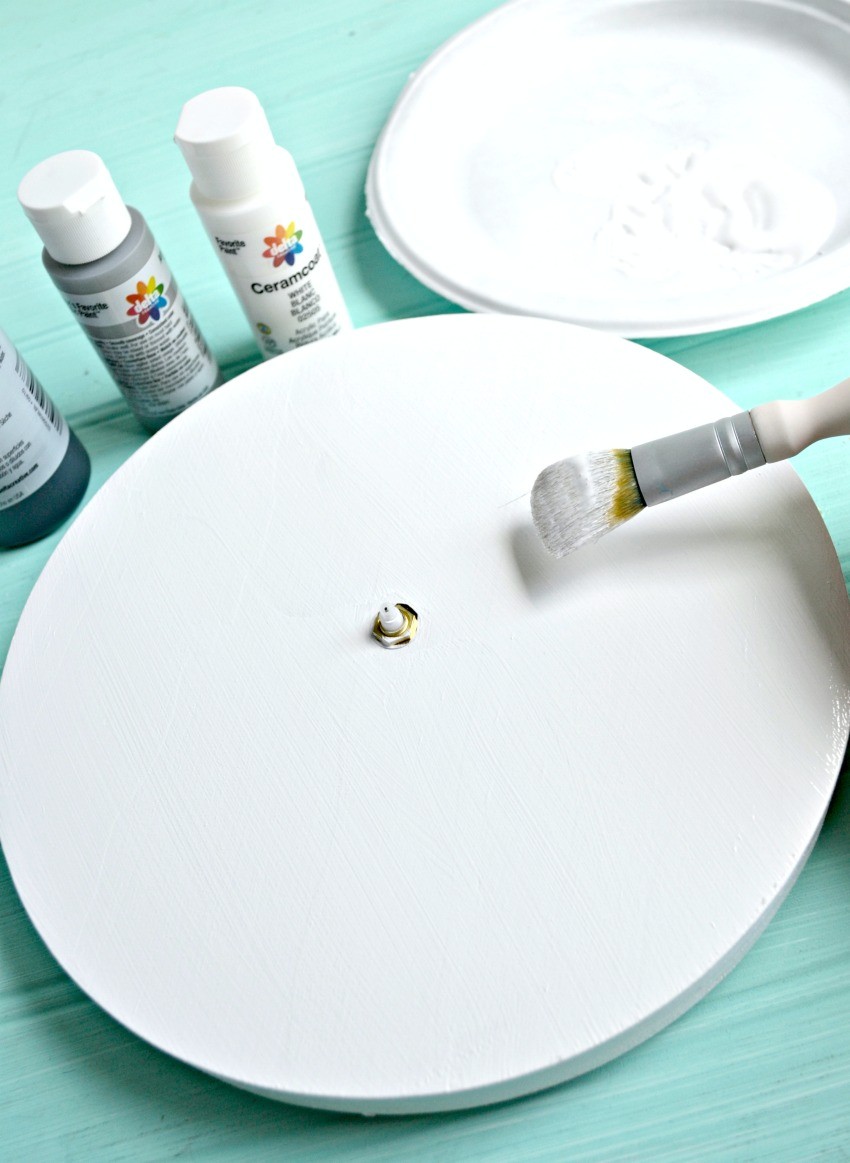
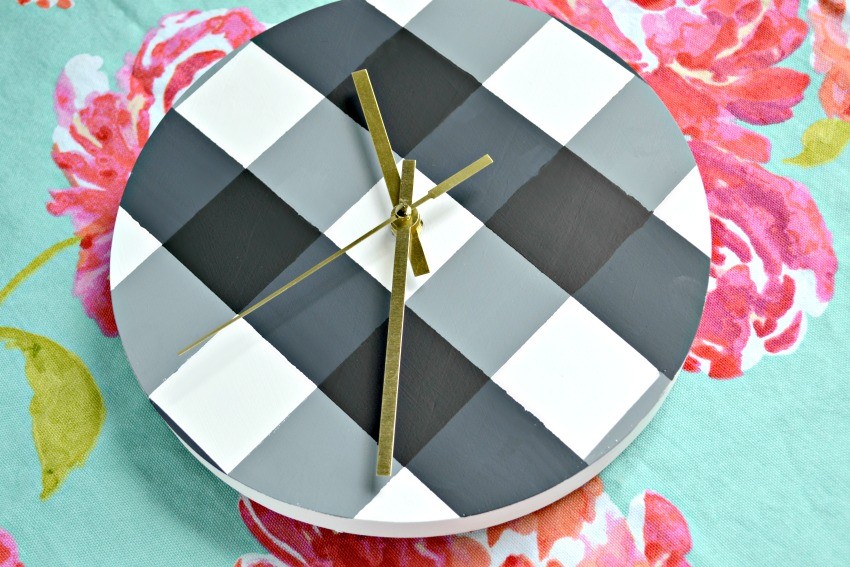
To start, you will need to paint the base of your clock with the Delta Ceramcoat® Acrylic Paint in White. Paint all the edges and let dry. Delta Ceramcoat® Acrylic Paint is a rich and creamy formula that provides excellent coverage…it’s perfect for base coating, stenciling and decorative painting and works well on wood, terra cotta, plaster and paper mâché. It dries to a matte finish and is made in USA!
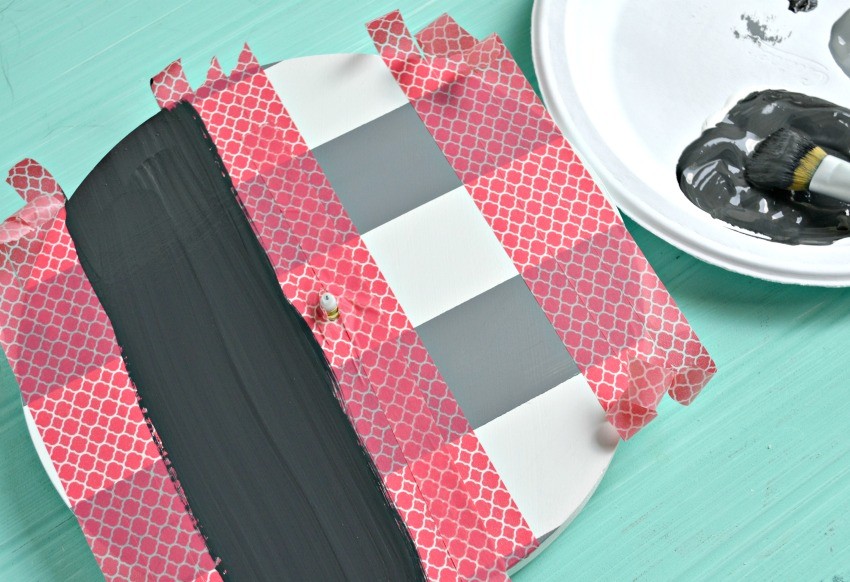
Next you add your first row of stripes (vertical). I used 1.5″ spacing for my stripes and taped off the whole clock, then painted with my lightest gray color. Once painted, pull the tape off and let dry.

Because you need three colors for gingham and I wanted a darker gray color, I mixed my black and white to create a darker gray than the “Rain Grey” bottle. Then I taped off my horizontal stripes using the same 1.5″ spacing. I painted between the tape again and pulled the tape off and let dry.

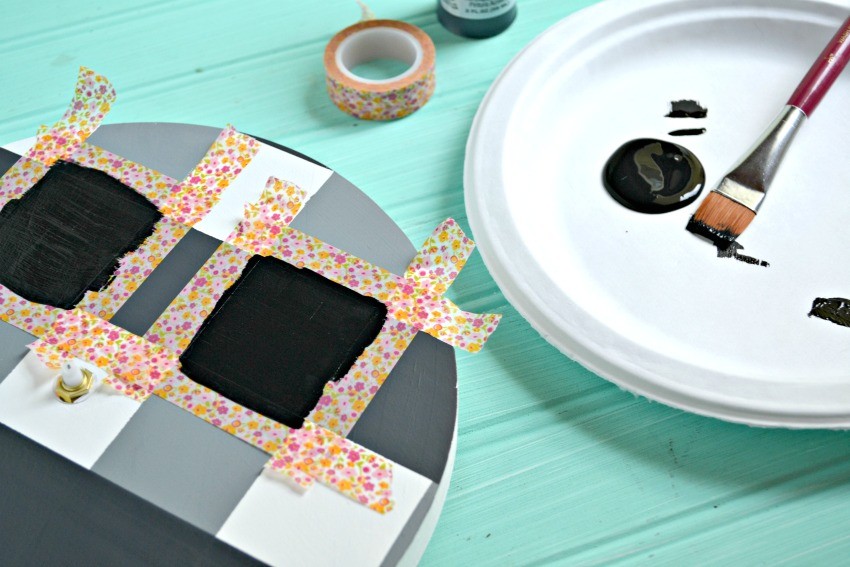
Finally, in the spots where the dark and light gray paint overlapped, I taped those off and used the black to fill them in for the finishing touch on the gingham.
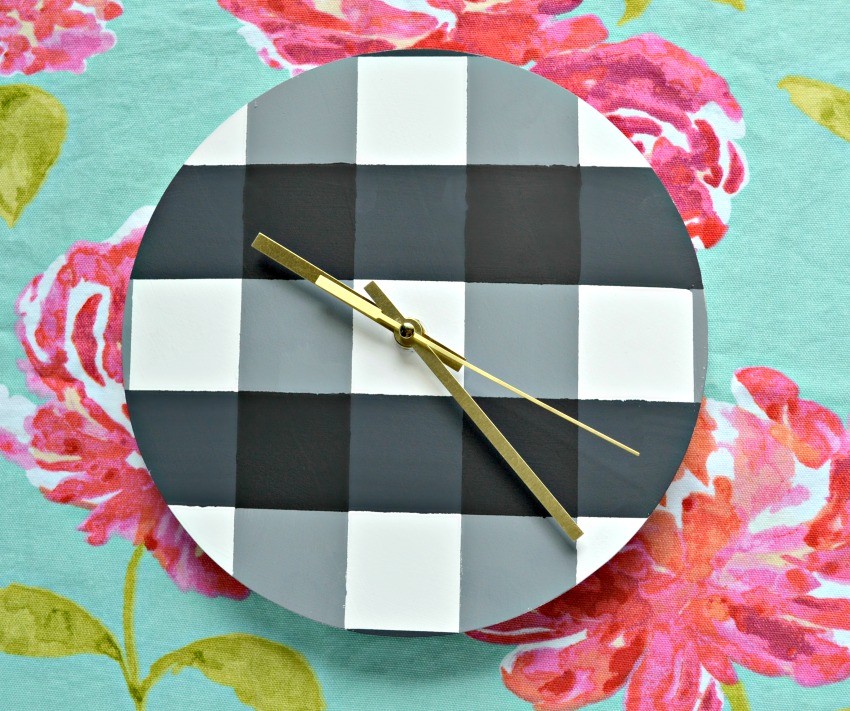
The last step is to fully assemble your clock and put a battery in the back. Then hang and enjoy!
Pin it for later…