


When I was at SNAP last April I had the chance to meet TWO awesome new vendors that inevitably helped really transform my Nautical Bathroom. Moen and Ryobi Tools were both vendors present that I got to meet and chat with for a while and I knew I had to contact them when we got into the heat of our makeover. I’m SO happy I did too. Today I’m going to share how we used Moen and Ryobi products to make over our bathroom and share some simple tips on installing new bathroom hardware.
First off, I got this great new hardware for my bathroom all in brushed nickel and part of the Ashville Collection. The cool thing about this collection too is that it is microban protected and is specially made to prevent spotting on your hardware! Brilliant!
Ashville’s™ classic elements flow organically into each other to create a sleek and timeless style…you can see what an amazing difference it made in my bathroom!
- spot resist brushed nickel with Microban® infused into the faucet finish, Microban® technology works 24/7 for durable antimicrobial protection that won’t wash off or wear away.
- two–handle lever handles make it easy to adjust the water
- faucet handles can be installed at any distance between 8″ to 16″ for a more customized widespread installation
- complies with Americans with Disabilities Act (ADA) specifications
- aerated flow is ideal for everyday bathroom tasks, like brushing teeth and washing hands
- meets epa WaterSense® criteria to conserve water without sacrificing performance
- limited lifetime warranty
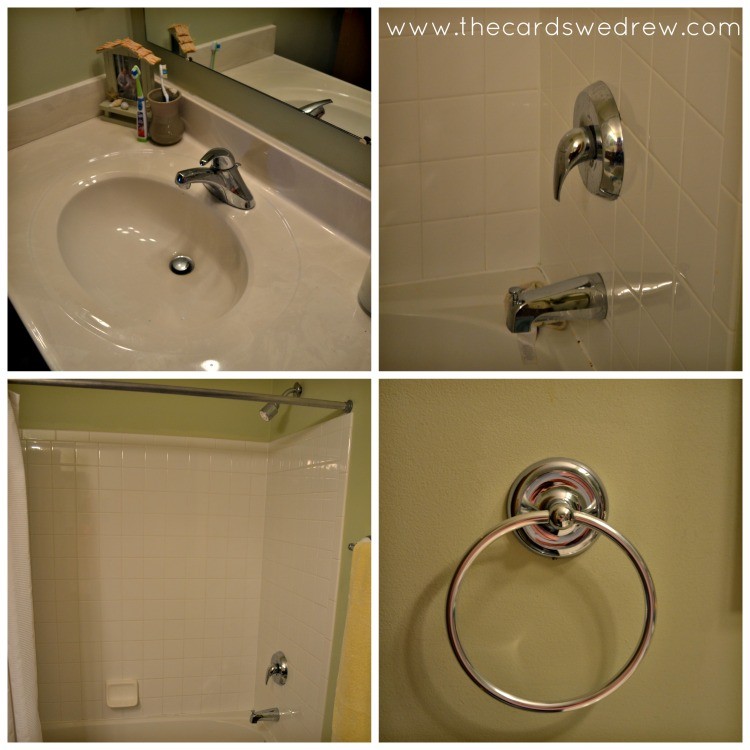
Here’s what I had in the bathroom BEFORE:
 And here’s how great it looks with the new Moen Ashville Collection hardware AFTER:
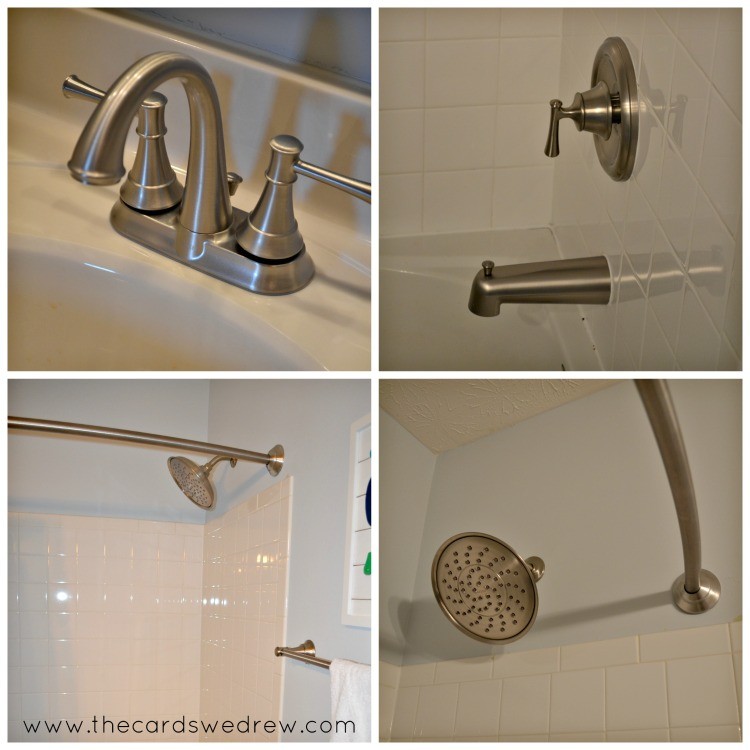 It’s amazing what some updates can do, huh!? We love it.
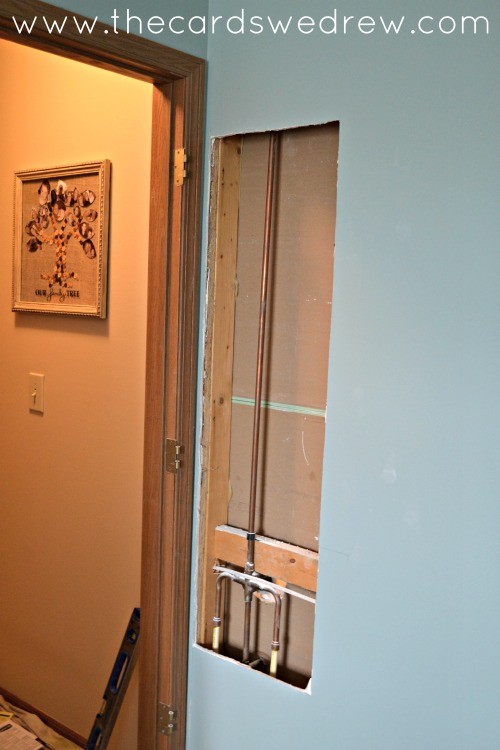
This process wouldn’t have been easy though without the help of my dad. He helped us replace the shower head and tub hardware, as well as replace the bathroom faucet. The bathtub took quite a bit of work since the current connections didn’t go with the Moen hardware. I can’t possibly explain the whole process, but we had to open up the wall behind the shower that’s in our bathroom to fix it so we could install the Moen fixtures.
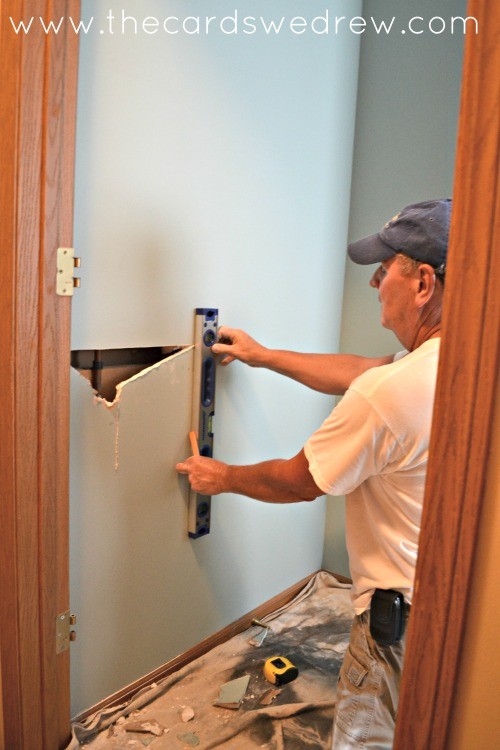
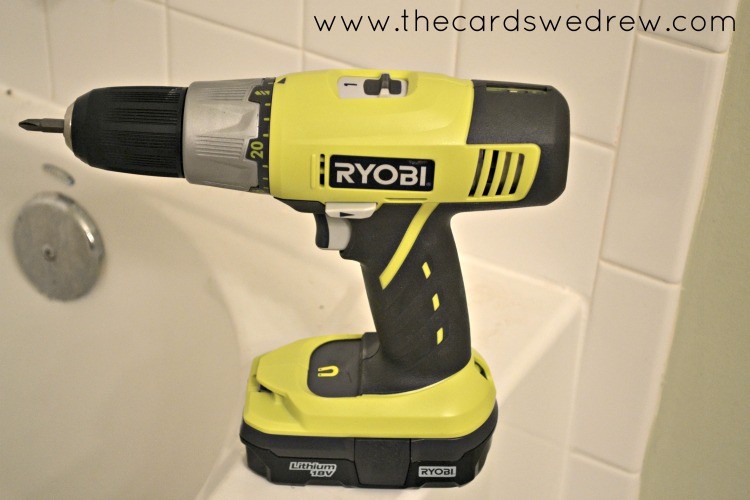
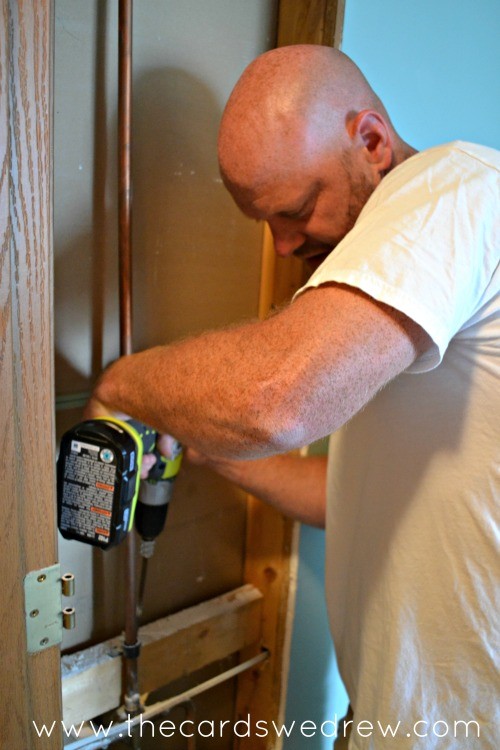
This is where we got to use our new Ryobi Power tools we received. My dad is a contractor and has been in business for 30+ years and he was so impressed with the Ryobi tools we have. My husband loved them too!
 I personally love the coloring of the tools…they just look fun! 😉 Here’s some photos of the work my hubby and dad did to get our new bath tub hardware in. It wasn’t necessarily an easy process, but having a contractor as a father really helped. First, we cut a hole in the wall and then the guys replaced the copper pipes to fit the new hardware…

My hubby enjoyed using our new tools on the project. The Ryobi drill is one of a few drills we own, but as my husband said, it’s WAY better than any of our other drills!
 We also had to use our new Ryobi saw to replace the wood in the wall (don’t ask me the specifics on this).
 Then we used the drill to put it in place and secure our new piping.
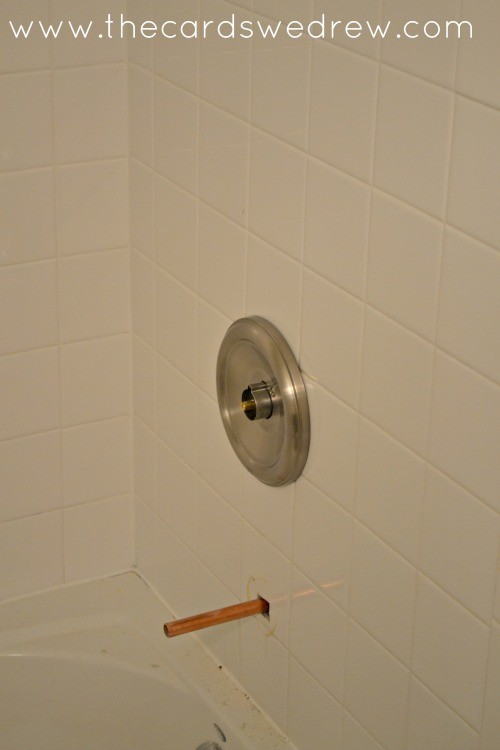 There’s the new pipe coming through! It was quite an interesting process. Next up on our to do list is to replace our master bath with the same Moen Ashville collection hardware.
The end result was so great and we love our new bathroom hardware. Everything was replaced so easily.
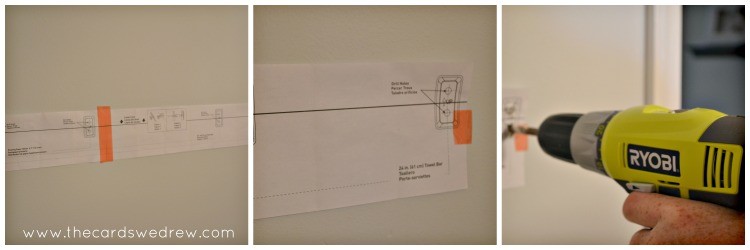
So here’s the other AWESOME thing about Moen products. They sent us a curved shower curtain, towel bar, hand towel bar, and toilet paper holder. These items can be a pain to make sure that they’re level and all the holes are where they are supposed to be…but Moen makes it simple! With each item they sent us a paper guide with easy instructions on where to drill holes, through the paper, and then remove the paper and install your rod or bar. It was SERIOUSLY the easiest install ever.
My husband and I always dread hanging things like this because we will inevitably miss a spot where we were supposed to drill or it won’t be level and then we end up frustrated (to say the least). With Moen, we didn’t have ANY issues at all.
With the help of Moen and Ryobi we were easily able to transform our bathroom…if you’re looking for new tools or bathroom hardware, I highly suggest checking them out. We found that they not only have a great selection online, but that Home Depot has wonderful selections of both their products locally.
So here’s my tips on installing new bathroom hardware:
1. Get someone who knows what they’re doing. I can’t tell you how many different steps we took doing this, but it’s about a half days process, if not more when considering patching up the wall once you’re done.
2. Use good tools. I suggest Ryobi–you’ll need a drill and a saw for this process (for power tools).
3. Search around for bathroom fixtures and be sure to consider ease of installation. Again, I’d recommend Moen because they were the easiest of the installations we’ve ever had to do. Their bathroom paper guides saved us a ton of time measuring and marking the walls.
4. Make sure to stick with all the same finish in your bathroom (like brushed nickel) and consider things like how the finish will go with your new or existing light fixture.
5. Take lots of before and after photos to document your big change! It’s always fun to show people :o)
Enjoy!
NOTE: This post is not sponsored by Ryobi or Moen. I did receive free products for my bathroom in exchange for an honest review. All thoughts and opinions are 100% my own and I’d personally recommend using Moen and Ryobi and will use them again in the near future.


Thank’s for your post about drill (ryobi). Love your drills.