


When I was at the Plaid Crafts Headquarters some time ago, I got to do one of my FAVORITE crafting projects to date! I was taught how to make a marbled pumpkin with acrylic paint. The idea is really easy, but there is an art to this, so I encourage you to practice a few times before doing anything large or expensive. The best thing about it is that you can personal the project any way that you like with a variety of colors and even get glittery if you want to! Check out my Facebook Page for a full video on the “pour” for this project (it’s pretty cool!).
Here’s what you need to make this Marbled Pumpkin:
**This post has been updated with new products that make this project much easier!
- Dowel Rods
- Tin Tray to catch paint
- Plastic Pumpkin
- 4 plastic cups
For the pouring you can either use:
- OPTION ONE: Use a Pouring Medium and standard craft paint
OR
2. OPTION TWO: Use a pre-mixed marbling Paint
The plus to using pouring medium is that you can use ANY color you want. The plus to using marbling paint is that it’s already pre-mixed for you and you can modify colors by mixing the paints.
How to OPTION ONE:
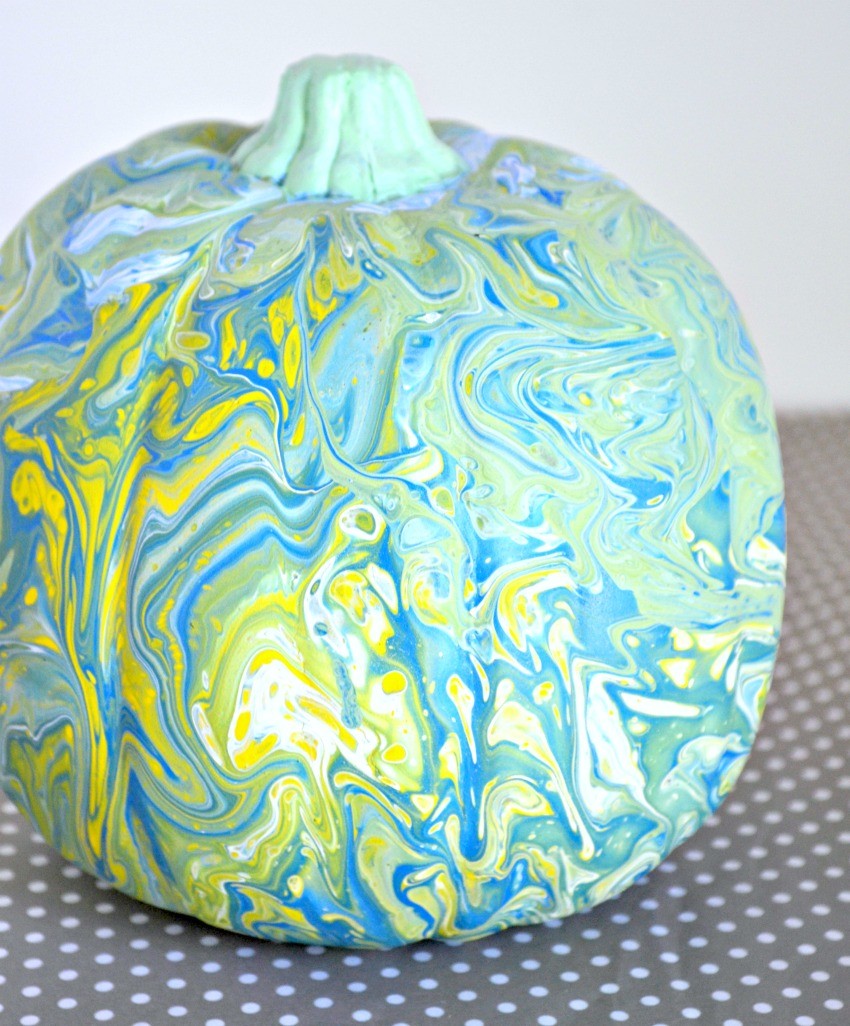
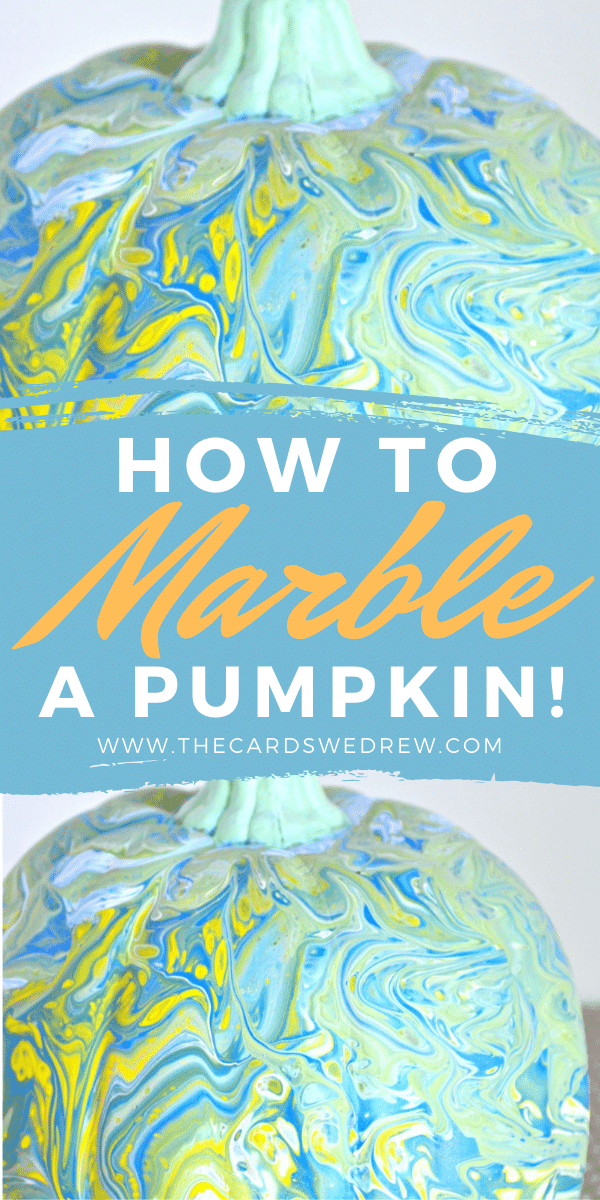
Start with your choice of paint colors and select the three colors you wish to use for this project. I ended up using about 1/2-3/4 of each bottle I used and I went with Royal Blue, White, and Yellow for this project. I want to give the pumpkin to my son’s teacher for his desk, so I used school colors. 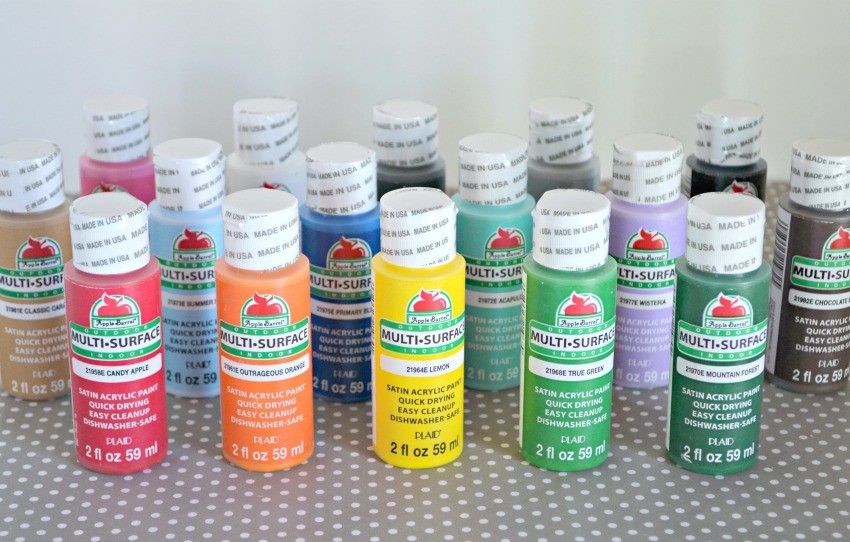
Next, I went outside on my back walkway to do this project. It’s MESSY you guys. So either be prepared with a plastic tablecloth and newspaper inside or just do this outside.
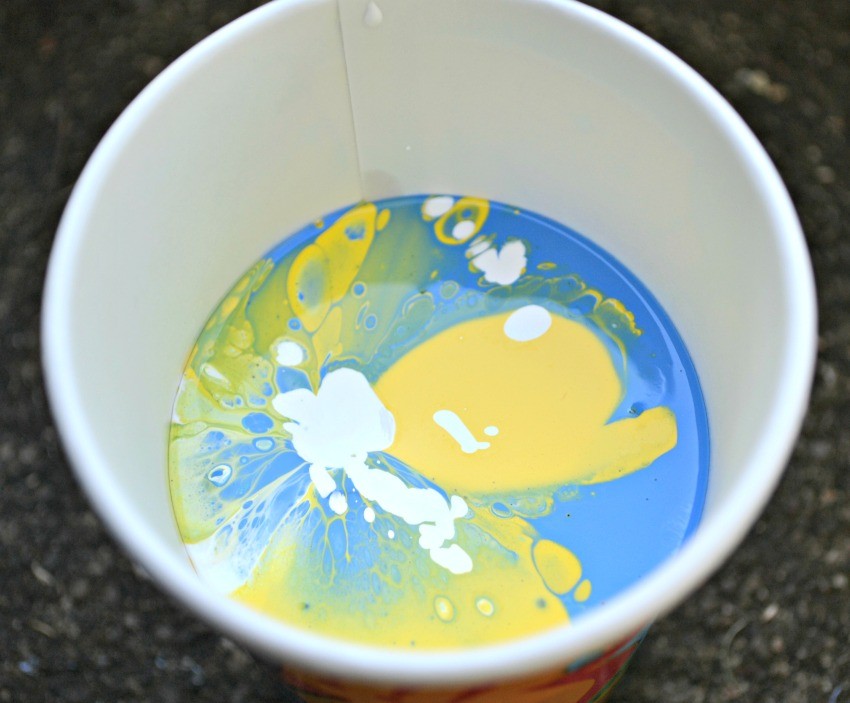
Get four cups ready, you’ll put paint in three and set one aside to combine all the paint. Start by pouring the recommended pouring medium into each cup. Next, add about 1/2 the bottle of paint into each cup, so you’ll have three cups full of paint. Then use a dowel rod and stir each cup well. The paint should run fairly easily, so if it’s too thick, add more pouring medium.
HOW TO OPTION TWO:
If you decide to use Marbling Paint, then you simply layer the paint into one cup, do not mix, and then pour over top of the pumpkin. You can skip the steps of mixing the pouring medium and acrylic craft paint.

Once mixed, use the fourth empty cup to combine all three paints. They should NOT mix too much because of the ingredients added into them…it should look something like this:
Then prepare your pumpkin. I stuck a dowel rod up through the bottom and then poured the paint over top of my pumpkin, gently spinning the pumpkin as I went to spread the paint evenly across. The paint creates a great marbled look. You can even gently reuse the paint at the bottom of your pan if you’re running low.
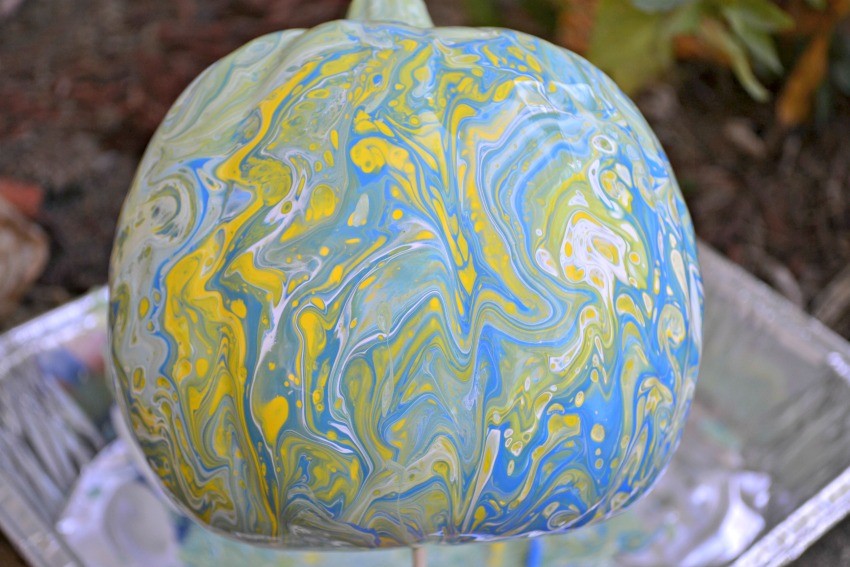
Once you get the desired look, use your dowel rods to let your pumpkin drip dry.
 I let mine dry for 24 hours, then painted the stem light green to match the pumpkin.

Check out my Facebook Page for a full video on the “pour” for this project (it’s pretty cool!).
Pin it for later…


There are no photos
Never mind! I just tried reloading. These are super adorable!!!
What do the different addatives acheive?