


I’m helping out with a bridal shower this weekend for a friend, mostly doing the dessert table, and I decided to make some homemade chocolate covered oreos for the shower. I know Oreo celebrated it’s 100th birthday yesterday and I kept thinking about how perfect posting yesterday would have been, but I just couldn’t get to it.
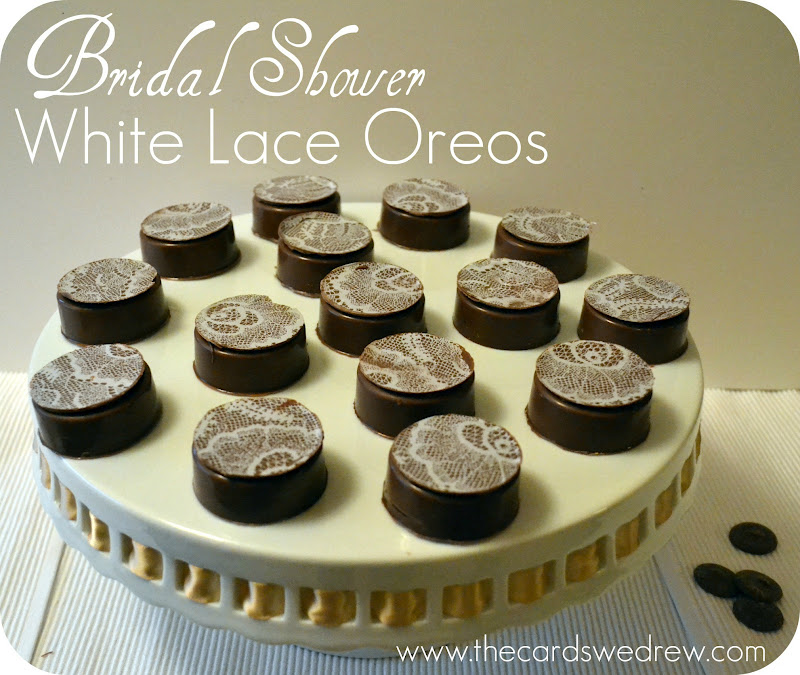
So tonight I got home and set out to make my Bridal Shower White Lace Oreos.
What you need:
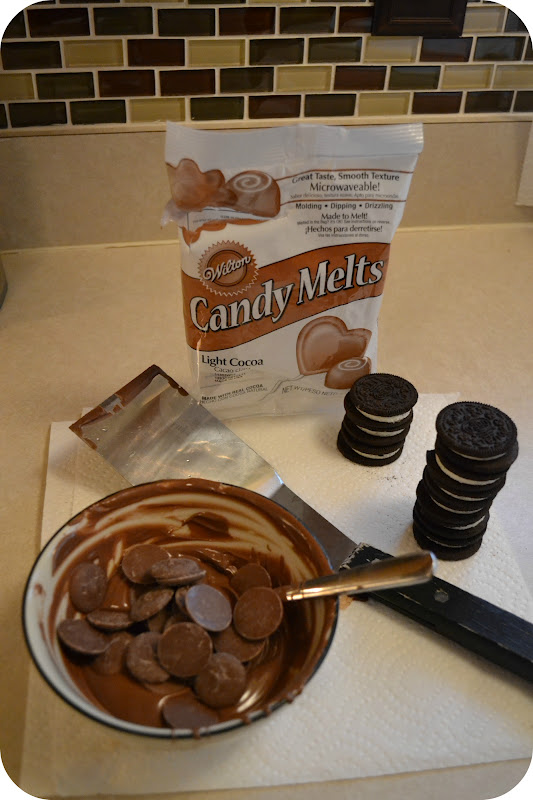
One bag of chocolate *your choice on color
Cookie mold
Chocolate Transfer sheet
Oreos
Spatula
Circle Cookie Cutter (or in my case…wine glass)
I started by melting my chocolate in the microwave for about 1 minute, stirring, then doing it for another minute. Don’t be intimidated by chocolate, I use the JoAnn fabrics chocolates and I’ve never had issues and it doesn’t solidify too quickly.
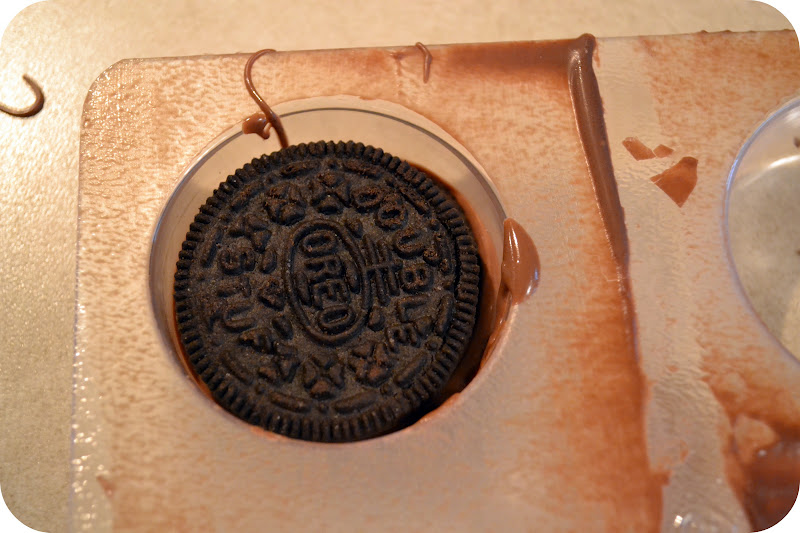
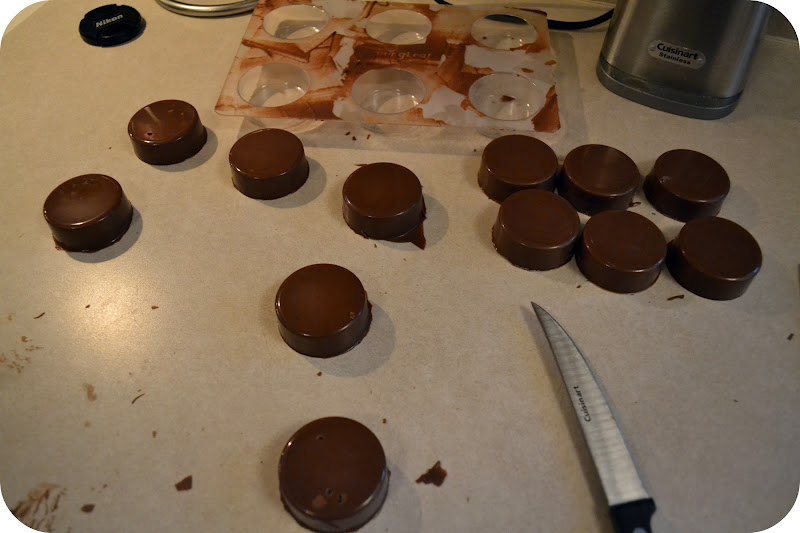
Take a small spoonful of chocolate and put it into the mold, place your oreo, and cover it all with chocolate. Once all six molds are filled, tap the oreos down to make sure the chocolate has sunk down and there aren’t any air bubbles on the sides. Then use a spatula to even out the chocolate across the top of the oreos.

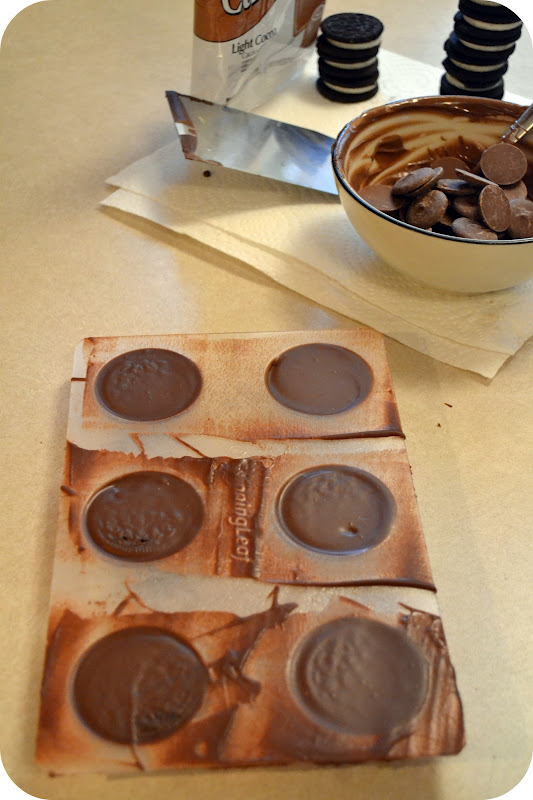
Place the mold in the freezer for about 5-7 minutes and then pop them out of the mold.

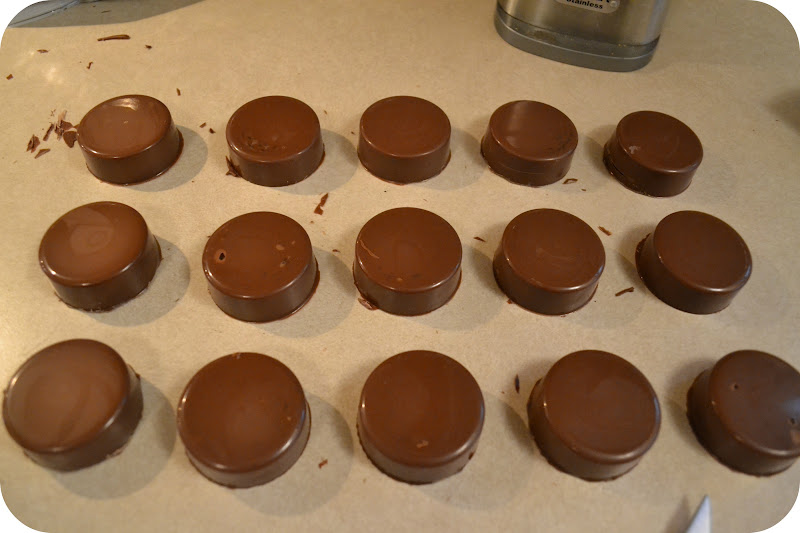
When they come out, you’ll need to trim the extra chocolate off all the sides of the cookie to make it look finished.
After your cookies are ready, it’s time to get started on the lace overlays for the cookie. I bought a chocolate transfer sheet online with a lacy pattern on it, which includes instructions.
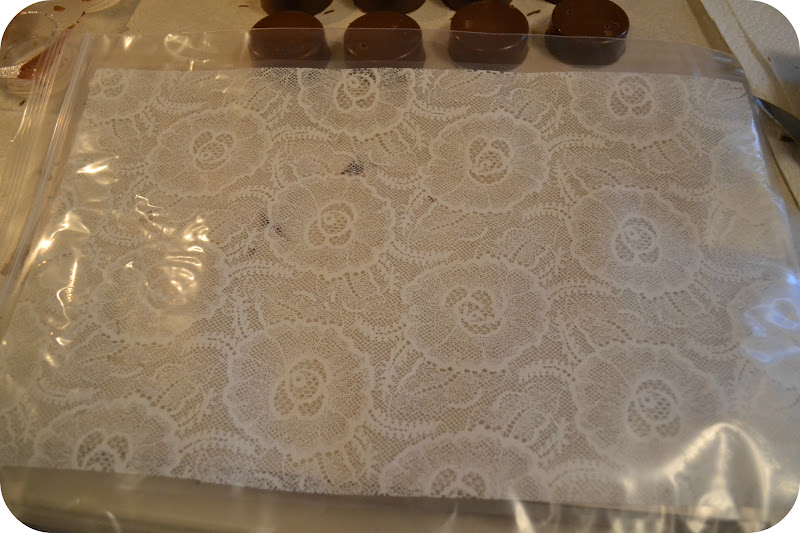
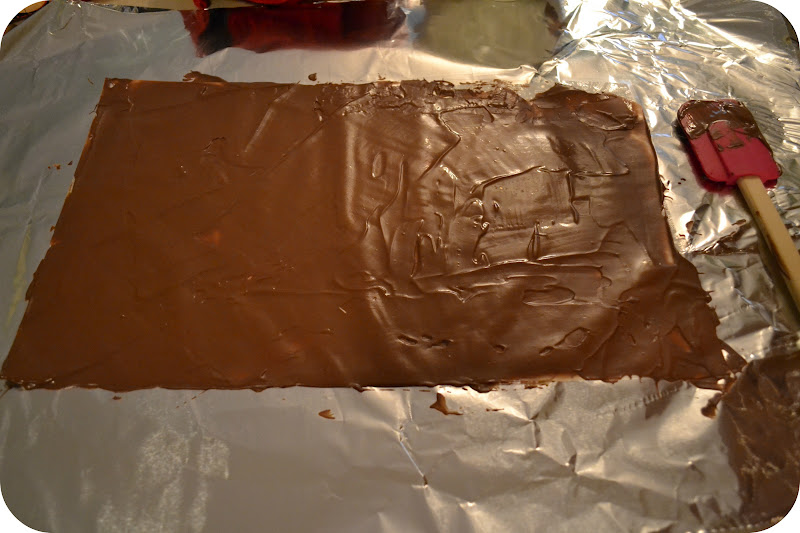
From there, I spread a thin layer of chocolate across my transfer sheet. I’ll be honest, this part is super tricky. You have to get it smooth and even and not bump around the transfer sheet too much. If you’re worried about it, I would suggest getting two of these sheets…one to practice on.
I didn’t get this too perfect, thus my cookies weren’t “perfect” but I think for a first timer I did pretty well and either way people will be happy with the results (and taste!!!!).
Once the chocolate is a little set, but not solid, use your cookie cutter to cut out your circles. Take extra care in this step and take your time.
Once you have your circles, dab a little bit of warm chocolate onto your cookie and apply the overlay to hold it on place.
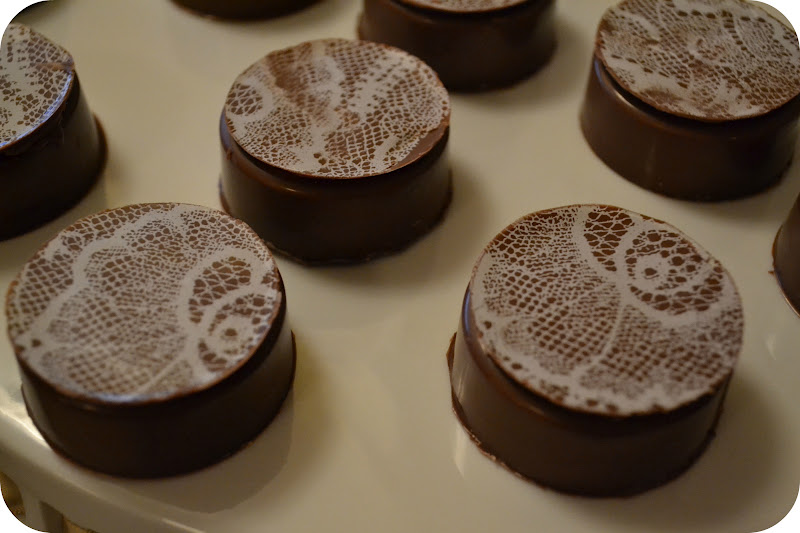
For something so simple, it makes a big statement and you’d be AMAZED at the chocolate transfer sheets available out there! There are hundreds of designs!!

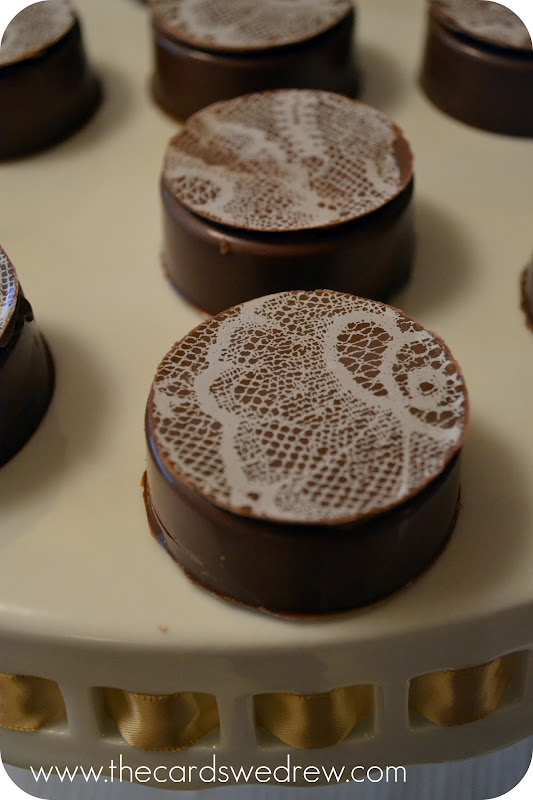
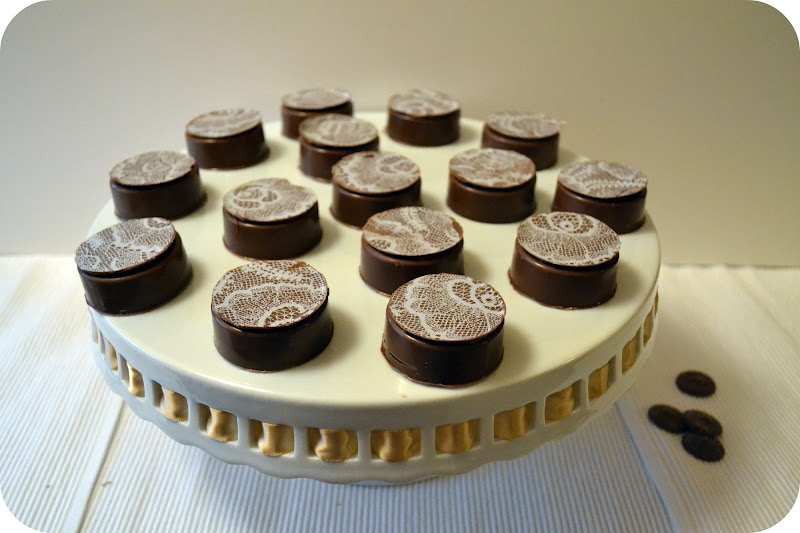
Here’s another view of the Oreos. And just to let you know…my kiddo and I split one and they are just as delicious as they are pretty! 🙂

I’m super excited to show these off this weekend at the shower and I hope that this is something I can continue to make going forward.
Tomorrow I will be showing you another fun dessert I’m making for the party! It’s bride and groom theme. What do you think it is?! 😉


Abbey,
They turned out pretty as a picture. I bet they are tasty, what’s not good dipped in chocolate.
So, are you making the cake also? That’s what I’m thinking when you said bride and groom theme.
Stopping by from the Weekend Wrap Up Party. These are so pretty!
How fun! They turned out so pretty! I would love for you to stop by and link to my Sew Crafty Saturday Party!
I have always wondered how they made those awesome designs on the top of chocolates! Now I know! Thanks for that AWESOMENESS you shared! Also, I wanted to thank you for helping Jamielyn in featuring my “Catch a Fruit Rainbow” on I Heart Naptime! That was really quite shocking to see my project on the TOP 20! I hope you’re having a SUPER weekend! SMiles, Jill
Hi Abbey, love your idea, it come out pretty good!
I already saw some tips maybe you can use too
(https://candy.about.com/od/phototutorials/ss/sbs_transfers.htm)
See you
These look like they could have come from a magazine. Wow! The lace looks so realistic
neat! i had never heard of those transfer sheets!
Very pretty! You did a fantastic job! I’ve always wanted to try transfer sheets but can totally see myself messing it up..LOL!