


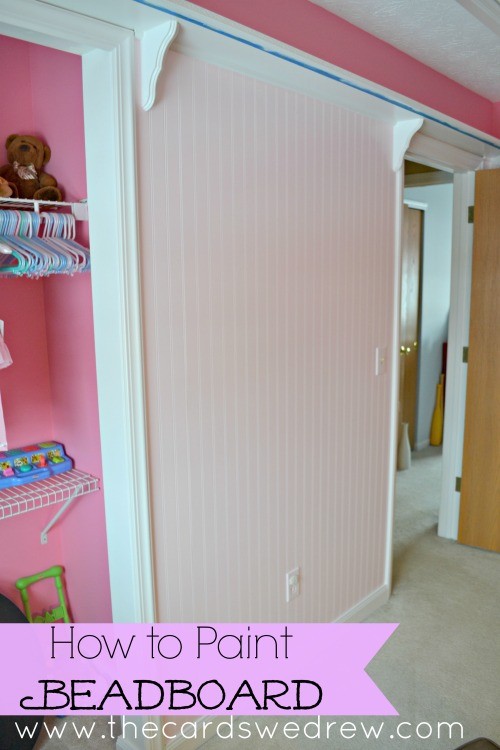
My husband and dad have been working hard these past few weeks to get our little girl’s nursery ready for her arrival! The nursery is covered in beadboard up to about a foot from the top, then there’s a shelf that surrounds the room. The previous homeowners put the beadboard up and when we moved in, it had a lot of nail holes and dings in it and it wasn’t in great shape. When we put our son in that room, we painted the top area and covered the holes strategically with frames and other decorations, so we knew when we changed the room over to a girl’s nursery that we’d have to really work at it and make things right. So today I’m going to share with you how to paint beadboard to make it look brand new again and add some color to your room!
 White beadboard is very pretty, but we wanted some color this time. My dad is a contractor, so we started with the basics…we filled in the holes, re-caulked all the woodwork, repainted the woodwork and ceiling, applied a fresh coat of paint to the closet and the top of the walls where the beadboard isn’t touching, and then we repainted the beadboard! I wasn’t sure how it would turn out, but we LOVE the end result, so I thought I’d share with you how easy it was!
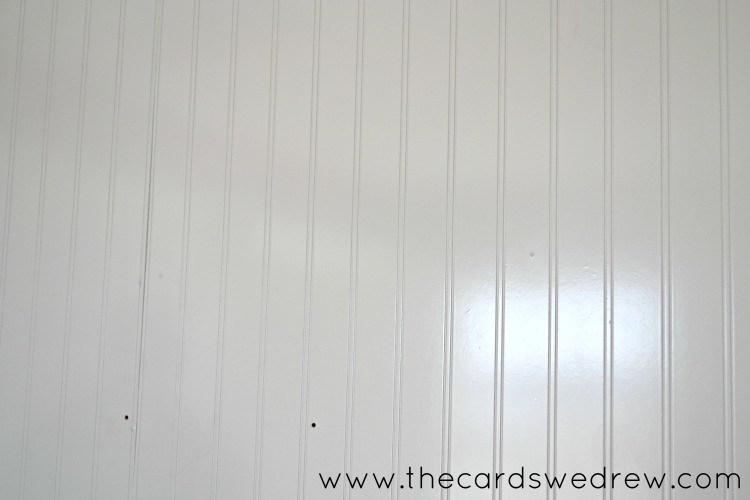
First, here’s a few shots of the white beadboard BEFORE with the holes in it….and some of it lifting.
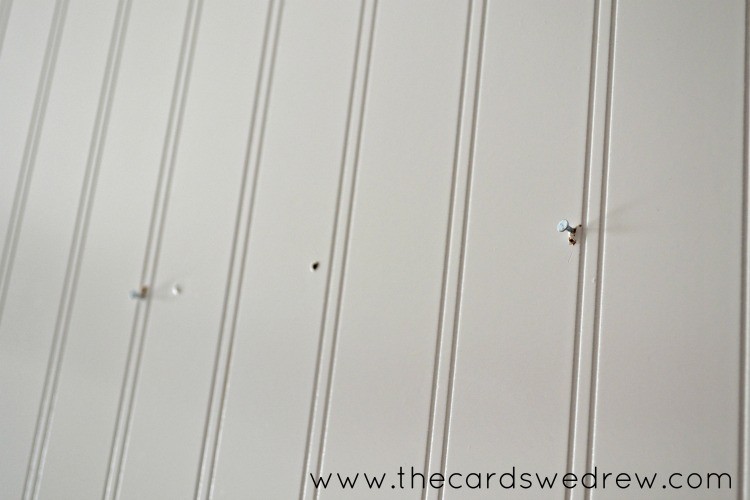 The guys started by filling in the holes like you would any wall, sanding over them gently, and then doing any touching up needed to make them whole again.
After the holes were filled in, they went over all the board gently sanding it to prepare it for a new coat of paint. Then they got the paint ready.
Here’s the big thing…we used Oil Based Paint for both the beadboard and the woodwork. My dad has been a contractor for my entire life and he has always felt that latex paint used on woodwork and beadboard doesn’t hold up. So as we’ve been painting our woodwork all throughout our house this past year, we have been used oil based paint from Benjamin Moore. The name of the paint is Benjamin Moore Satin Impervo and you want the oil based kind rather than the latex.
 I’ll forewarn you now, this paint isn’t cheap. For a gallon it costs around $70, but it does last quite a while, especially if you’re painting workwork.
From there, they would roll the wall with the paint as normal and then go back over the wall with a brush to get the paint evenly into the crevices of the beadboard and to give it a nice even look rather than the textured look the roller would give it. The paint will take a bit longer than latex paint to dry, but it gives off a nice sheen that you’d be used to with the regular beadboard on the walls.
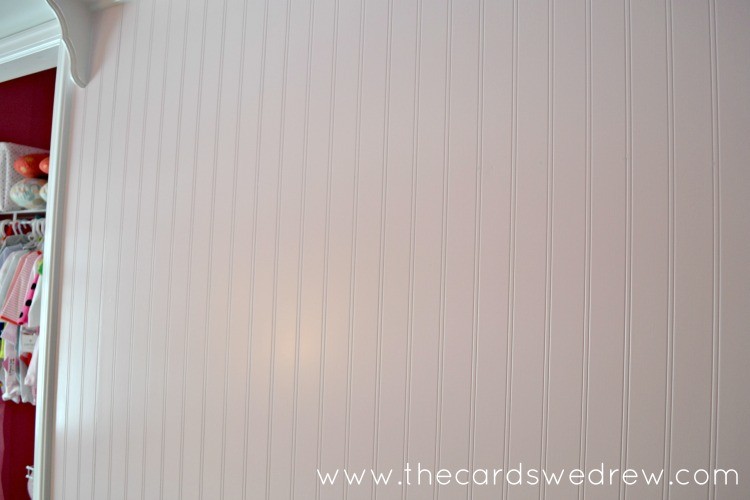 You can see the little bit of sheen to it, all the holes are filled in, and we chose a nice light pink color to pop it off the woodwork a bit and play against the brighter pink at the top of the walls and in the closet.
So that’s that! The real key to how to paint beadboard is in a few easy tips:
1. Fill in the holes and sand over them.
2. Gently sand the board before painting.
3. Use Ben Moore oil based Satin Impervo paint (and no, I’m not working with Benjamin Moore, nor was this post sponsored or did I get the paint for free…this is all personal opinion).
4. Roll the paint onto the walls, then lay it off with a paint brush to get nice even strokes and a smooth finish.
5. To really make it pop, touch up your woodwork with a fresh coat of white paint, as well!
Hope that helps! My full nursery reveal is coming soon!


Comments 1