


This post is sponsored by HomeRight, all words and opinions are my own.
They say January is for organizing and starting fresh and there is no better way to start off the New Year with a clean refrigerator. Perhaps many of you, like me, are trying to eat better after the holidays…and having junk in your fridge to tempt you isn’t such a great idea. Or, maybe you’re just sick and tired of not being able to find things and need to get organized. Whatever your reason is, today I want to show you how to clean and organize your fridge the EASY way!! I’ll walk you through step by step and the tools I used to get it sparkling clean!!

So showing off your fridge to the world in all its unbridled glory is a little like walking down the street in your underwear. It’s a little embarrassing to say the least. I think a fridge can say a lot about a person. For example, I visit my parents house and their fridge is organized and always very clean. They don’t have months of nasty leftovers piling up or spoiled food sitting around…it shows that they are on top of things. We recently went to a friends house and you opened their fridge and the soda cans were neatly stacked in the back, lots of fruits and veggies lined the shelves, and it too was very clean.
Then I opened my fridge–dodging food from two weeks ago’s dinner. Lunch meat that I wouldn’t dare eat. MAN! What have I been doing!? But sometimes life just gets busy and you forget about these little things.
So let’s stop the fridge shame, put on our gloves, and get to work!!

Pull out that trash can and get to purging items from your fridge. Check expiration dates, open the contains and do the “sniff” test, and if you’re unsure or you know you won’t eat it, then throw it out. Now is the time to be liberal and realize you might be a little sickened at the amount of food you just wasted, but you have to start somewhere!! Don’t forget to do this for ALL your condiments, as well. Every item in your fridge should be hand checked during this stage. Once you’re done, take the trash out and let your fridge cool off again for a bit.

So now that you’ve determined the essentials in your fridge and are only left with good food, the next step is to get to cleaning. No one likes this part, but I have a trick to make it easier!! All those nasty, caked on spots of “ick” in your fridge? You know those ones that take you a lot of elbow grease to get up? Well, what if I told you there is no need for elbow grease with my method? Why, because I take my handy dandy AutoRight Steam Cleaner to my fridge and it takes those sticky spots off in SECONDS!!!
So here’s how it works.
I have a double door fridge, so I cleaned it in this order:
- Cleaning right side of door and compartments (removing shelves, cleaning the doors and compartments individually).
- Cleaning left side of door and compartments (same as above).
- Cleaning the very bottom of the fridge (pulling out the drawer, cleaning all the way to the back of the fridge, lifting up glass and cleaning it, as well).
- Cleaning the drawers in the fridge (pulling out each drawer and cleaning above and below the drawers).
- Cleaning the middle layer shelves (top and bottom of shelves).
- Cleaning the top layer shelves (same as above).
- Cleaning the rubber crevices around the doors.
It took me about an hour to an hour and a half to get through this step, but if I had been hand scrubbing, I know it would have been much longer.
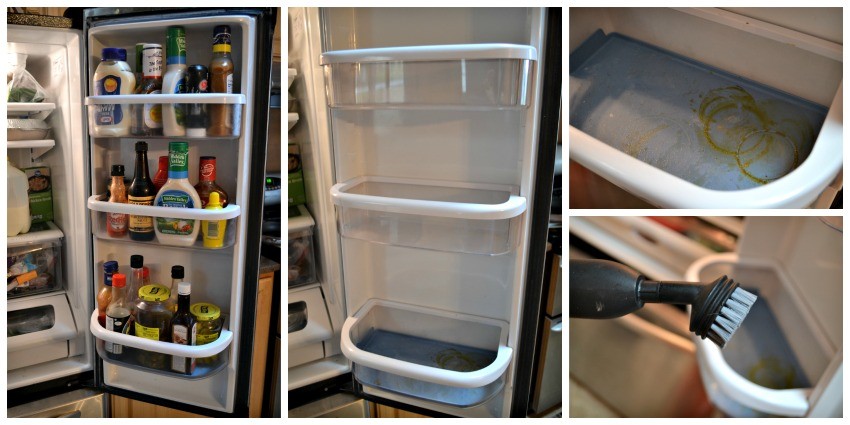
Above you can see I started on the right side, emptied it, and then pulled off each compartment to clean it. The bottom one had some deliciously disgusting pickle juice caked onto it, so I pulled out my steam cleaner, got the scrubbing nozzle, and got to work!!

The AutoRight Steam Cleaner has several different heads and nozzle attachments that make it perfect for any cleaning situation! The other thing that is nice is that the steam heats up so hot that it kills any germs and bacteria on contact, so you don’t even need harsh cleaning chemicals if you don’t want to.
For this project, I went ahead and used 7th Generation Multi Use Cleaner. Like I mentioned, the steam cleaner is more than enough, but I wanted that little extra bit of help for the fridge and there is no better or more natural cleaner for the job that 7th Generation.
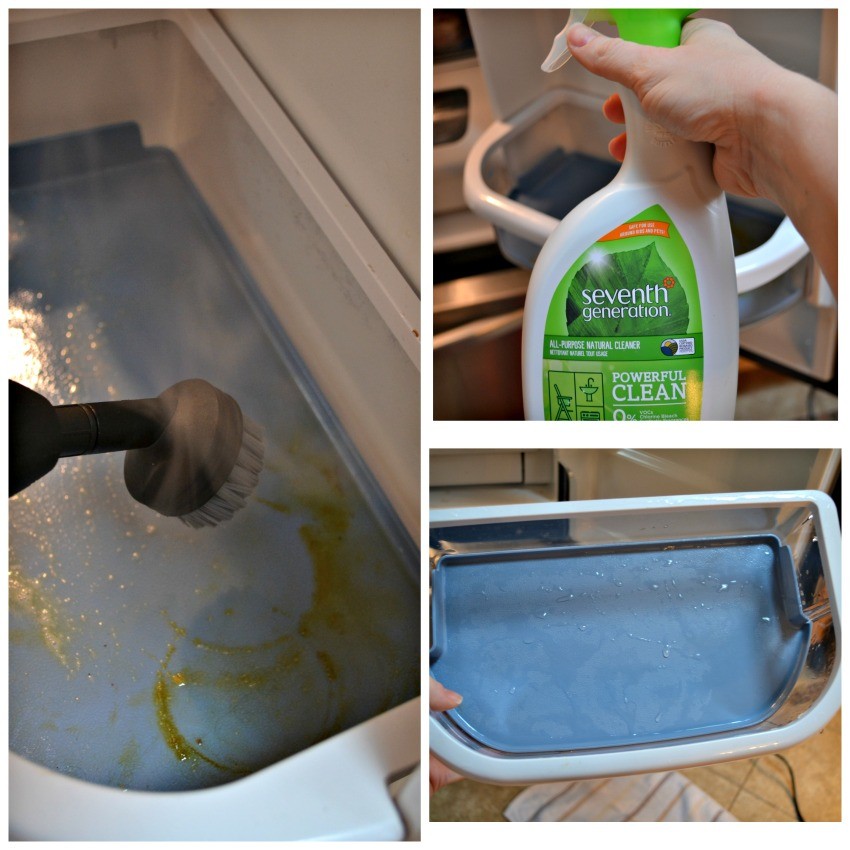
I let my Steam Cleaner heat up, then I used the scrubbing nozzle and gave it a few back and forths and in no time the gunk was gone. I think it literally took about 5 seconds. I rinsed it off in the sink and then put my little helper to work….
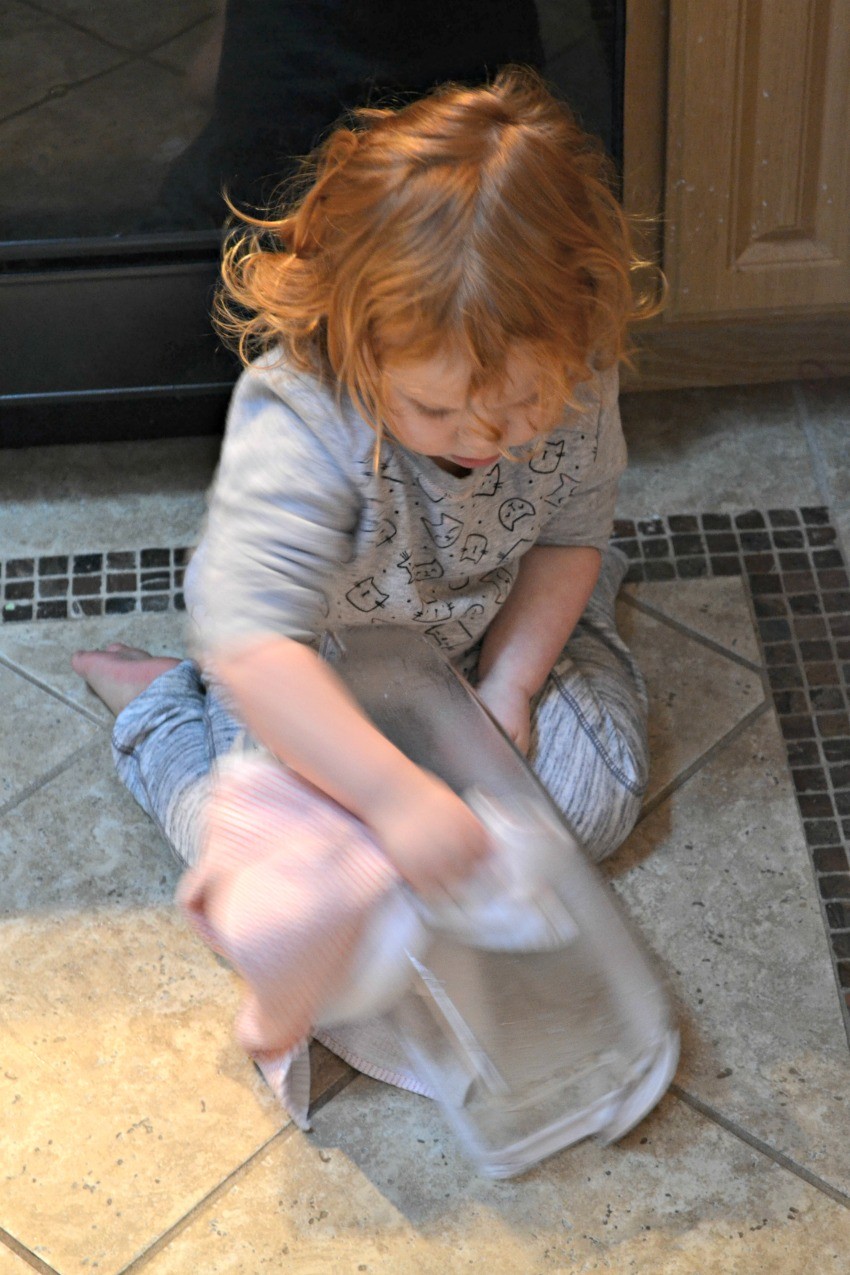
I would suggest taking the time to towel dry all of your fridge off. This will eliminate water stains and will give you a nice, clean look. I let my daughter do the first dry and then I followed up with the second.
I repeated these steps for my whole fridge. Dried, crusted on food was no match for my steam cleaner. When I lifted the glass off the base of the fridge I found this disaster….

But once I hit it with my steam cleaner, it just rinsed right off. I dried off the glass and then ran over the inside of the same area with the steam cleaner. I used a rag to wipe off the residue that remained, then put the glass back.
Once I was done cleaning off all of different layers of the fridge, giving time between each so that I didn’t spoil my food in the process, I got to the final step.

Turns out, after I threw out all the bad items in the fridge, I didn’t have much left! But, I did take the time to organize it nicely. For example, I put all the salad dressings in one spot in the side door. Then I put all the items for sandwiches and burgers in another tray. Next, I put all of the stuff I use to cook with in another (Worcestershire, soy sauce, garlic, cooking wine, etc.). On the other side I put our sweet stuff like jellies, cherries, whipped cream, and more. Finally, I put stuff for coffee on another layer.
I plan to get some permanent vinyl and label the fridge so that it’s 100% clear where everything goes!
Now after all that work…let’s see the before and afters!!

Look at all that r0om!
And honestly, this is the cleanest my fridge has EVER been! No gunky messes! No nasty food! No crumbs! I just want to stare at it!!
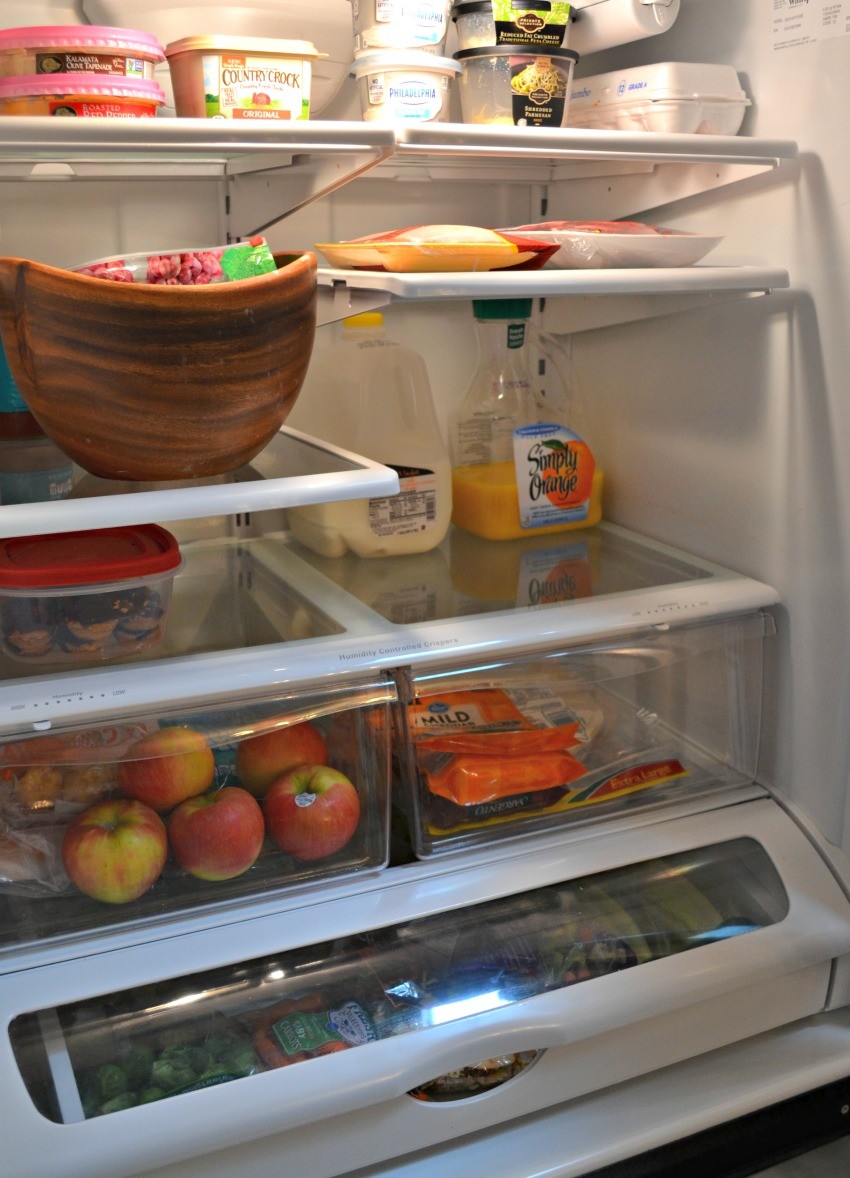
The funniest part about this whole process is seeing all of the things that we have like 3 and 4 of because we forgot we already had one in the fridge! So needless to say, I’m good on feta cheese and coffee creamer for at least a few weeks!
I encourage you to seize the day and get that fridge cleaned out post haste.
Visit HomeRight for more information on the AutoRight Steam Cleaner or other great products!!
You may also like…
 DIY Grout Cleaner
 How to Clean Your Patio Cushions
Pit it for later!


