


Rainbow popsicles – need I say more?! As a kid, I can always remember being excited seeing my mother making Kool-Aid Fruit Juice for us on a hot summer day. There was something so refreshing about Kool-Aid and my brother and I could often be found fighting over which flavor we wanted her to make! I’ve never been big on carbonation or soda. so Kool-Aid was definitely my drink of choice in that department. Flash forward 25 years and here I am today, celebrating summer with a special Kool-Aid Fruit Juice treat…Rainbow Popsicles!! Forget about the extra carbs and total fat- this blogger had a long summer & needed to add some sweetener to her life!! 🙂
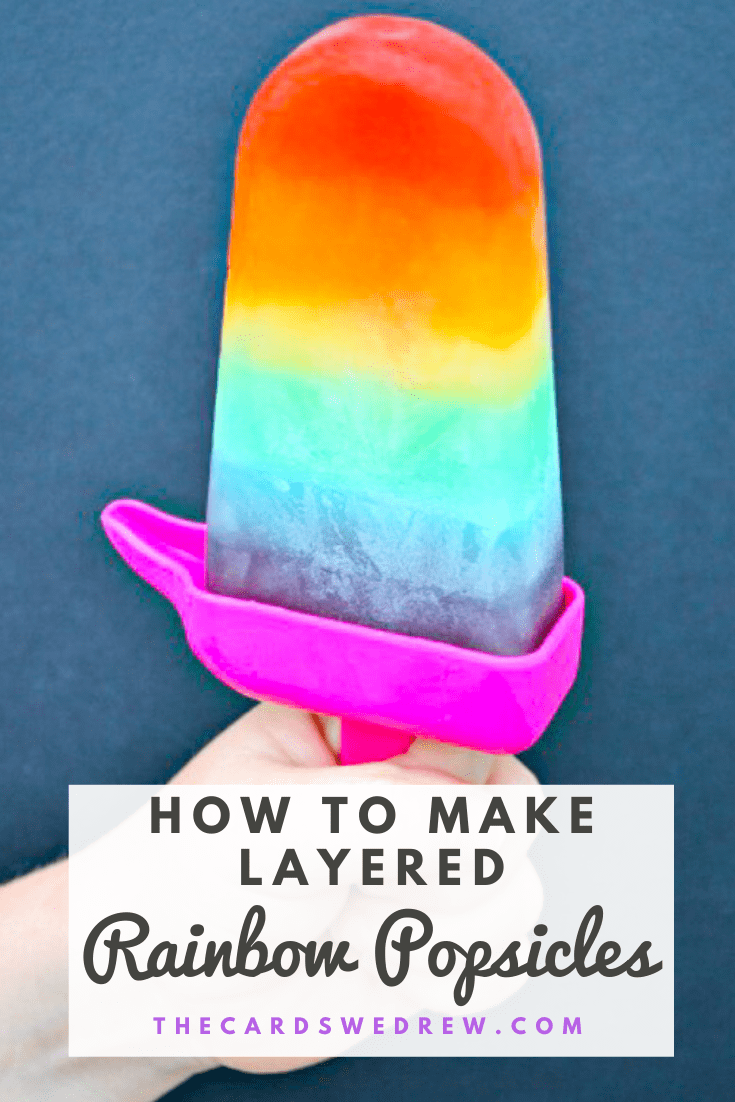
How to make Layered Rainbow Kool-Aid Popsicles
DIY homemade popsicles – need I say more!? These babies are so pretty and fun to make, albeit a tad time consuming. They’d be PERFECT for a Rainbow Themed Party or get together! It’s a pretty simple idea, the time consuming part is mixing up the colors and allowing for freezing time. Seriously – forget ice cream – these popsicles are the perfect frozen treat.
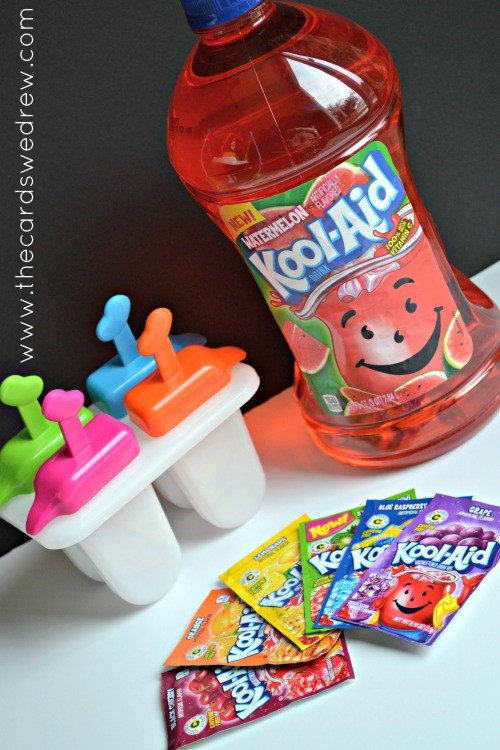 First, buy a pack of plastic popsicle molds. I found some for under $5 from Walmart, although Amazon has them too. From there, you want to get started making your Kool-Aid flavors. Since you obviously don’t need the FULL pitcher of Kool-Aid I purchased six colors for 20 cents each packet and experimented with the amount of water and sugar I needed for each.
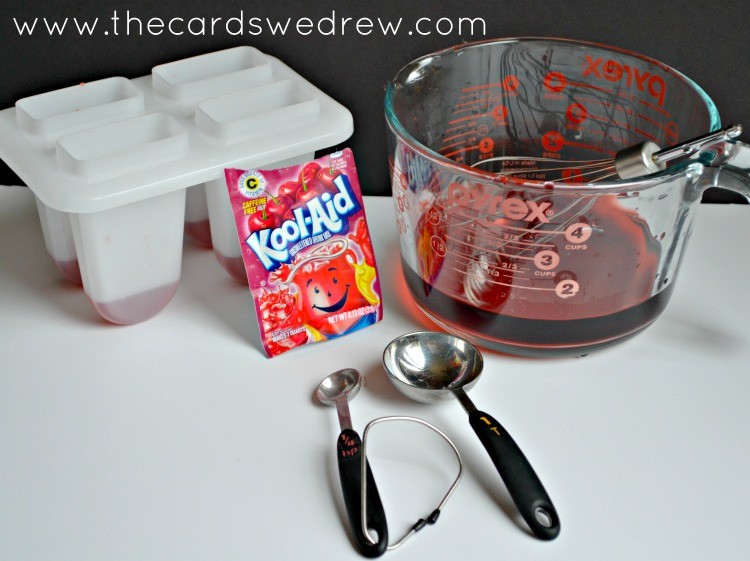
Popsicle Recipe
For each color I mixed up one cup of cold water, one quarter teaspoon of Kool-Aid, and 1-1/2 tablespoons of sugar. Each mixture could potentially make eight layers of ice pops (serving size).
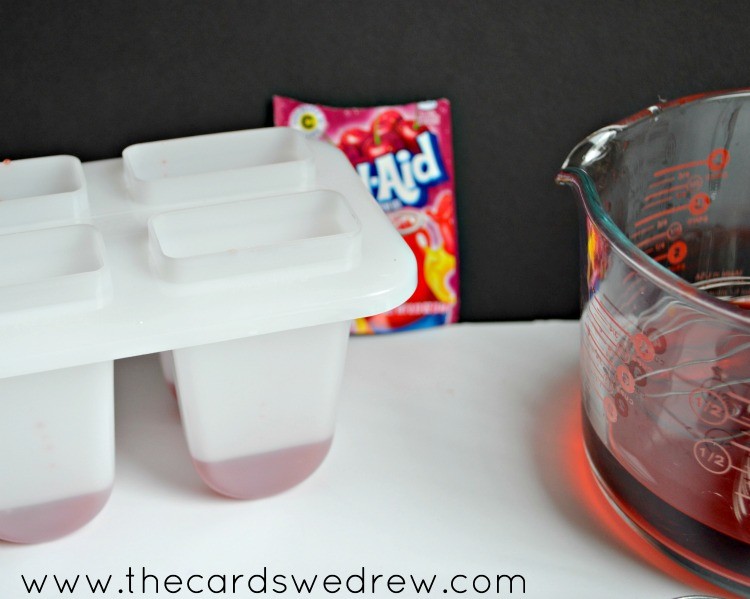 Once it’s mixed up you’ll see that I added a little bit of each color to the layer of popsicle and then placed in the freezer to freeze. It doesn’t take too long for each layer to freeze enough that you can move onto the next. But I would recommend making these in larger batches to make it worth your time. The prep-time can become a bit redundant – but this frozen dessert is so worth it.
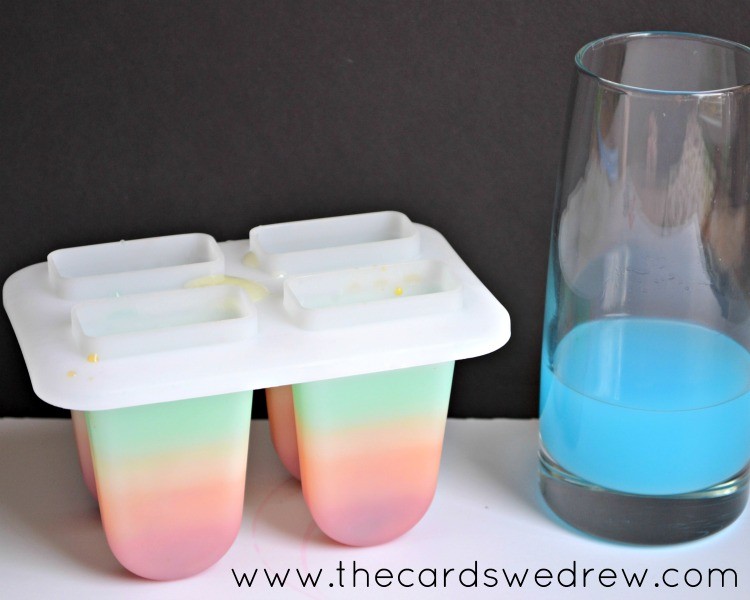 I added a little of each flavor at a time trying to make all of my layers the same width. After added the purple/grape layer you’ll put your popsicle sticks into them and let them REALLY freeze good before removing them from their holders.

Yummy, tasty, summer treats! Enjoy! Let us know how you liked this original recipe down in the comments. Maybe next time I’ll share my famous Jello popsicle recipe with you all (watermelon tropical punch flavor :))
Pin it for later…


I love the colors, but patience in popcicles is not something I have. I wish most molds came in more than 4 or six, to do this! #Client
Yes, it would be much better to do them like a dozen at a time! 🙂 These aren’t for the faint of heart, but are great for parties and special occasions for sure!
SO cute and fun Abbey! I picked these to feature on Do Tell Tuesday–thanks for sharing!
The texture is more enjoyable for kids if you mix in gelatin.
OHH good idea!
How much gelatin?